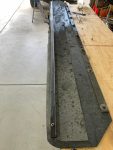
 I needed to replace the angle iron on the mudflap that broke off a mile before turning into Champoeg campground last fall. I had to tie wrap it up so It wasn’t dragging on the asphalt or getting pulled under the front tire of our tow car till we could get to the campground. I took it all the way off of the mudflap while camping there and made a note to replace it once we got home. I looked at a friends mudflat to see how it differed. He didn’t have the angle iron and his mudflap was being ground down significantly on the sides like my sacrificial angle iron looked. I decided I would rather the unseen steel be ground off instead and I bought some angle steel at Industrial Metals when we got back to San Diego. I drilled the required holes using the mud flap as a template and bolted it back on. I also cut up a piece of flat stock to be the wear points at each end of the mud flat so I don’t wear down the plastic and then the expensive stainless logo. The top left photo shows the angle after attaching it and the one below and to the right shows on the the sacrificial steel plates I added to both sides.
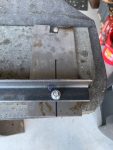
I also bought new Shackles to hang it as the originals were not really the correct type for this application, they had threads where the chain hung. The new ones only have the threads where they screw into the shackle as its supposed to be, and the part the chain rests on are solid steel (a lot stronger). They were 5/16″ x 3/4 inch and can lift 1.5 tons.
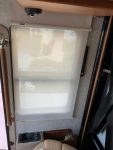
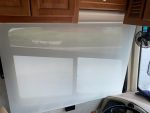 I installed new MCD shades in the cockpit area so we could donate the curtains. They were sill usable, but were just too ugly to keep anymore and we really wanted easily deploy-able sun shades. All the roller shades are now installed. The windshield ones were a much harder install than all the others combined. Basically working above and behind you is not a very fun thing. I found that buying the MCD roller shades thru Camping World around Black Friday is significantly cheaper than buying them anywhere else. And of course that means you must install them yourself. They are not hard to install, except the windshield ones.
Two of my rooftop Solar panels went Kaput this year so I contacted the seller and they refunded the cost of the two panels (5 years old). That was so easy it was amazing to me. Turns out they don’t make that panel anymore but I was able to get two NOS from a seller on Walmart. And I was able to use a sharp putty knife to remove the old panels. We are back putting out the amp’s again! Just in time for Boondocking @ Escapade this spring.
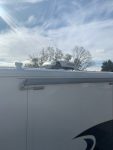 I also purchased a new AC Cover for the roof as mine had a large piece broken off it. Not sure what did that, but it was pretty ugly. A new one was ~$400 so I opted for a used one. (no use buying a new one for a very old AC as the new AC when needed, comes with a new cover) $80 from a place out in El Cajon. Its installed and looks much better now.
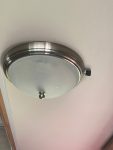 I changed out the lamps inside the Dining Table Fixture that I had I installed last spring Kathy
 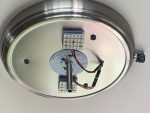 thought it was too bright while camping last summer so first I purchased a Dimmer, which wouldn’t do anything with the existing LED’s in the fixture. I then purchased two small Small stick on 24 bulb lamps at M4products and wired them in to the dimmer, now they are controllable. Nice!
Diamond Shield Install. Had an installer come out and install the diamond shield. He made it look easy, but I could never have gotten that installed. It looks good, but I probably wouldn’t have it installed again. It was pretty pricey for what you actually get.
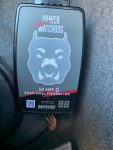 I replaced our 6 year old surge protector with a Power Watchdog EPO model. It includes an app
 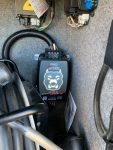 that you can look at the power being used from the pedestal and also which circuit, L1 or L2 is using how much power.
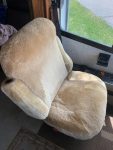 I am very happy with the Sheepskin Seat Covers we had custom made by Superlamb in Escondido CA.
 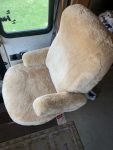 They were pricey, but are they comfortable! It took them a couple weeks to make them but well worth the wait. I still have my original sheepskin seat cover on my 2004 Silverado and still loving it.
Pulling a few Ethernet cables from the front to the rear bay in the bus had been needed for a long time. I put that off for years and finally bit the bullet and did it. What a PIA. But its working well.
Installed some gutter over the windshield and over the drivers window. Stick on Gutter We had put them on years ago after a buddy told me about how it keep the windshield a lot cleaner. I had pulled them off prior to getting the bus painted. This time I used white gutters instead of black so they blend into the new paint scheme.
Also, I redid the new 400w solar suitcase infrastructure. The new wiring has been run and the breakers installed. We got to test them out at Escapade for 7 days of boondocking. They worked perfectly. Even in the wind, although I did have to tie them down using the D rings I had installed on them just prior to heading toward Tucson.
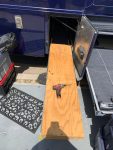 I built and added a slide out tray for the small door on the passenger side. Its 60″ long and pulls all the way out on 60″ Vevor Full Suspension Slides. (accuride slides are much better than these, but the price was 5x the cost of the Vevor) These slides have 500 lbs capacity. The tray itself is made from some scrap 3/4″ plywood I had in the garage.
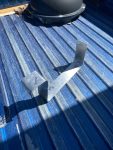 While looking for spots in the motorhome basement to store things not needed very often, but when needed that couldn’t be impossible to get at. I found a couple fairly large unused spaces
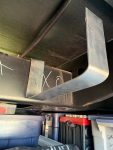
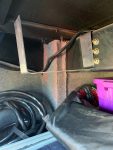
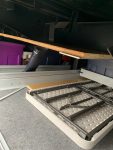 above the sliding trays on the drivers side. I made two sets of brackets that I bent from 3″ wide 1/8th in thick 5159 aluminum pieces that were left over from my Starlink In Motion project. On one side they hang over the Chassis Frame and then cantilever from there.
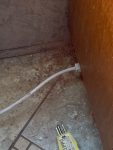 Another mod that needed to be done was add an outlet next to the toilet for the heated seat. I was tired of looking at the extension cord running to it.
 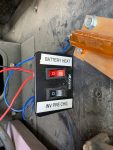 I also finally got around to installing a switch for the battery heating pad as I knew we could be in much colder weather this year on our Alaska trip.
This year I decided to ditch (sell on eBay) my iPad. I 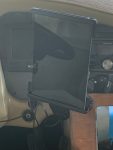 wanted to use it for navigation but Apple only puts GPS chips on their cellular enabled iPads. So I sold the 2017 iPad for $125 and bought a new Lenovo 10′ tablet for $110 that has been working great as a Navigation device. Finally something larger than a phone to look at while driving down the highway.
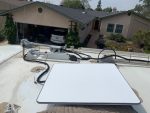 I also installed a StarLink In-Motion Dishy on the roof the 3rd week of April (2023) and have been testing it since. That post will publish tomorrow May 14th.
