Starlink In-Motion Research and Installation

Getting the correct information about this new SL In-Motion option was not as easy as it should have been.   I read a lot of blog posts and watched a lot of  half baked youtube videos.  Every one of them left out the two most critical pieces of information I needed to make sure this was feasible:   How large of a hole do you need to get the cable into the motorhome and any information about using a third-party router without using that low-spec SL router.

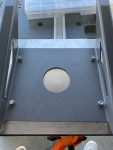
I watched one video of an installer drilling a 1.5″ hole in his roof for the cable from the Dishy.   He apparently didn’t know the other side of that cable was a .6″ connector.   Slightly larger than a 1/2″ hole was all that was  needed.   And this In-Motion Dishy comes with an Ethernet cable built in, which was perfect to plug into our Max Transit.

I finally got to see what comes in the box while attending Escapade Tucson in March, and I was able to measure the cable hole size requirements with a tape measure and also look at the Ethernet cable it comes with so you can leave the obsolete SL router in the box.   After that I was ready to pull the trigger.
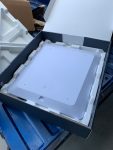
When we got home, I ordered mine thru MobileMustHave.com.  It drop-shipped via Fedex from Winegard the next day.  It arrived in San Diego less than a week later.  When I got home, I unboxed it immediately as there was a hole in the box.  I wanted to make sure everything was in good shape and all the cables I expected to be there were there!

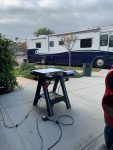
It all looked good.   I set up a table out front on the driveway and hooked it up with a small travel router I’d used in the past.  It started working within minutes and I was a happy camper!  I figured I would let it run till it got dark out, then bring it back in the garage.  Then I’d deploy it in the backyard in the morning for a few days to “burn in” while I got the motorhome roof ready to mount it.
I decided to use a 12″ square piece of 5962 VHB from Digikey.com.  5962 is slightly thicker.  That would give me 144 square inches of bond.   The wedge mount was a bit smaller than that size, so I purchased a piece of 5150 1/8″ sheet aluminum and counter sunk some flat head screws from the bottom up thru the wedge mount and locked them with Nylock nuts.  Now I had the 12×12 square that would hold the SL In-Motion Dishy to the roof and it would be difficult to remove.  I used CSL silicone to surround it and over the nuts to prevent water from trying to get under it and possibly pop it off if I was ever in a spot that it could freeze.


I cleaned the area of the roof a few days prior with Acetone and then the day of with alcohol and roughed it up with 200 grit sandpaper.   It was as clean a surface as I was going to get it.  Then I brought up the wedge and placed it where I thought it should go, brought up the Dishy and mounted it to look at clearances for the A/C and spotlight.   Both were far enough away to not be part of any obstructions to the view of the Dishy and it looked straight from the ground way in front of the coach.    I then marked the roof with a Sharpie so I knew where it needed to be glued down.
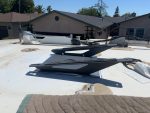
It was a nice warm day, probably 80 degrees, perfect for the VHB to bond to the fiberglass; so I put it in its place and slowly pealed off the red cover a little at a time to make sure it stuck in the correct spot.  I used some heavy tool steel to hold it down after I was done pushing it down for a while.   A few hours later I gave the wedge mount a yank and realized the roof would probably come off first before the wedge did.  It was well bonded.   If I needed to get that wedge off,  I will need to cut off the bolts.
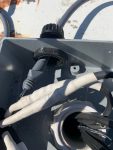
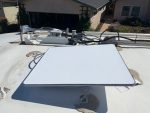
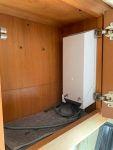
The next morning I installed the Dishy on the wedge and wired it up and put the small end thru my roof access port and snaked that wire over to the cabinet I installed the POE device in that it plugs into.    That POE device is plugged into an outlet that is supplied by the inverter.  It’s a really large device that uses 80 watts of power almost all the time.   If you use the Dishy’s sleep mode, that cuts the power by 1/2, to 40 watts, which isn’t really a light load for something that can be running on batteries often.
The next part of the project was to connect the Starlink into my existing internet system, namely, making it a WAN connection on my Max Transit cellular router.   The most interesting part of the equation was the Starlink was providing internet access thru the Max as soon as it was connected, no configuration other than the WAN wired port was in the Priority 1 position beforehand.

Then I started testing the SL app on the phone and noticed it would only connect using its “remote” feature.  It wouldn’t connect as local.   Without the local function, some of the Dishy configuration was not accessible.

I could find nothing about getting it to work via the Max.  A few days of posting on the Peplink forum, I got a response from a vendor out of Texas that sent a picture of a part of the configuration that allowed my app to connect local.   I had to edit that WAN connection and add an address.  Then I had to add a DNS entry:  dishy.starlink.com = 192.168.100.1    Once done, my app would connect local to the Dishy.   We were done!!!


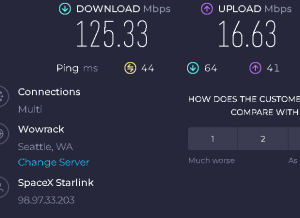
UPDATE 2 weeks into our Alaska trip we are in Glacier National Park in Canada.  The In Motion Dishy has NOT lost connectivity yet.   Which was totally unexpected camping in canyons and under trees many times during this journey so far.   As we get further north I expect that to change as the Starlink 3rd party maps show very few satellites in those orbital planes.   We are camped in the Waterton Lakes Townsite Campground for the next three nights, surrounded by tall mountains, very close on three sides but the app says “no obstructions”.  So far this very expensive piece of hardware is preforming way way better than expected.  Here is a screenshot from Waterton Lakes…

UPDATE 5 weeks into our Alaska trip.   We are outside of Watson Lake, Yukon.  The In-Motion dishy has been a god send.  The last 10 days we have been camping and driving the ALCAN.  No cell service here, and no service most of the way since Dawson Creek.  We have camped under trees and surrounded by mountains.  Yes, some drops but phone calls were working and data was moving quickly.  I am very glad I opted for the $2500 hardware and not the $600 option.   I am parked under trees as I write this update.

This thing rocks!  [06/07/2-23]
Denver Colorado Sideshow

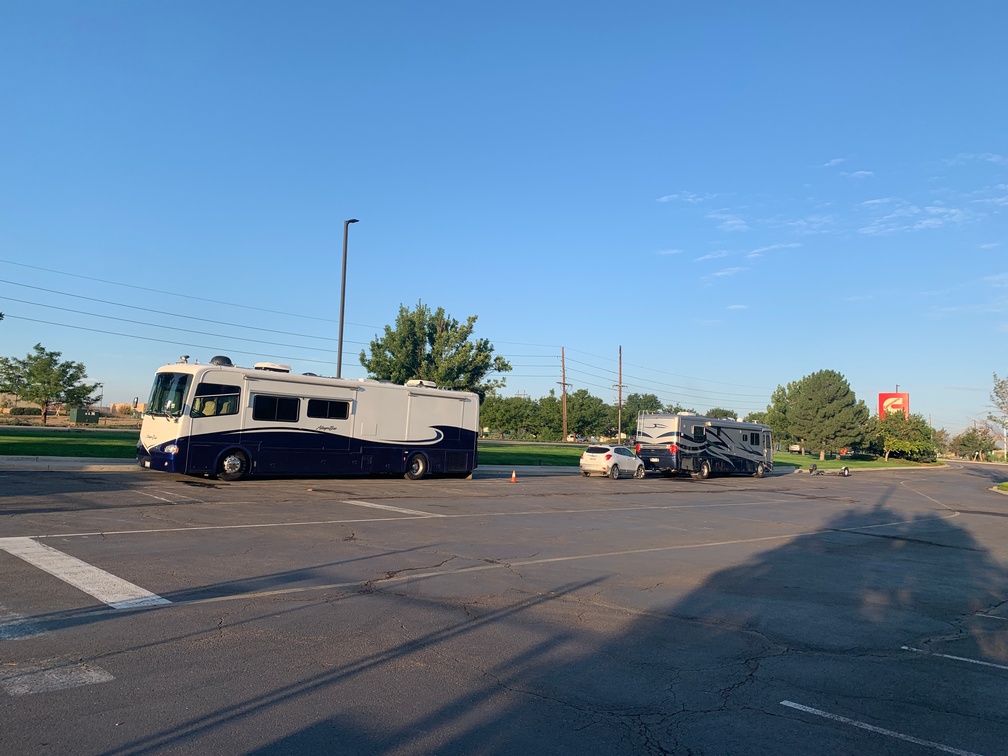
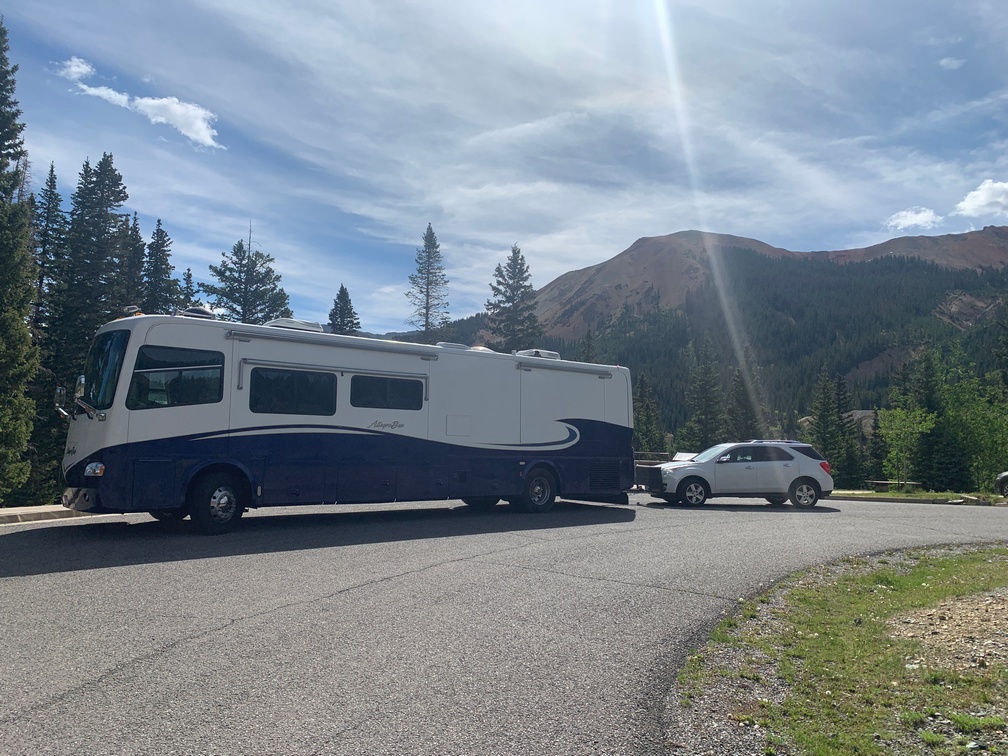
Pulled into the Henderson Cummins dealer around noon on Sunday for its free hookups to wait till 7 am the next morning to see if we could get a diagnostic on the check engine light we had a few times while traveling around the Rocky Mountains.  When I went back into the monitor to download the info to an email, I noticed the error codes stopped on July 10th, 8 days prior to now.   We will see what transpires with the service person this morning.  The service guy convinced me the problems were just from the altitude, so we headed out to St. Vain State Park that Monday afternoon after making a reservation for one night.   We left the next morning to head for Estes Park, and the CEL light came on while still on the flat ground (although 5,000+ elevation)  We drove to Estes Park with it coming on and off fairly often.  [Very nerve wracking drive in the mountains!]

After a week touring RMNP and Estes Park, CO, we headed back to Cummins.  Only one CEL light happened and that was during the initial engine start. We arrived that Tuesday afternoon (July 26th)  and they were going to take it in 7 am the next morning.

On Wednesday they ran diagnostics all day, checking the fuel system all the way to having the injectors fill a beaker to make sure the flow was correct.  It was double the minimum, so that wasn’t the problem.

Late that afternoon two techs did a road test with their computer hooked up and surprisingly were able to reproduce the issues.  (That never happens!)  That evening they sent all the data to Cummins Engineering and the next morning (Thursday)  were told to install a test ECM.  They did that and after lunch asked me to take it on a long test drive.  (so I didn’t need to pay them $200 an hour for that)  We drove it about 3 hours and not one CEL appeared.

One of the nights while there, I went out to pick up Mexican takeout and saw this Skoolie on the way there that had a mini split mounted up high in the rear.  I had not seen that before but seemed like an ok spot to mount the condenser.


The next morning (Friday) they replaced the test ECM with a “new” one, and I then made reservations near Grand Lake, the supposed headwaters of the Colorado River.   Since it was already Friday afternoon, I realized that getting a reservation was going to be a problem for that night and the rest of the weekend, so I started with the highest priced place, figuring that would be the last place to fill up, and of course they had an opening.

We headed out after 2 pm on Friday and took 1-70 west into the Rocky Mountains.  (July 29th)   It was about a 2-3 hour drive, and about half way there the CEL came on and the engine would barely run if the RPM’s were between 1100-1400.  This was a new problem and not a good one to have driving in the mountains.  It had just started raining, and when I turned on the wipers, my driver’s side wiper just disappeared, dropping down where I could not see it.  My thoughts were it fell off.   I asked Kathy to stand up and see if she could still see the wiper.  She could, it was just below the windshield propped on the right-side wiper; so at least I didn’t need to find a new wiper assembly!

It started raining harder, so I had to find a place to pull off and see if I could fix that new problem.  I saw a spot and pulled over on the freeway, never fun.  I took the wiper off and it seemed to be ok.  I put it back on in the right spot and tightened it up good.  Turns out the painters had put it back on but did not tighten it all the way; so me putting it back and giving it a good turn worked and should continue to work.

Not long after we got back on the road, the sun came back out and it was dry the rest of the way to Granby, CO.

Unbeknownst to me, Granby was on the other side of a very high pass, and that pass turned out to be a couple thousand feet higher than we had ever driven the Bus since we got it close to 6 years ago.  There were a lot of switchbacks on the way up to the 11,307 foot pass and again on the way back down.   Having the engine cut out in the 1100-1400 RPM range made that climb very interesting!  (And not in a good way.)

We made it to the RV resort in Granby and settled in for the weekend.  I sent some emails to Cummins informing them of what transpired (not the wiper issue)  and asked for an appointment on Tuesday morning.

We arrived Monday afternoon (August 2nd) and before I set up the coach for staying the night, I went inside to make sure we had an appointment for the morning.  The gal said the techs were waiting for me and wanted to look at it as soon as I got there.

They pulled it in and put it back on the computer.   Afterward they brought it back out so we could stay in it till the morning.

They took it back in around 7 am and pulled out the muffler so they could see and work from underneath more easily this time.   A couple hours into the process, one of the techs came out (Maximus) and said they found a loose ground wire attached to the engine block and were going to test it on the dyno to see if that had fixed it.

It had fixed it!!  Then we left for a few nights in Cheyenne, WY,  (August 3rd) about $4,000 poorer from the whole experience.   Quite a bit of money for a  loose ground wire, in my opinion.

We ended up staying in Cheyenne for some extra days, and we both tested positive for Covid the day after getting there.  I was feeling pretty bad, so we went to an urgent care where the test came back positive.  They did one for Kathy even though she was not sick and she tested positive too.  I then had to get my PCP to prescribe Paxlovid as the urgent care wouldn’t do that.  They wanted you to be able to follow up with your regular doctor.

A couple days later Kathy started feeling sick and she got a 5-day course of Paxlovid too.     It’s a weird drug, actually two different drugs, 6 pills a day, and it gave me the worst metallic taste in my mouth for the 5 days I had to take them.

I avoided Covid for so long, I was thinking I must be immune… stupid me..


Salida Colorado

We arrived at Poncha Springs Fairgrounds to attend an Xscapers convergence for July 4th, 2022.  We would be spending 8 nights dry camping and with only 30 amp power.  We were hoping it wouldn’t get too hot as that amount of power will only sustain 1 air conditioner running at a time.

We are starting to get used to Colorado weather: Thunderstorms each afternoon with high winds and often hail.  So far only pea gravel sized hail, so just a bit noisy and no damage.   The good part is those storms really cool off the afternoons nicely.   We got to meet a lot of folks we had not met before and a few we had.

A day into the event I met Chip who was parked a few rigs down from us.  He came by to ask if we were experiencing low voltage.  I said I didn’t know and proceeded to look for my multimeter.  At that moment we were getting 115v, which is fine.  But later in the afternoon I checked it again and we were at 104v, not good at all.  That’s when I realized I had nothing but the multimeter to measure voltage.  My smart plugs only measured watts used, but not the more important voltage.  After researching there was really nothing available that would measure voltage and log it somewhere.  So I did the next best thing.  I ordered one of these real-time meters from Amazon.  Hughes Autoformers Dual Color DVM, LED Digital Voltmeter .

About a week later, it had worked so well I purchased another one to go onto the other side of the incoming hot wires.  It doesn’t log anything, but at a glance you can read the voltage.   If the voltage is 108v or higher, the back ground is green; if below that it’s red, easily seen and unmistakable.   I saw that red color a lot while camped at the convergence.

The next morning I decided to test out my special Y cable that is supposed to combine the 30 amp outlet with a 15/20 amp outlet to give you about 45 amps.  It did not work, specifically it doesn’t work if the 20 amp outlet has a GFI, which these all did.

I also noticed my existing Surge Guard didn’t even allow the 30 amp to work as the other leg was dead.  (L1 & L2 make a 50 amp connection)

It was then I noticed the other pedestal at the front of the bus and looked in there.  Low and behold, there was a 50 amp plug.  I got out my 50 amp extension and tried to plug it in, but someone mounted the outlet upside down.   The way the plugs work, there was a bar in the box that prevented it from connecting.

I walked over to the fairgrounds office and found the manager, explained my issue, and she tried to call the site supervisor.   He didn’t answer and she told me she would keep trying.  I left, and probably 1/2 hour later I saw him at the event building across the way.   (at least I saw his truck)   I found him and explained the issue.  He mentioned he knew about that but needed a certified electrician to do the work.  I asked if I could do it, it was a simple thing to rotate the outlet, and the breakers were right there next to it to shut off to make it safe.   That’s when he said he would do it, and we walked over and in 5 minutes it was fixed.  I was then able to plug into the 50 amp outlet.  That didn’t really solve the voltage issue, but having two legs of power kept the voltage above 108v the rest of the time, not great, but way better than before.  And now on the hotter afternoons we could run both AC’s if needed.

We decided to hang back at the fairground to watch the fireworks with a bunch of others in their camp chairs.   It was about 4 miles from downtown Salida, so the fireworks were spectacular but the sounds were way off due to the distance and the difference in the speed of light vs sound waves.  But we got to see fireworks.  Really hadn’t seen any since the Pandemic started.  We almost could see them while in Memphis last summer, but they were too far away to feel like you really got to watch them.

The next evening was the Lot Crawl, but just prior a big storm moved in and it rained for a couple hours.  Usually the afternoon storms were done by 5, but not today.   Kathy and I had made our Fireball Jello shots for the crawl and they went over well.  There was only one left at the end of the evening and it was really, really good! (I got it)

They had moved the Lot Crawl into the event building due to the weather.  We were hoping it wouldn’t be a super spreader event.  No one got sick from what we heard.  Some folks were saying a lot of folks caught it at the Escapade which occurred a few weeks before this event not very far from here, over in Rock Springs, Wyoming.

I think it was the next night after the Lot Crawl we had a band (The Status Crowes) play for us.   We had heard them at the Bash a couple years back and they were pretty good.

One morning on the way back from town, I stopped in a gun store.  It had to be the biggest one I had ever seen.  They had so many rifles and handguns it reminded me of an armament museum I checked out in Cody, Wy, a few years ago.  Something that I had never seen prior, and didn’t think were actually legal in the US, were silencers or suppressors for rifles and handguns.  Some of the handguns I looked at had threads for the silencers.   Wow.

The next weekend we stumbled upon their yearly Brewers Rendezvous down at the Riverside Park in Salida.  It looked like a big deal, there were at least 60 brewers there.

There were a lot of Starlink users at this event.  I got to see many different mounting options for the dishy.     When we get home this year, I will probably turn off three of my 100GB Data SIMs and replace them with a Starlink setup.   Starlink’s monthly is about $70 less per month than those 3 SIMs, and Starlink now allows you to turn off your service when you don’t need it. (for us that’s about 6 months of the year when we aren’t traveling in the motorhome)   The SIMs cannot be turned off when we aren’t traveling.   We will see what’s available from SpaceX this winter.

July 2nd thru 10th.

Updating my Solar install to allow Web Portal Access

Having the Bluetooth (BT) connectivity to my solar controllers was to me a necessity so I went with the Victron line of controllers after looking at what was available.   The issue that came up was very short range for the Bluetooth connectivity.  This was due to mounting them inside the electronics bay, a metal compartment at the rear of the bus!  That all aluminum bay is acting as a Faraday cage which made the connection from a phone or tablet a very short range affair.   Basically I can only connect to it from the RV’s bedroom located right above that bay.  I found that I could also add a Victron Bluetooth Dongle to one of the charge controllers and mount that up inside a bedroom cabinet allowing my phone to access it from the front seat of the coach.  That was nice but now that we have two controllers and the Victron Connect App cannot view both controller screens at the same time.  The App allows only one connection at a time.  That’s very limiting in my opinion when you have two controllers charging one set of batteries.

I had read about the Victron VRM portal that allowed a couple of their accessory devices, the Venus GX or the Victron Color Control GX to upload the solar data from multiple devices like controllers, battery monitors and many other devices Victron Energy produces to a website that you can access from anywhere with an internet connection.

I looked at buying one of those devices but they are pretty costly and didn’t feel the need to spend that kind of money just for the convenience.  So I starting looking around to see if there was another way to do the same thing.

Turns out there is.  Those devices firmware (actually their OS) is in the public domain. (GNU) so I looked around and found to find a device someone has ported it to.  I found it ported to Raspberry Pi (RPI).   Currently they are $38 so I pulled the trigger and ordered one to see if I could make this work for me.

I had a few old 2 GB microSD card (had a bunch of them from over the years laying around)  So I downloaded the Venus OS from a repository on the web.  I then burned it to a microSD card and once the RPI arrived I pushed it into the slot on the underside of the little board (RPI) and then plugged in a micro USB adapters power cord into the power port and an Ethernet cable into its port and powered it up.

Bamm, it booted up and finished with the Victron Logo on the screen and stopped at the command prompt.  I typed in ifconfig hit enter and it showed me the IP address it had received from my home networks router.   I walked back to my desk and put that address into my web browser and connected to the device.   (It was a bit more complicated for me because at first I downloaded a version of the OS that didn’t support that new RPI device.  v2.30 or above is needed)

That is the required version to run on the B+ device (newest device available when I did this, early 2019) is here in the development folder:   https://updates.victronenergy.com/feeds/venus/develop/images/raspberrypi2/   Those files change often so by the time you read this the working version may have been release to production and be here: https://updates.victronenergy.com/feeds/venus/release/images/raspberrypi2/ in the Released area.

I also had to get a couple USB to VE Direct cables that connect from the RPI’s USB ports directly to the Victron Controllers.   I used a phone power supply i had laying around to power it until I could get a power supply to hard wire into the bay.     Hard wired 12v to 5v power supply

In order to burn the image I downloaded I needed a minimum of a 2 GB microSD card.  If you don’t have any lying around this link will give you two cards for very little money.  SanDisk 32GB MicroSD HC Ultra Uhs-1 Memory Card, Class 10   2 GB cards might be found on EBAY.  But these new 32 GB ones are extremely cheap.

First thing I had to do to the card is format it, I used SD Card Formatter, the  newest one from there. I always scan new downloads with all my virus and malware scanners prior to running and unzipping them to my laptop.  After a  successful card format I used this free tool to burn the downloaded VenusOS image to that card.  Win 32 Disk Imager.   In all, I have $109 into the install now that its done.  1/3rd the cost of a Venus GX and 1/5th the cost of a Color Control GX device.   There may be a way to use Bluetooth to connect to the controllers negating the need for the special USB cables but I am not sure how to do that yet.  Maybe someone else can try and let me know.   We were leaving for the 59th Escapade the following week so I took the easy way and bought the two inexpensive cables from Bay Marine here in San Diego.

I was able to look at my charging information while attending seminars at the Escapade in Tucson.   I had setup my device to upload info every 5 minutes, you can lower that to every 1 minute but I only did that while testing it, then I moved it back to every 5 minutes.    Now I want to get my battery monitor talking to it before we head for Alaska this summer.


First Boondocking experiences after installing Solar on the RV

Let the testing begin!    Our first camping trip after I installed 640 watts of flexible Renogy solar panels and a Victron 100/50 charge controller was at the Albuquerque Balloon Fiesta campground October 3rd till the 14th.     We had signed up for an Escapee’s HOP (Head Out Program)  late last year when I couldn’t find more than a couple days in a row of available reservations.  Turns out they open the Balloon Fiesta Camping reservations up about a week after the last one ends so I was a couple months late to the party.  Luckily I found the ad for the HOP and they had a few openings.  I reserved a spot right then.

Fast forward ten months and we were camping there with our barely tested new solar panels charging our house batteries.    First thing I noticed was around noon the first full day there, they stopped charging the battery.  I checked the side compartment with the charge controller and I saw that one of the breakers on the battery side of the controller had tripped.  The devices I bought were supposed to be 50 amp breakers,  but from what I could tell, it tripped around 30 amps.  Not a good sign.  I clicked it back on and we started charging again.  

I started researching breakers and determined that I probably should have bought 60 amp breakers for that part of the circuit and better quality ones.   So I started calling local distributors, but none had them in stock, so I gave up for a bit.  

Next day it happened again, the same breaker tripped.  I could see this was going to be a chronic problem unless I replaced it.  Again I started looking online for a replacement and at the same time wondered where I could have it delivered.   After all, I was in a sea of RV’s.  No way for UPS to find us. 

A few  days went by while I called just about every electronic and electrical supply house within 90 miles of Albuquerque.    I also kept googling.  And then unexpectedly about 30 pages of results later, I found an ad for a 60amp breaker at an unlikely place called Sportsman’s Warehouse.   I called their local store, and to my surprise, they had a bunch in stock!   That afternoon I drove over and bought one immediately.   Turns out they were in the fishing section of the store for trolling motors, MinnKota MKR-19 Circuit Breaker 60A.   I replaced the faulty breaker that afternoon.  

Of course, once that was in place, the next day the breaker I had previously installed on the negative side of the circuit tripped.  I had only put that breaker on there as a switch so I could turn off both the negative and positive sides of the circuit.  Humbug!  So I went back to the store and bought a second one and installed that on the negative side of the circuit.   The issue with these particular breakers for me was no button to trip them manually, which is one of the main reasons I bought the problematic ones.  They had a button to press to trip them, so in effect they were also a switch.   I had seen other solar install pictures online where those same cheap breakers were used for solar hookups, so I figured they would work.   Geez,  was that a wrong assumption.

By now we are just a couple days from the end of the fiesta, so I decided to shop for one online that had the manual trip lever to install prior to us leaving for our next trip.   I eventually pulled the trigger on the Bussmann CB185-60 breaker and had it shipped to the house once we arrived back home.   I will be leaving the MinnKota on the other side of the circuit till I can find a suitable surface mount switch.

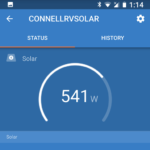
Now that I was no longer tripping breakers, I could really see what the panels were capable of.   One of the days I happened to look at the console and see over 540 watts of power being generated and almost 40 amps going to the batteries.  That was pretty amazing because the panels are flat mounted on the RV roof and the sun was getting low in the sky as it’s the middle of October.    Solar panels should be angled toward the sun for optimum production, but I decided early on in my research that I wasn’t climbing up on the roof to tilt them up and put them down each time we moved.   Once I committed to flexible panels that was fairly moot anyway.

While we were there, I experimented using the generator in the morning to charge the batteries up to around 80% SOC (state of charge), which is around the point the onboard charger drops out of bulk charging mode.  At that point I shut the generator down to let the solar panels attempt to top the batteries off during the rest of the sunny day.  Only using the generator while the charger is in bulk mode should be the most efficient use of the diesel generator.   Once the charging switches from bulk into the absorb charging mode, the charge amperage drops fairly quickly.  Even when the charger is only pushing 10 amps into the batteries, the generator seems to be under the same load as when it’s charging them at 125 amps in bulk.

I am now starting to more fully understand the difficulty of fully charging our batteries via solar . Adding more panels will help, but in reality I probably can’t fit enough panels on the roof of my RV to get it done in the middle of winter. 

The chemistry of batteries prevent them accepting the full amperage of the panels once they get above 80% charged state where the controller shifts into absorption mode.   More panels will get you to 80% quicker, but then the battery chemistry kicks in and effectively starts pushing back and the controller starts dropping the amperage going to them.  So if you calculated you could push 40 amps for 4-6 hours of the day (240 AH) and less AH before and after those hours, then in theory I figured we can push all those AH into the batteries during those six hours,  but that’s not reality.  As soon as those batteries hit around 80% SOC, the amount of charge accepted quickly drops.  So if your batteries are depleted below 80% SOC,  say at 60% SOC, you can really push in those amps for a while; but when they hit that 80% threshold, the amps  drop, and they drop in an almost linear line down to just a few amps and then hit float charging.

My experiment running the generator in the morning was my charge controller switched from bulk charging to float charging way too quickly, almost no time was spent in the absorb phase of charging from the panels, which should be the bread and butter of solar.   I started to search for an answer to that, and what I found out so far was the amount of time the charge controller stays in absorb is determined by the voltage the charge controller sees when it wakes up due to first sunlight in the morning.  The higher the voltage it sees when it wakes up, the shorter the time it stays in the absorb phase; and the generator made the controller see much higher voltage when it woke up, so the absorption time was cut to almost nothing.  

But that was learned a bit too late in the game, so this will continue when we dry camp in Quartzsite the middle of January.