Reducing the 24×7 power draw on the RV batteries

During our 8 days of boondocking in Tucson last month I was monitoring the constant power draws on the batteries.   One thing I noticed was the Inverter was drawing a constant 6 amps of power from the battery 24 hours a day.   The inverter is what creates 120v AC power from the 12 volts of power the house batteries produce.  It has a few amps of overhead and there is also a conversion loss there, not to mention the power conversion loss that also happens at low power devices we have plugged via wall warts.  (those little black transformers you plug into wall outlets)

My solution was to find DC-DC power converters that will use the 12v direct from the batteries to change it to the voltage a particular device needs.   Some examples are:  8 Port Gigabit Switch   It actually runs on 5v so removed the wall wart and used one of these 5.5mm Power Adapter barrel connector coupled with a 5v power supply and also tied in our HDhomerun to that same power supply via another 5.5mm barrel connector.

A note on that power supply, the width around the terminal screws was so small I had to grind down the crimp on connectors.  And they were the smallest (Red) connectors I have seen.

I also switched out my 120v POE supply with one of these 12v models:  Gig DC-DC POE power supply My WiFi device is passive POE (24v) and this device converts 12v to 24v and injects it into the Gig Ethernet cable to power my  Mikrotik Metal CPE   The Mikrotik is a CPE WiFi device with an Omni Directional antenna attached that I use to grab WiFi signals when near WiFi Access Points I can logon to.    That WiFi signal, once connected to the internet provides a connection to my internal  TP-Link AC750 WiFi Access Point via Ethernet cable thru the gig switch.  That access point also runs from 5v, but it uses a micro USB cable for power.   I power that from one of these 12v to 5v power micro usb output

My DVR (Sage-TV) runs on an Intel NUC  in the RV.  I found this 12v NUC power supply

I tied these all together with this Fuse Box. I also added one of these 3 port 12v power outlet switch box to allow for the Dash-cam and new NUC power supply to connect.    I have one left over to power the NVIDIA Shield Android TV device if I ever find a 12v adapter.   Is appears that no one makes one yet.  And no one makes a decent replacement remote for it either.

In its current form it appears I have reduced the current draw from 6amps to about 2.5amps.   A reduction of about 80 amp hours per day from the always on stuff.  That’s a lot of amps to replace when not connected to shore power!

Other things I want to change out will be the two TV’s.   Until then we will need to run the Inverter only when we use them.  Or maybe look into a couple low wattage individual inverters.   For now we can just turn on the main inverter to sit in front of the boob tube…


Updating my Solar install to allow Web Portal Access

Having the Bluetooth (BT) connectivity to my solar controllers was to me a necessity so I went with the Victron line of controllers after looking at what was available.   The issue that came up was very short range for the Bluetooth connectivity.  This was due to mounting them inside the electronics bay, a metal compartment at the rear of the bus!  That all aluminum bay is acting as a Faraday cage which made the connection from a phone or tablet a very short range affair.   Basically I can only connect to it from the RV’s bedroom located right above that bay.  I found that I could also add a Victron Bluetooth Dongle to one of the charge controllers and mount that up inside a bedroom cabinet allowing my phone to access it from the front seat of the coach.  That was nice but now that we have two controllers and the Victron Connect App cannot view both controller screens at the same time.  The App allows only one connection at a time.  That’s very limiting in my opinion when you have two controllers charging one set of batteries.

I had read about the Victron VRM portal that allowed a couple of their accessory devices, the Venus GX or the Victron Color Control GX to upload the solar data from multiple devices like controllers, battery monitors and many other devices Victron Energy produces to a website that you can access from anywhere with an internet connection.

I looked at buying one of those devices but they are pretty costly and didn’t feel the need to spend that kind of money just for the convenience.  So I starting looking around to see if there was another way to do the same thing.

Turns out there is.  Those devices firmware (actually their OS) is in the public domain. (GNU) so I looked around and found to find a device someone has ported it to.  I found it ported to Raspberry Pi (RPI).   Currently they are $38 so I pulled the trigger and ordered one to see if I could make this work for me.

I had a few old 2 GB microSD card (had a bunch of them from over the years laying around)  So I downloaded the Venus OS from a repository on the web.  I then burned it to a microSD card and once the RPI arrived I pushed it into the slot on the underside of the little board (RPI) and then plugged in a micro USB adapters power cord into the power port and an Ethernet cable into its port and powered it up.

Bamm, it booted up and finished with the Victron Logo on the screen and stopped at the command prompt.  I typed in ifconfig hit enter and it showed me the IP address it had received from my home networks router.   I walked back to my desk and put that address into my web browser and connected to the device.   (It was a bit more complicated for me because at first I downloaded a version of the OS that didn’t support that new RPI device.  v2.30 or above is needed)

That is the required version to run on the B+ device (newest device available when I did this, early 2019) is here in the development folder:   https://updates.victronenergy.com/feeds/venus/develop/images/raspberrypi2/   Those files change often so by the time you read this the working version may have been release to production and be here: https://updates.victronenergy.com/feeds/venus/release/images/raspberrypi2/ in the Released area.

I also had to get a couple USB to VE Direct cables that connect from the RPI’s USB ports directly to the Victron Controllers.   I used a phone power supply i had laying around to power it until I could get a power supply to hard wire into the bay.     Hard wired 12v to 5v power supply

In order to burn the image I downloaded I needed a minimum of a 2 GB microSD card.  If you don’t have any lying around this link will give you two cards for very little money.  SanDisk 32GB MicroSD HC Ultra Uhs-1 Memory Card, Class 10   2 GB cards might be found on EBAY.  But these new 32 GB ones are extremely cheap.

First thing I had to do to the card is format it, I used SD Card Formatter, the  newest one from there. I always scan new downloads with all my virus and malware scanners prior to running and unzipping them to my laptop.  After a  successful card format I used this free tool to burn the downloaded VenusOS image to that card.  Win 32 Disk Imager.   In all, I have $109 into the install now that its done.  1/3rd the cost of a Venus GX and 1/5th the cost of a Color Control GX device.   There may be a way to use Bluetooth to connect to the controllers negating the need for the special USB cables but I am not sure how to do that yet.  Maybe someone else can try and let me know.   We were leaving for the 59th Escapade the following week so I took the easy way and bought the two inexpensive cables from Bay Marine here in San Diego.

I was able to look at my charging information while attending seminars at the Escapade in Tucson.   I had setup my device to upload info every 5 minutes, you can lower that to every 1 minute but I only did that while testing it, then I moved it back to every 5 minutes.    Now I want to get my battery monitor talking to it before we head for Alaska this summer.


First Boondocking experiences after installing Solar on the RV

Let the testing begin!    Our first camping trip after I installed 640 watts of flexible Renogy solar panels and a Victron 100/50 charge controller was at the Albuquerque Balloon Fiesta campground October 3rd till the 14th.     We had signed up for an Escapee’s HOP (Head Out Program)  late last year when I couldn’t find more than a couple days in a row of available reservations.  Turns out they open the Balloon Fiesta Camping reservations up about a week after the last one ends so I was a couple months late to the party.  Luckily I found the ad for the HOP and they had a few openings.  I reserved a spot right then.

Fast forward ten months and we were camping there with our barely tested new solar panels charging our house batteries.    First thing I noticed was around noon the first full day there, they stopped charging the battery.  I checked the side compartment with the charge controller and I saw that one of the breakers on the battery side of the controller had tripped.  The devices I bought were supposed to be 50 amp breakers,  but from what I could tell, it tripped around 30 amps.  Not a good sign.  I clicked it back on and we started charging again.  

I started researching breakers and determined that I probably should have bought 60 amp breakers for that part of the circuit and better quality ones.   So I started calling local distributors, but none had them in stock, so I gave up for a bit.  

Next day it happened again, the same breaker tripped.  I could see this was going to be a chronic problem unless I replaced it.  Again I started looking online for a replacement and at the same time wondered where I could have it delivered.   After all, I was in a sea of RV’s.  No way for UPS to find us. 

A few  days went by while I called just about every electronic and electrical supply house within 90 miles of Albuquerque.    I also kept googling.  And then unexpectedly about 30 pages of results later, I found an ad for a 60amp breaker at an unlikely place called Sportsman’s Warehouse.   I called their local store, and to my surprise, they had a bunch in stock!   That afternoon I drove over and bought one immediately.   Turns out they were in the fishing section of the store for trolling motors, MinnKota MKR-19 Circuit Breaker 60A.   I replaced the faulty breaker that afternoon.  

Of course, once that was in place, the next day the breaker I had previously installed on the negative side of the circuit tripped.  I had only put that breaker on there as a switch so I could turn off both the negative and positive sides of the circuit.  Humbug!  So I went back to the store and bought a second one and installed that on the negative side of the circuit.   The issue with these particular breakers for me was no button to trip them manually, which is one of the main reasons I bought the problematic ones.  They had a button to press to trip them, so in effect they were also a switch.   I had seen other solar install pictures online where those same cheap breakers were used for solar hookups, so I figured they would work.   Geez,  was that a wrong assumption.

By now we are just a couple days from the end of the fiesta, so I decided to shop for one online that had the manual trip lever to install prior to us leaving for our next trip.   I eventually pulled the trigger on the Bussmann CB185-60 breaker and had it shipped to the house once we arrived back home.   I will be leaving the MinnKota on the other side of the circuit till I can find a suitable surface mount switch.

Now that I was no longer tripping breakers, I could really see what the panels were capable of.   One of the days I happened to look at the console and see over 540 watts of power being generated and almost 40 amps going to the batteries.  That was pretty amazing because the panels are flat mounted on the RV roof and the sun was getting low in the sky as it’s the middle of October.    Solar panels should be angled toward the sun for optimum production, but I decided early on in my research that I wasn’t climbing up on the roof to tilt them up and put them down each time we moved.   Once I committed to flexible panels that was fairly moot anyway.

While we were there, I experimented using the generator in the morning to charge the batteries up to around 80% SOC (state of charge), which is around the point the onboard charger drops out of bulk charging mode.  At that point I shut the generator down to let the solar panels attempt to top the batteries off during the rest of the sunny day.  Only using the generator while the charger is in bulk mode should be the most efficient use of the diesel generator.   Once the charging switches from bulk into the absorb charging mode, the charge amperage drops fairly quickly.  Even when the charger is only pushing 10 amps into the batteries, the generator seems to be under the same load as when it’s charging them at 125 amps in bulk.

I am now starting to more fully understand the difficulty of fully charging our batteries via solar . Adding more panels will help, but in reality I probably can’t fit enough panels on the roof of my RV to get it done in the middle of winter. 

The chemistry of batteries prevent them accepting the full amperage of the panels once they get above 80% charged state where the controller shifts into absorption mode.   More panels will get you to 80% quicker, but then the battery chemistry kicks in and effectively starts pushing back and the controller starts dropping the amperage going to them.  So if you calculated you could push 40 amps for 4-6 hours of the day (240 AH) and less AH before and after those hours, then in theory I figured we can push all those AH into the batteries during those six hours,  but that’s not reality.  As soon as those batteries hit around 80% SOC, the amount of charge accepted quickly drops.  So if your batteries are depleted below 80% SOC,  say at 60% SOC, you can really push in those amps for a while; but when they hit that 80% threshold, the amps  drop, and they drop in an almost linear line down to just a few amps and then hit float charging.

My experiment running the generator in the morning was my charge controller switched from bulk charging to float charging way too quickly, almost no time was spent in the absorb phase of charging from the panels, which should be the bread and butter of solar.   I started to search for an answer to that, and what I found out so far was the amount of time the charge controller stays in absorb is determined by the voltage the charge controller sees when it wakes up due to first sunlight in the morning.  The higher the voltage it sees when it wakes up, the shorter the time it stays in the absorb phase; and the generator made the controller see much higher voltage when it woke up, so the absorption time was cut to almost nothing.  

But that was learned a bit too late in the game, so this will continue when we dry camp in Quartzsite the middle of January.


Modifications to the RV prior to leaving for the Balloon Fiesta.

After getting back from the NW trip I had a list of things I wanted changed or added before departing for the Balloon Fiesta trip.   First modification was to move  the living room TV/Couch from the driver’s side to the passenger side, thus allowing the chairs to be moved to the larger slide behind the driver.  This switch simplifies the tasks needing to be done when arriving and departing.  Also allows someone to sit in those chairs while driving now that there are seat belts although the ottomans are normally seat-belted in.  Currently those seat belts hold on to the ottomans.  I’d hate to get hit by one of those in an emergency stop.

Next thing was to install a motion light by the inside stairs.  I happened to find something on Amazon that now after using it a few days is the perfect solution.  Motion LED light.   It’s rechargeable via a micro USB cable.  And to make it even simpler to install, it has a metal plate with 3M tape to mount it to your surface.  Then you can remove the light at any time to charge it as it’s magnetically attached to the plate you installed.   It only stays on 18 seconds, which is perfect for entering or leaving the RV.  It’s affixed to a flat surface under the passenger-side pullout drawer.  I like it so much I want to buy more, so I am trying to figure out where I need them first.

After installing that, I tackled installing some drip channel above the windshield.  A buddy told me he had done that and it really helped keep that huge piece of glass clean while parked.  Prior to adding this, water and dirt from the roof would streak down the windshield after just a day or so, making it necessary to clean it almost every day.   Since adding that a week ago, I haven’t had any dirt streaks on the windshield at all.  Now if I could only figure out a way to keep the bugs from splattering while driving!

I then drilled a large hole in the dining room cabinet to install a power tower that can pull up or close down when not needed.  The only outlet in that area was under the table, very difficult to get a plug into.    Power Pop-Up Station, three outlets      I also installed a small 8″ square piece of sheet metal on the roof to act as a ground plane for our  Cell Phone Signal Booster

The last thing I accomplished during the time between trips was to install   640 watts of solar panels on the RV roof.   Last year I installed a Bogart Trimetric Battery Meter that measures amps into and out of the house battery pack.  That helped me determine how much energy needed to be put back into the batteries after a 24-hour period,  giving me a starting point to determine what I might need.  First I built a 200w portable suitcase, documented in an earlier post last spring.   I sorted out the controller details and approximately how much wattage I needed.   I then installed a controller in the coach that was sized for the panels on the roof; but while I did more research on what panels to buy, I could use it for the portable panels I have stowed in the RV basement till I pulled the trigger on the roof- mounted panels.

Fast forward to now.   I first tested each panel with a voltmeter laying in the back of the pickup truck to see if I had any DOA panels.   Then I did what I call a “sidewalk test”, laid them out on the side walk one morning and hooked them up to the coach’s controller to see if they put out amps.

I installed 4  Renogy Flexible 160w mono solar panels, all serially connected to keep the amperage low and the voltage high, allowing for much less voltage drop on the 35′ cabling runs from the roof to the controller via the rear cap.   I wanted to line them up along the passenger side edge but there were some things sticking up on the roof that would create shadows on the panels so a couple of them were moved further inboard the others.

I used 2 tubes of Sikaflex 252 for gluing down the panels to the fiberglass roofing.  Renogy recommended that as it would stick to their ETFE material.   All in all it was a simple process to install and cable them.  The only actual difficult part was fishing the cables down thru the inside of the rear cap.   You cannot see what you are doing as all you have is a 1″ hole and it’s not a straight shot to the bottom.   I eventually found a 1/4″ x 10′ piece of threaded rod that was stiff enough and flexible enough, and long enough to come out the bottom.   Everything I had that might have worked was only 6′ long.  Not enough to come thru the bottom of the compartment where I could grab it and pull it further down and over to the Controller storage compartment.

It’s all done and it generates a lot of power!   Next week we will be dry camping at the Balloon Fiesta for 12 days.   That should give me a lot of empirical data to work with for any future modifications.

Yes,  flexible panels were more expensive than rigid panels; but after I figured in the costs of the mounts and extra time it would take to install, not to mention the piece of mind while driving down the freeway that those heavy rigid panels might have become decapitation projectiles to an unlucky car following behind….  I am very happy with my decision.   The rigid mounting brackets I wanted to use were from AM Solar, and they were about $80 per panel.

We will see how they hold up over time.

Modifying the Absorption Fridge before NW trip.

Last summer our fridge worked OK most of the time, but I saw a device that could make it work better for us and also take out a bit of anxiety that some folks experience with having that type of refrigerator.

First thing,   absorption refrigerators have no moving parts,  no compressors or internal fans blowing the cold air around like the one in your house.    They can run on 120v or 12v with propane.   When the temp stays under 90 degrees outside, they work very well.   Once the temp goes beyond that, it takes a bit of help to keep them cooling your food.   Last summer while camping in AZ and UT during June (hot)  I went out and bought an 8″ clip-on 120v fan to put behind the fridge to pull cooler air thru the outside vent openings to run it past the condenser coils and out the roof vent.   That helped quite a bit.  But something I didn’t know at the time was the Norcold automatically goes into a defrost cycle every 24 hours.  It basically turns on heaters for two hours to keep the internal coils from freezing up like a block of ice.   That was not helpful on 100 degree days when there wasn’t any chance of frost building up.   In actuality, it is a bad design that should be able to sense the need for that defrost cycle and not run it on a set schedule.

Late last summer I ran into a few good ole boys from Virginia while we were camping in Maine.   One of them, the engineer of the trio, showed me a device called an ARP he had mounted on the back of his fridge.   It did a few cool things.   Its main purpose was to shut off the fridge if the boiler got hotter than its normal running temp.   Norcold had put on a recall device that shut off the fridge at 800 degrees.  This one does that at around 300 degrees, limiting the metal fatigue and preventing it from clogging up the system due to the solution getting way too hot, requiring whats called a burping or a much worse situation where it will no longer work at all, and lastly a catastrophic problem that could burn down the house.  The ARP will also would turn the fridge back on once the normal temp was reached again.   That’s something the recall device doesn’t do.  To turn that device back on from the recall device you need a magnet to reset its internal switch.

The second thing it has is a built-in controller to power up to two blower fans you mount back where I had put that clip-on fan last summer.    A sensor clipped to the condenser coil monitors the coil temp and tells it when to turn the fan(s) on or off.

But the best part I think it does is disable the defrost mode on the fridge.   That is a settable option on the device.  The fan temp can be set to a temp you desire it to turn on, and there are many other settings that I won’t fool with.

I installed ours the week prior to leaving for the NW trip.   I didn’t like their suggestion for mounting the unit, so I made a bracket from some Simpson building brackets for the controller and one fan .  You should be able to tell what I did by the pictures here.   I think I will buy a can of black spray paint when we get back home.

I also modified the inside of that space to make the air from my blower fan flow a bit more smoothly toward the coils with a bit of sheet aluminum.   There was a 2×4 just above the bottom vent opening, so making a 45 degree baffle to direct the flow directly to the coils made sense.    I have heard there is a similar situation above the refrigerator, and when I get home, I will look into making something to divert the hot air smoothly over to the vent.

It seems to be working as planned.   I was able to see the blower fan turn on at 130 degrees for the coils; and in the 95 degree weather, the ice cream stayed hard as the freezer temp never got above 12 degrees and the fridge stayed at 39 or below!

The real test will probably be next month when we get east of the cascades heading toward Glacier National Park.

Another simple mod I did was to replace the incandescent fridge festoon type bulb with a 6000 kelvin LED from M4 products.    I’m sure the heat difference will be negligible since it’s not on much, but it’s so much brighter than that original bulb, its literally like night and day.


Portable Solar Install for the RV

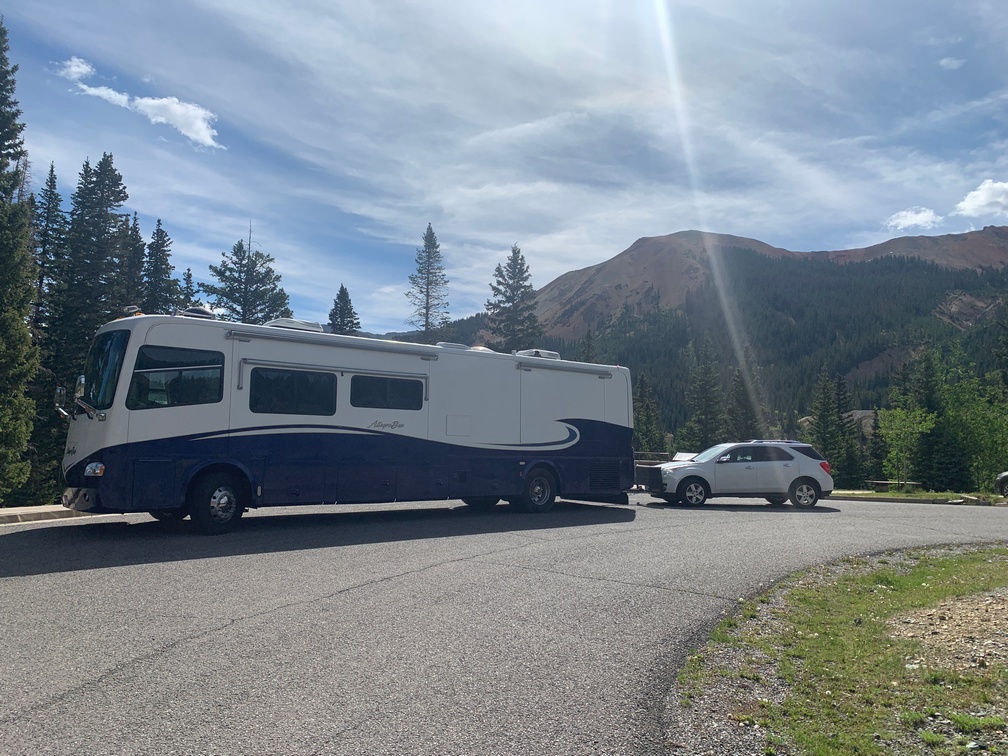
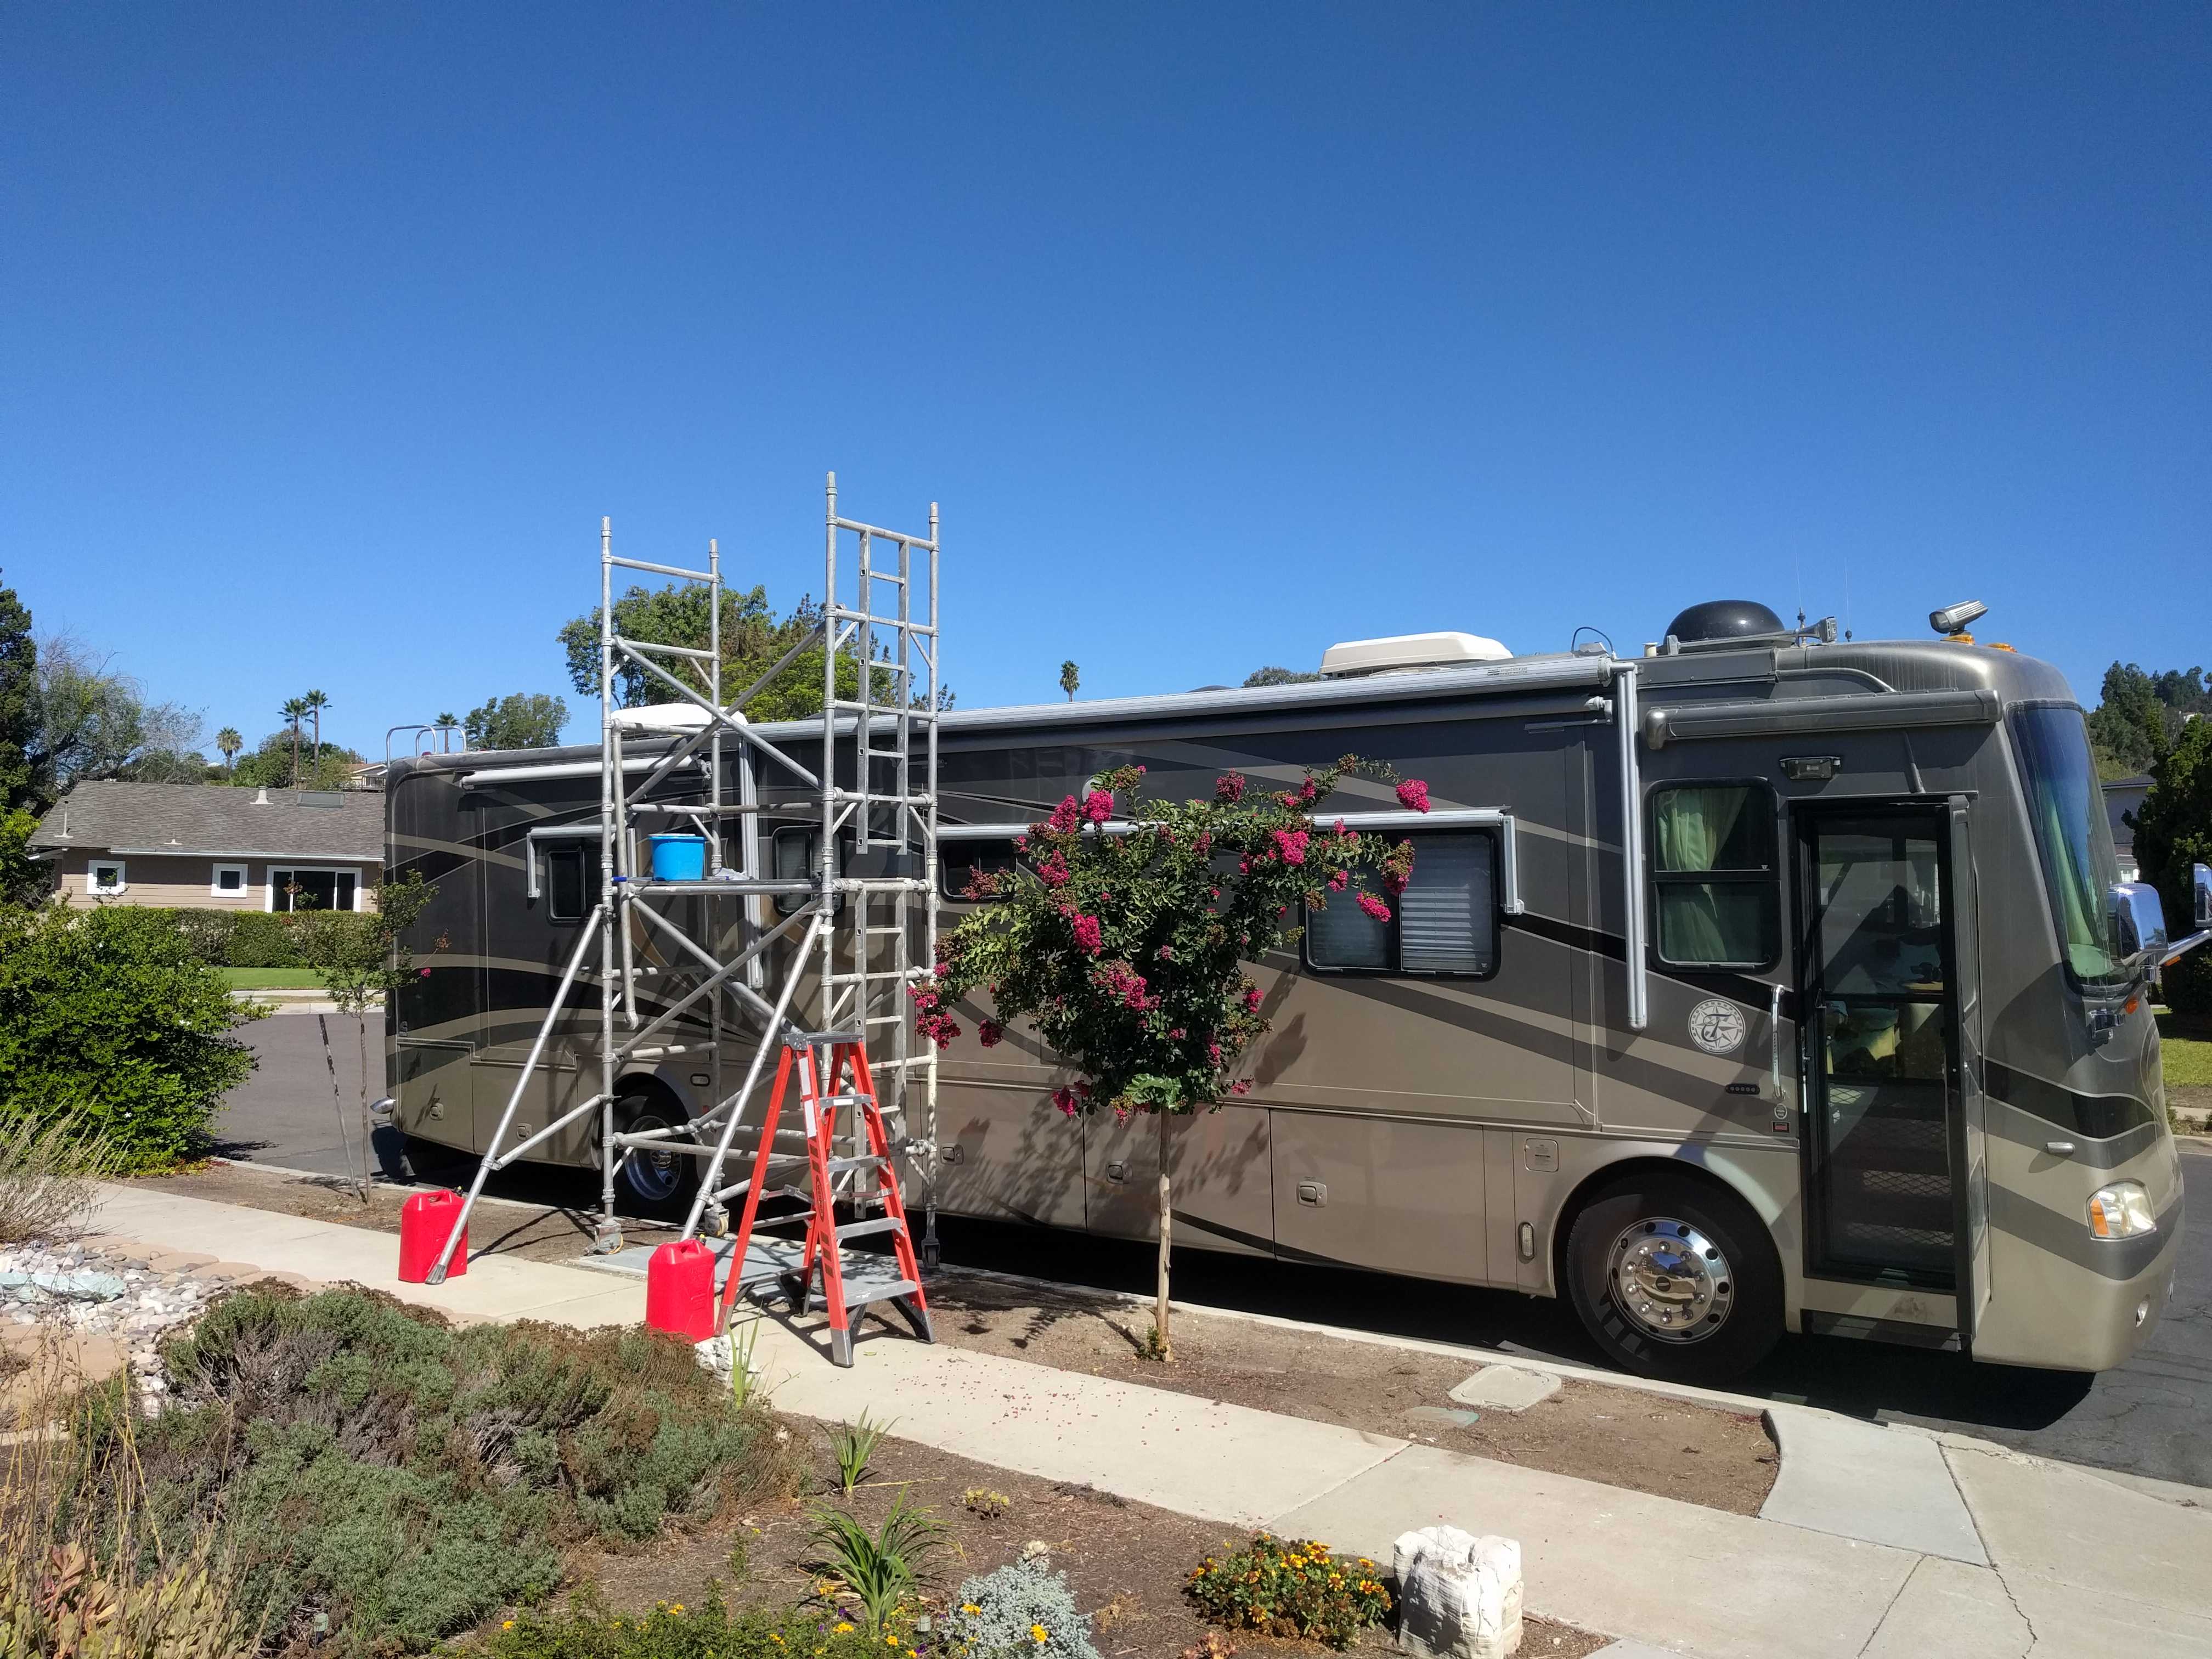
After our second week of dry camping, both Kathy and I are ready to have our batteries charged by sunshine instead of the generator.  It might be a quiet diesel, but it still makes noise and some vibration inside the coach.

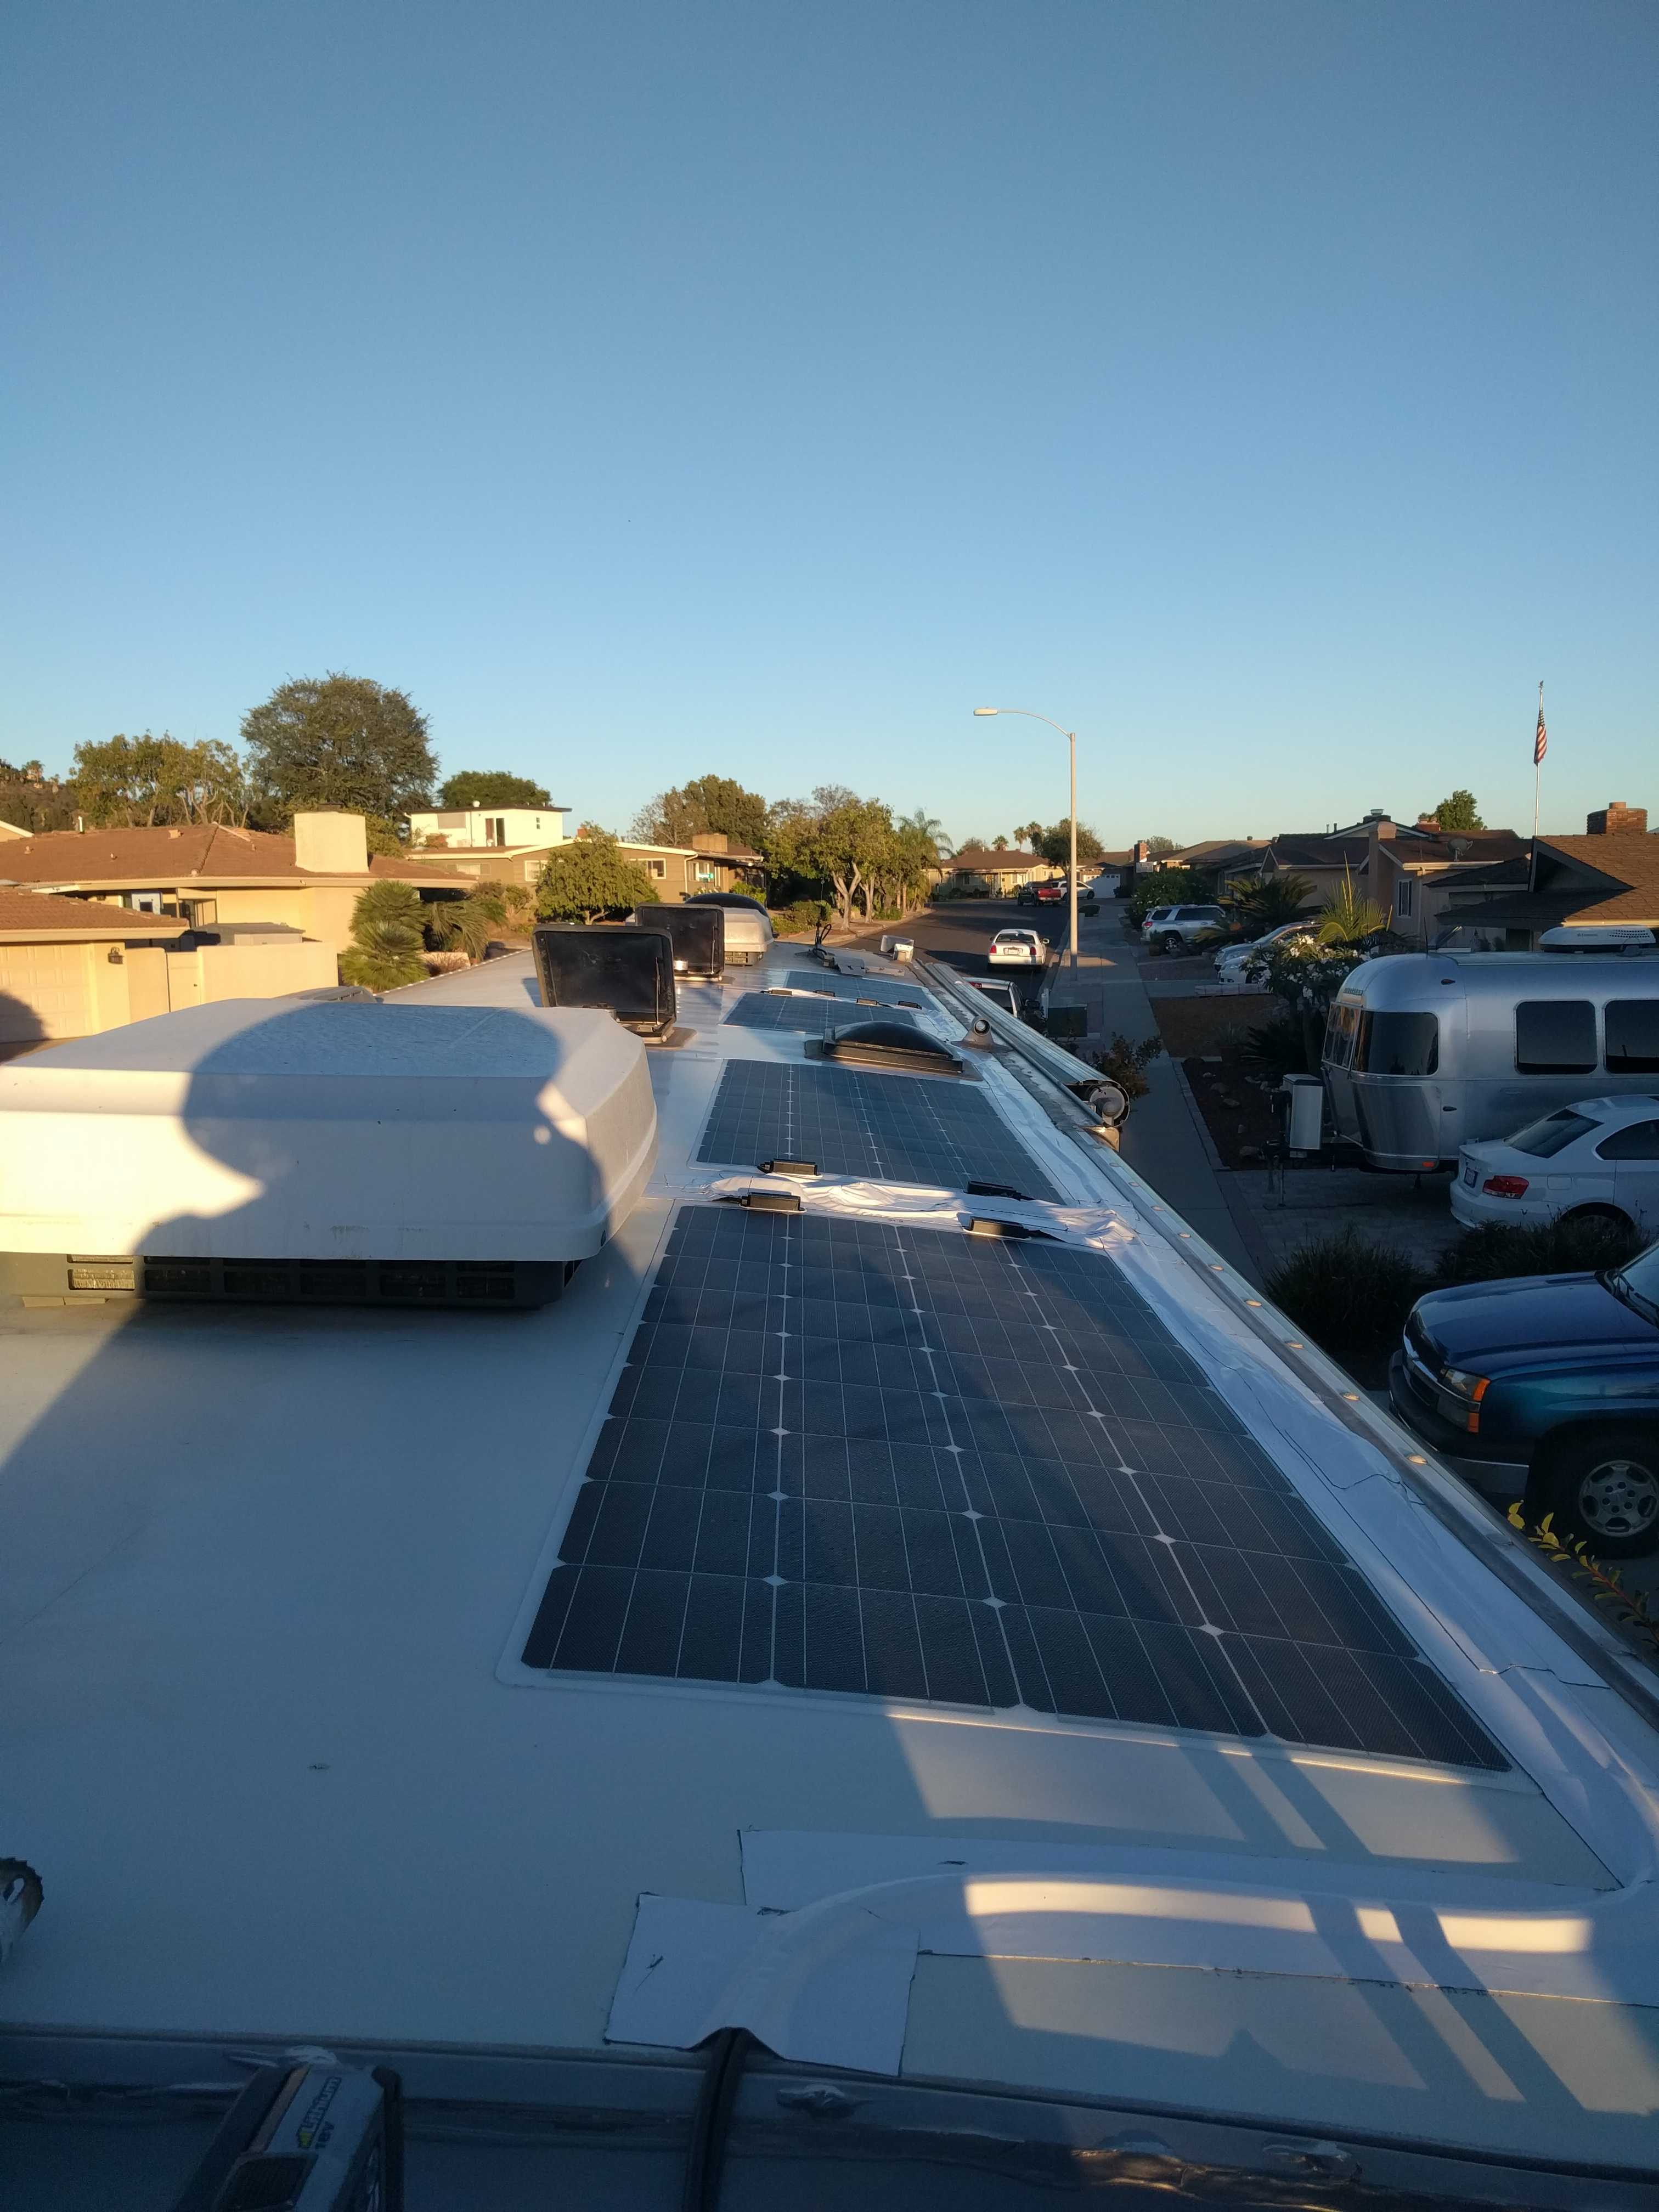
Having installed the Bogart Trimetric Meter  prior to our first dry camping trip last winter, and now after the second dry camping trip, we know that we need to replace about 180-200 Ah of power to the batteries each day.   That means I need to try to get about 50 amps to the batteries to charge them, so I will start off with two 300 watt panels that would produce somewhere between 30 and 50 amps or hopefully 180-240 Ah a day.   Due to flat mounting them on the roof,  I might need one or possibly two more, but that will only be known after we spend some time with those panels.   Since I built a portable set, I need to make sure I can add them to the string when needed.   That will take a bit more questions as I am not an electrical engineer.  But I know one!

I really liked these mounts: AM Solar tilting Solar Panel Mount Kit, but the price is outrageous.  Each panel mounting set is as much as the 100 watt panels I bought to make the portable suitcase though.    I also like their combiner box,  AM Solar Combiner Box, and it too is very pricey,    As I am probably going to hook the panels up in series, I may just be able to use a $20 gland instead of the combiner box.

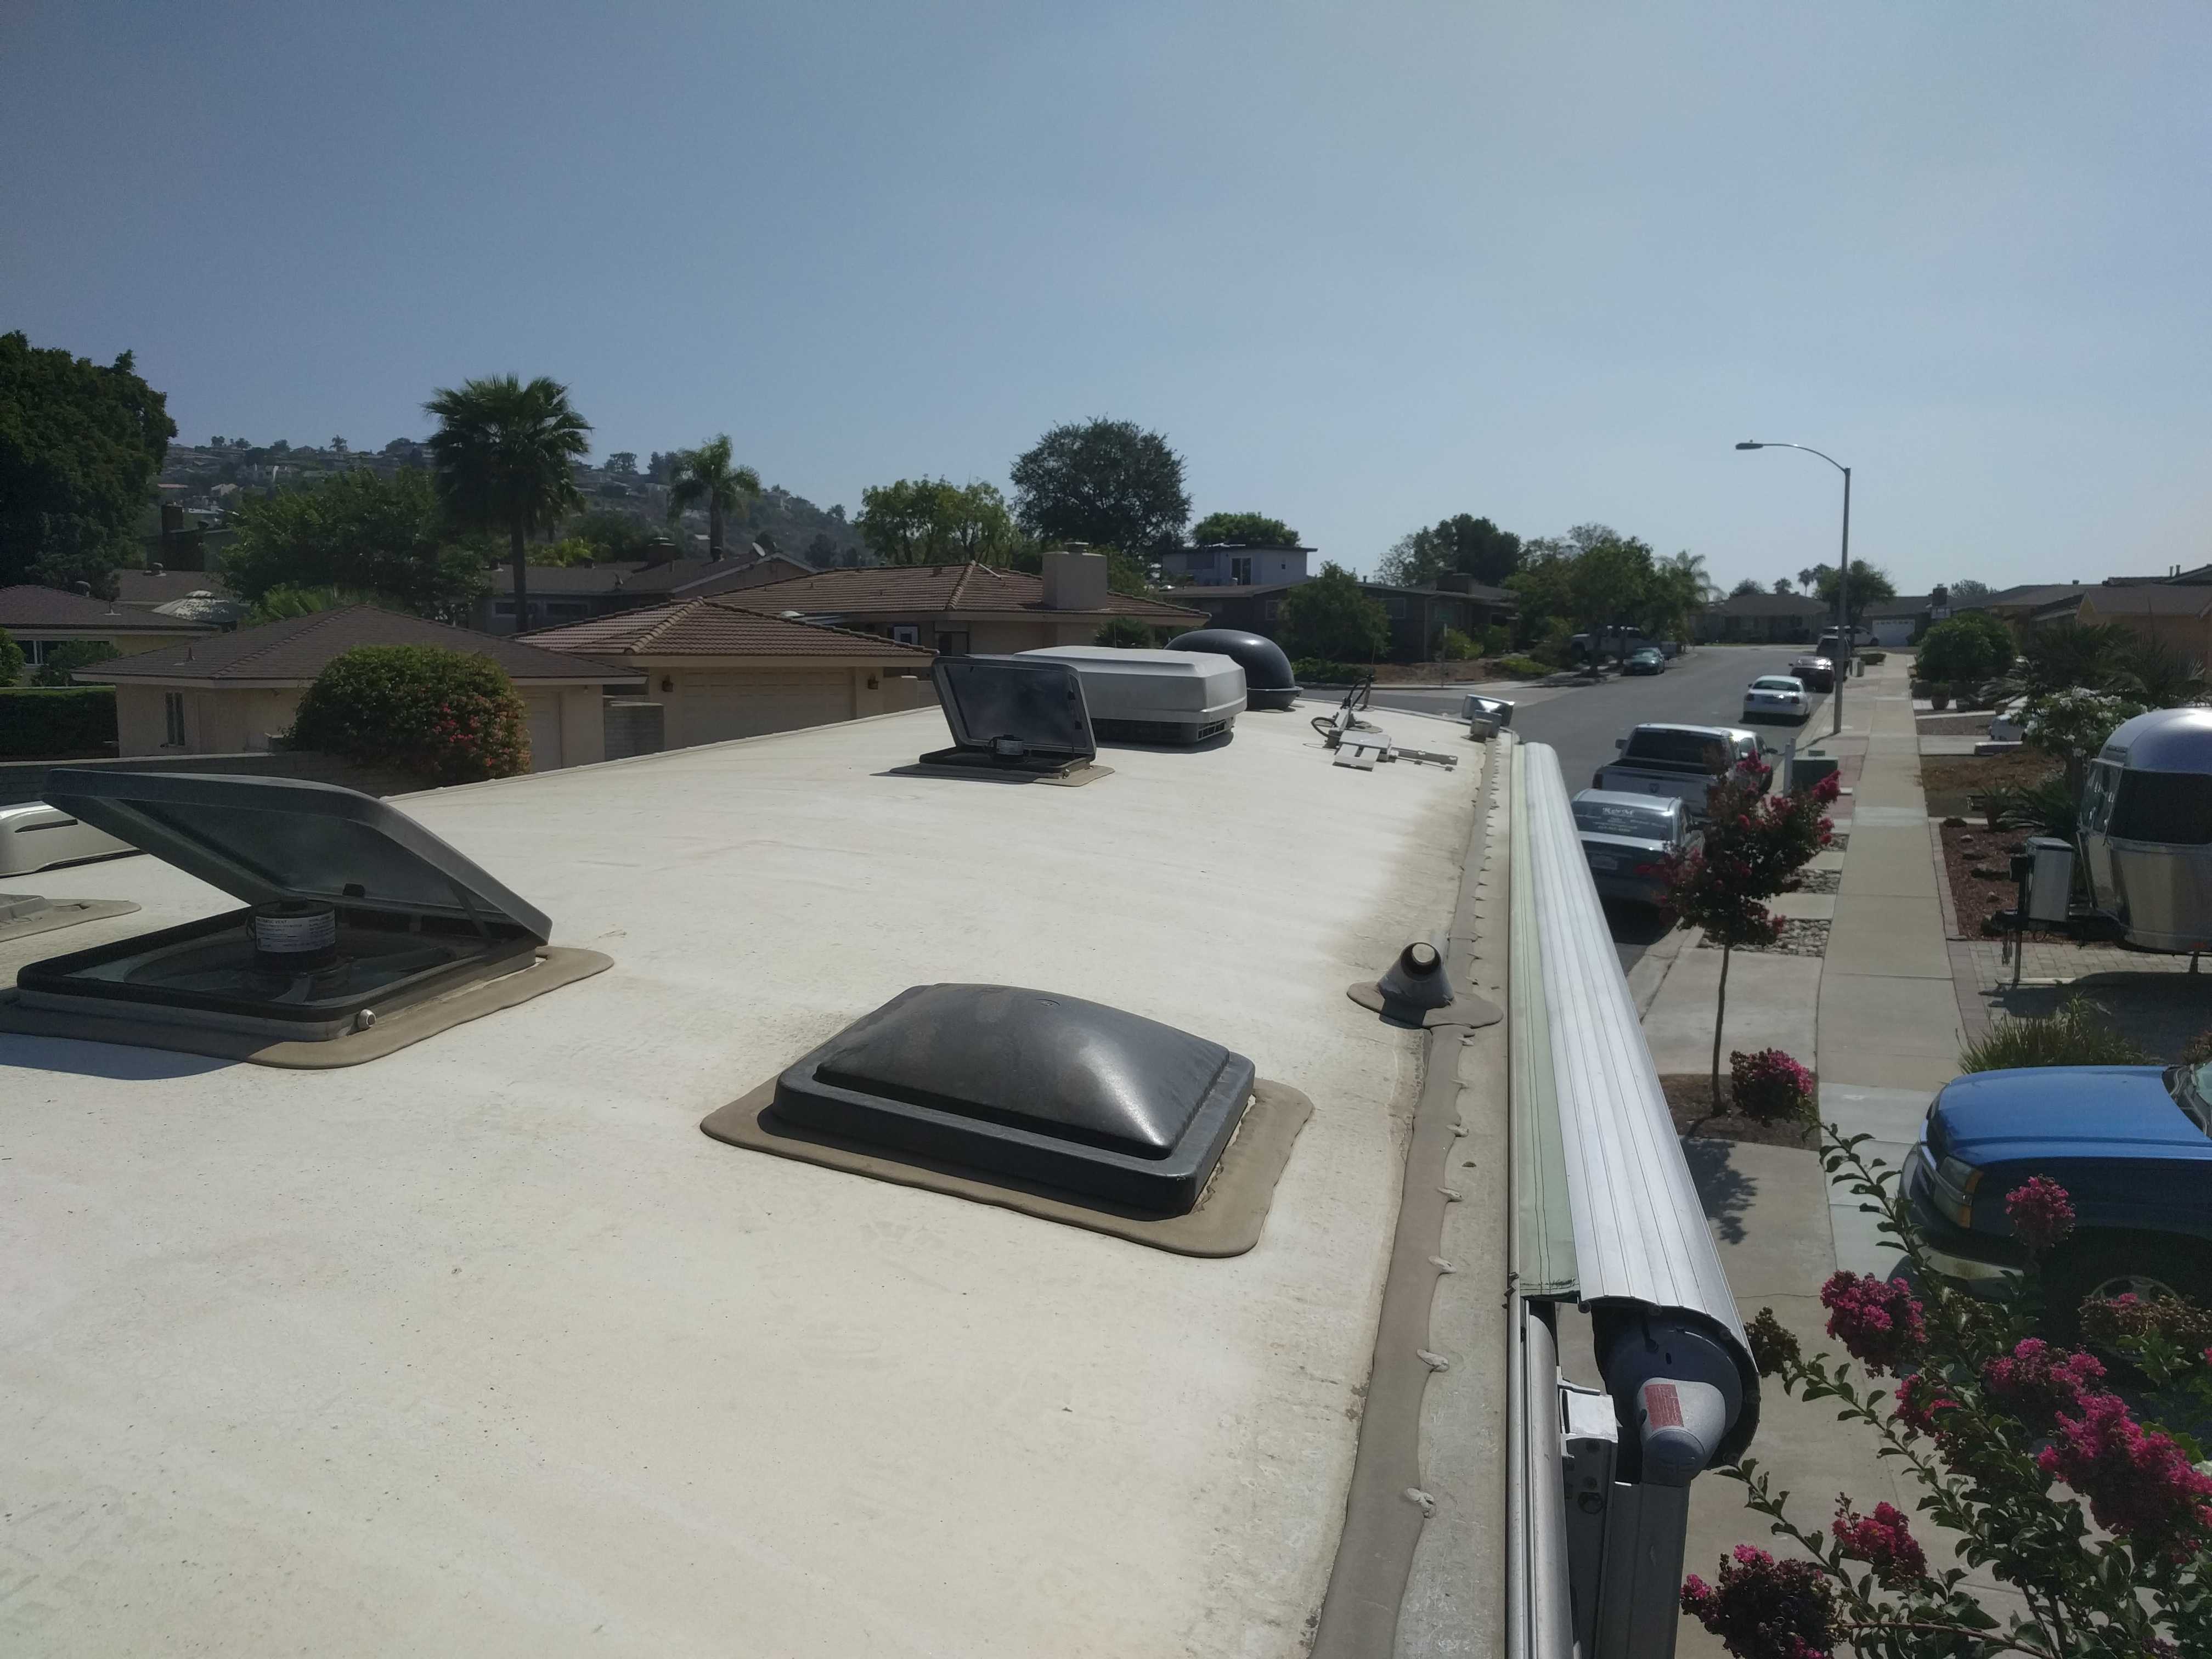
As for the future path for the  cables down to where the controller is mounted in the passenger side rear-most bay,  my best guess right now is I’ll mount the combiner/gland at the rear of the coach near where the ladder connects to the roof.   I have verified with other owners with my particular coach that there is room back there to bring the cabling straight down inside the rear cap and connect it thru the back of the inverter cabinet.  I also found out there isn’t any insulation back there,  I had assumed that after noticing how warm the rear closet gets when the sun is shining on the back of the coach.

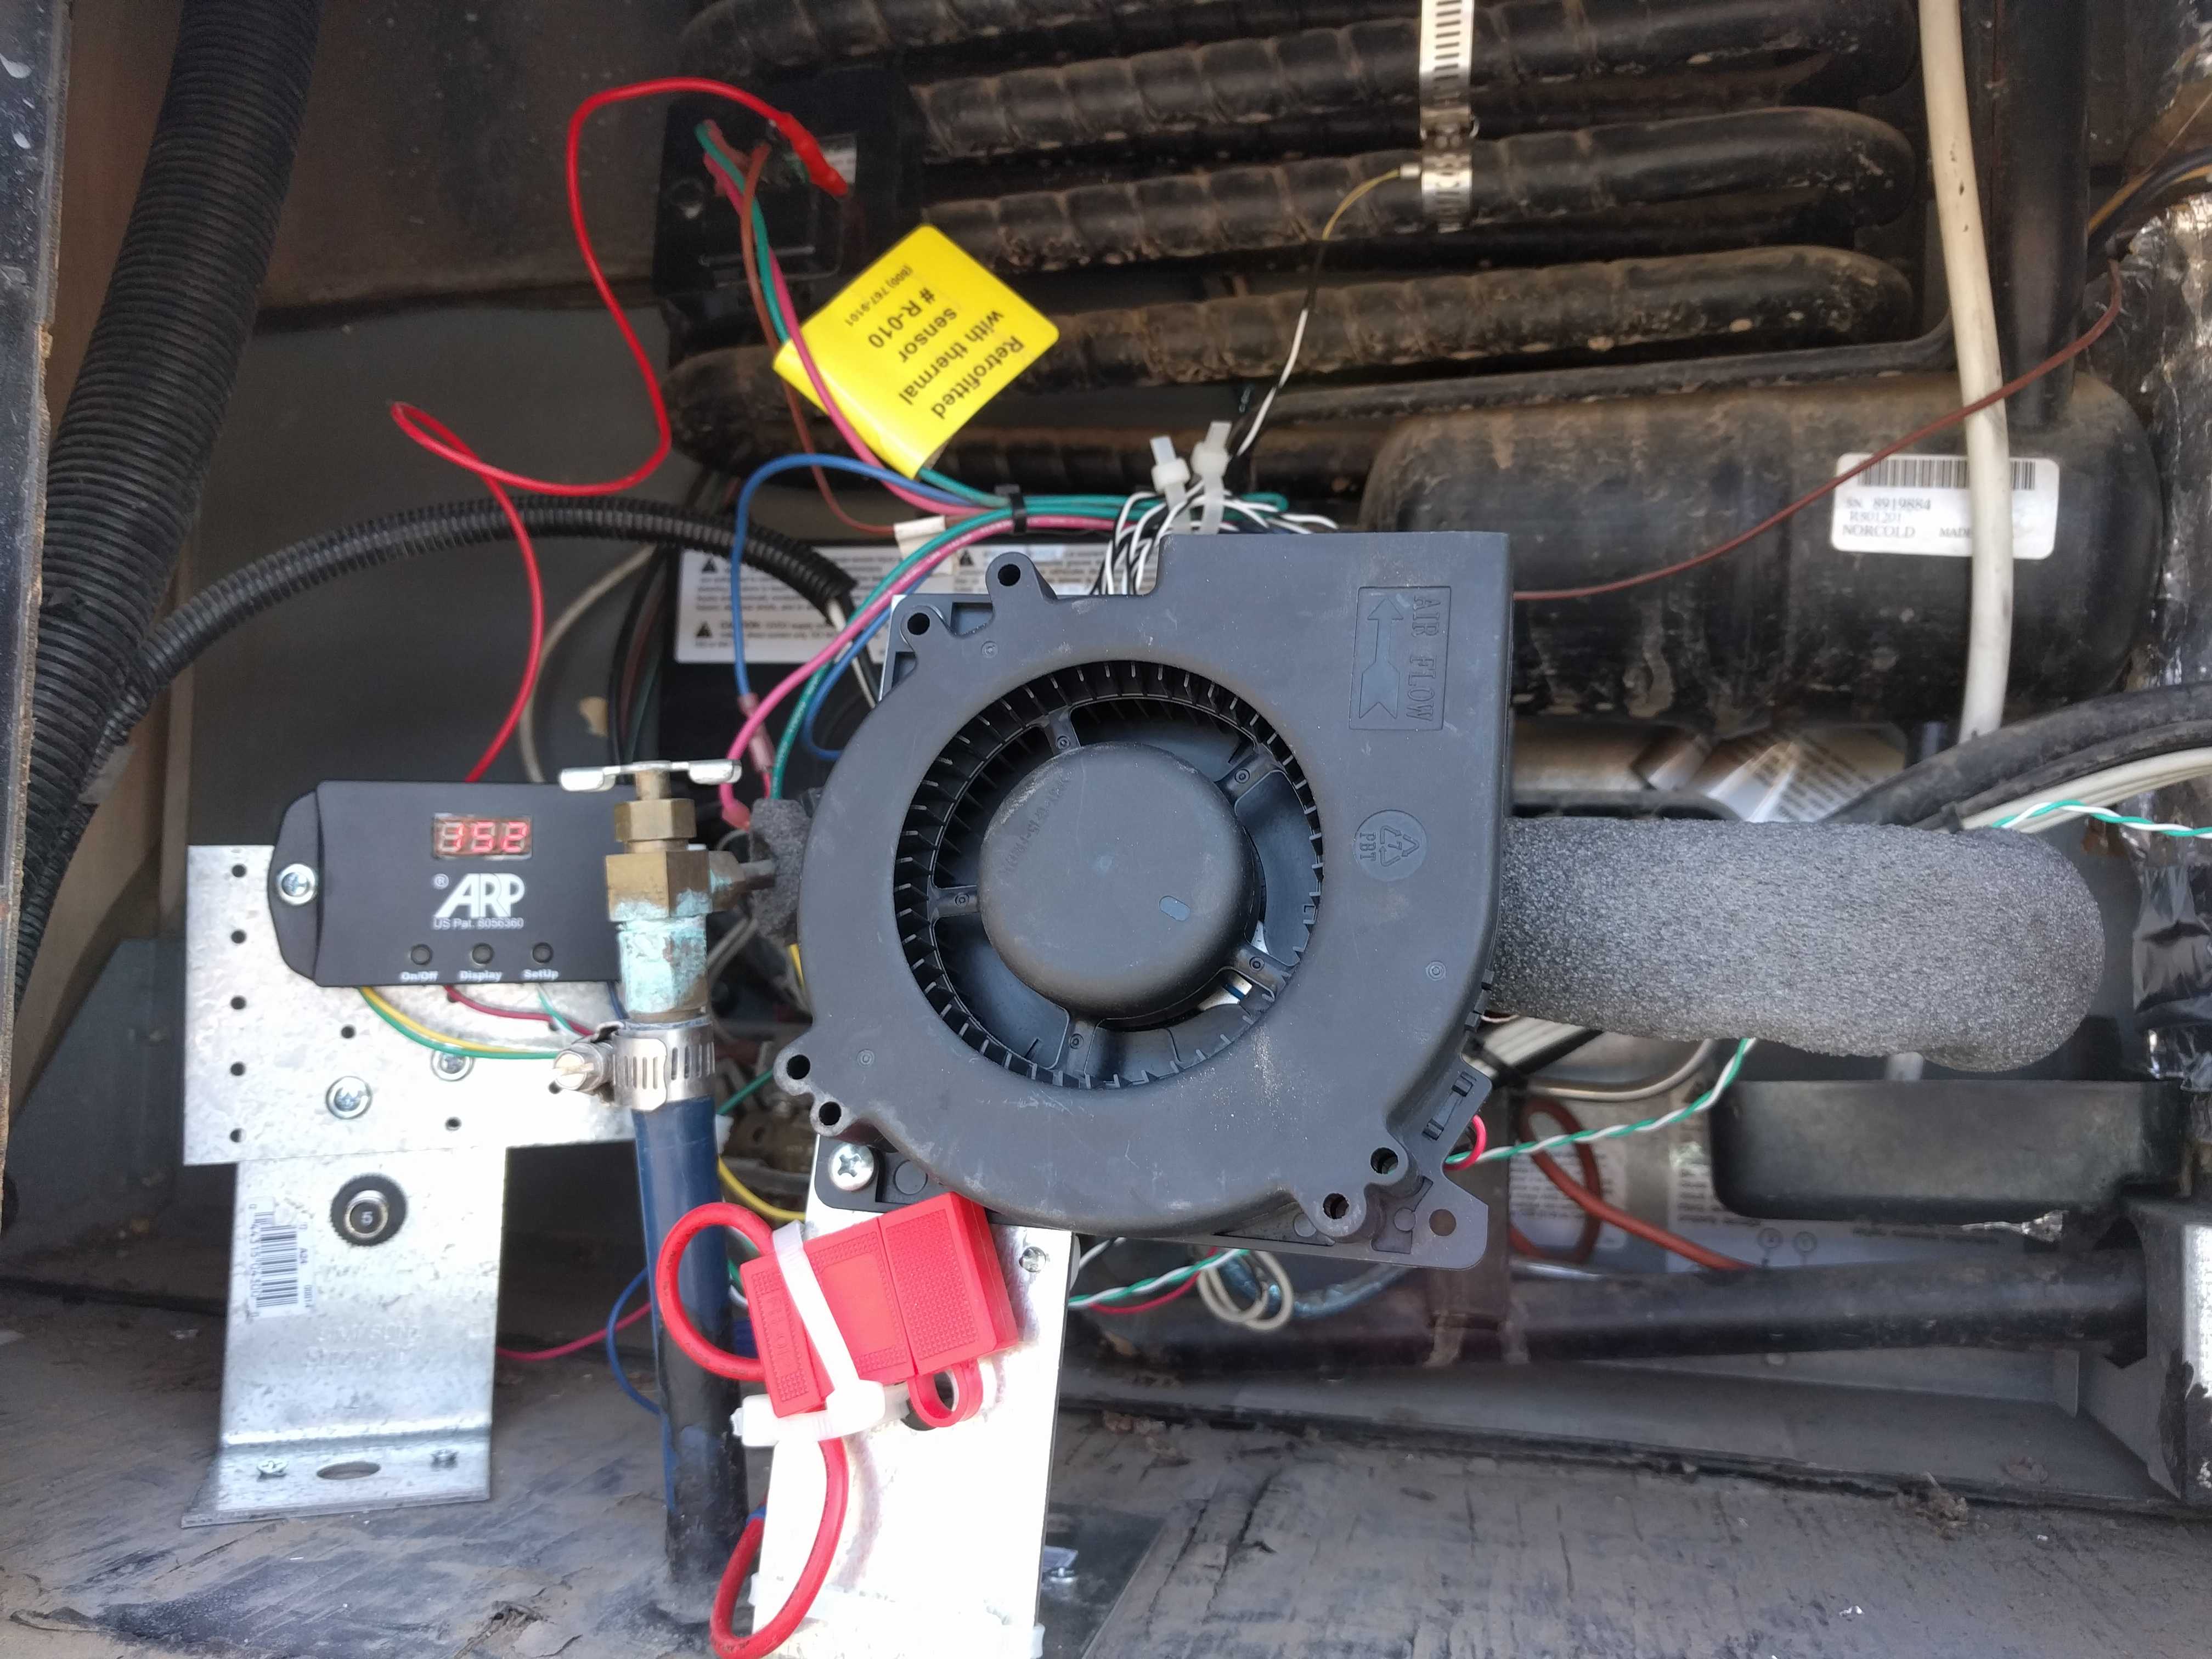
There was an an oddly mounted add-on fan at the back of the engine compartment that was pushing air out the PS engine door louvers.   I pulled that out and the electronics that controlled it from inside the inverter cabinet.   I guess the original coach owner didn’t understand that he needed to keep the engine revs up around 2,000 RPM on long, steep grades to keep the engine running cool, so he must have had that fan installed.

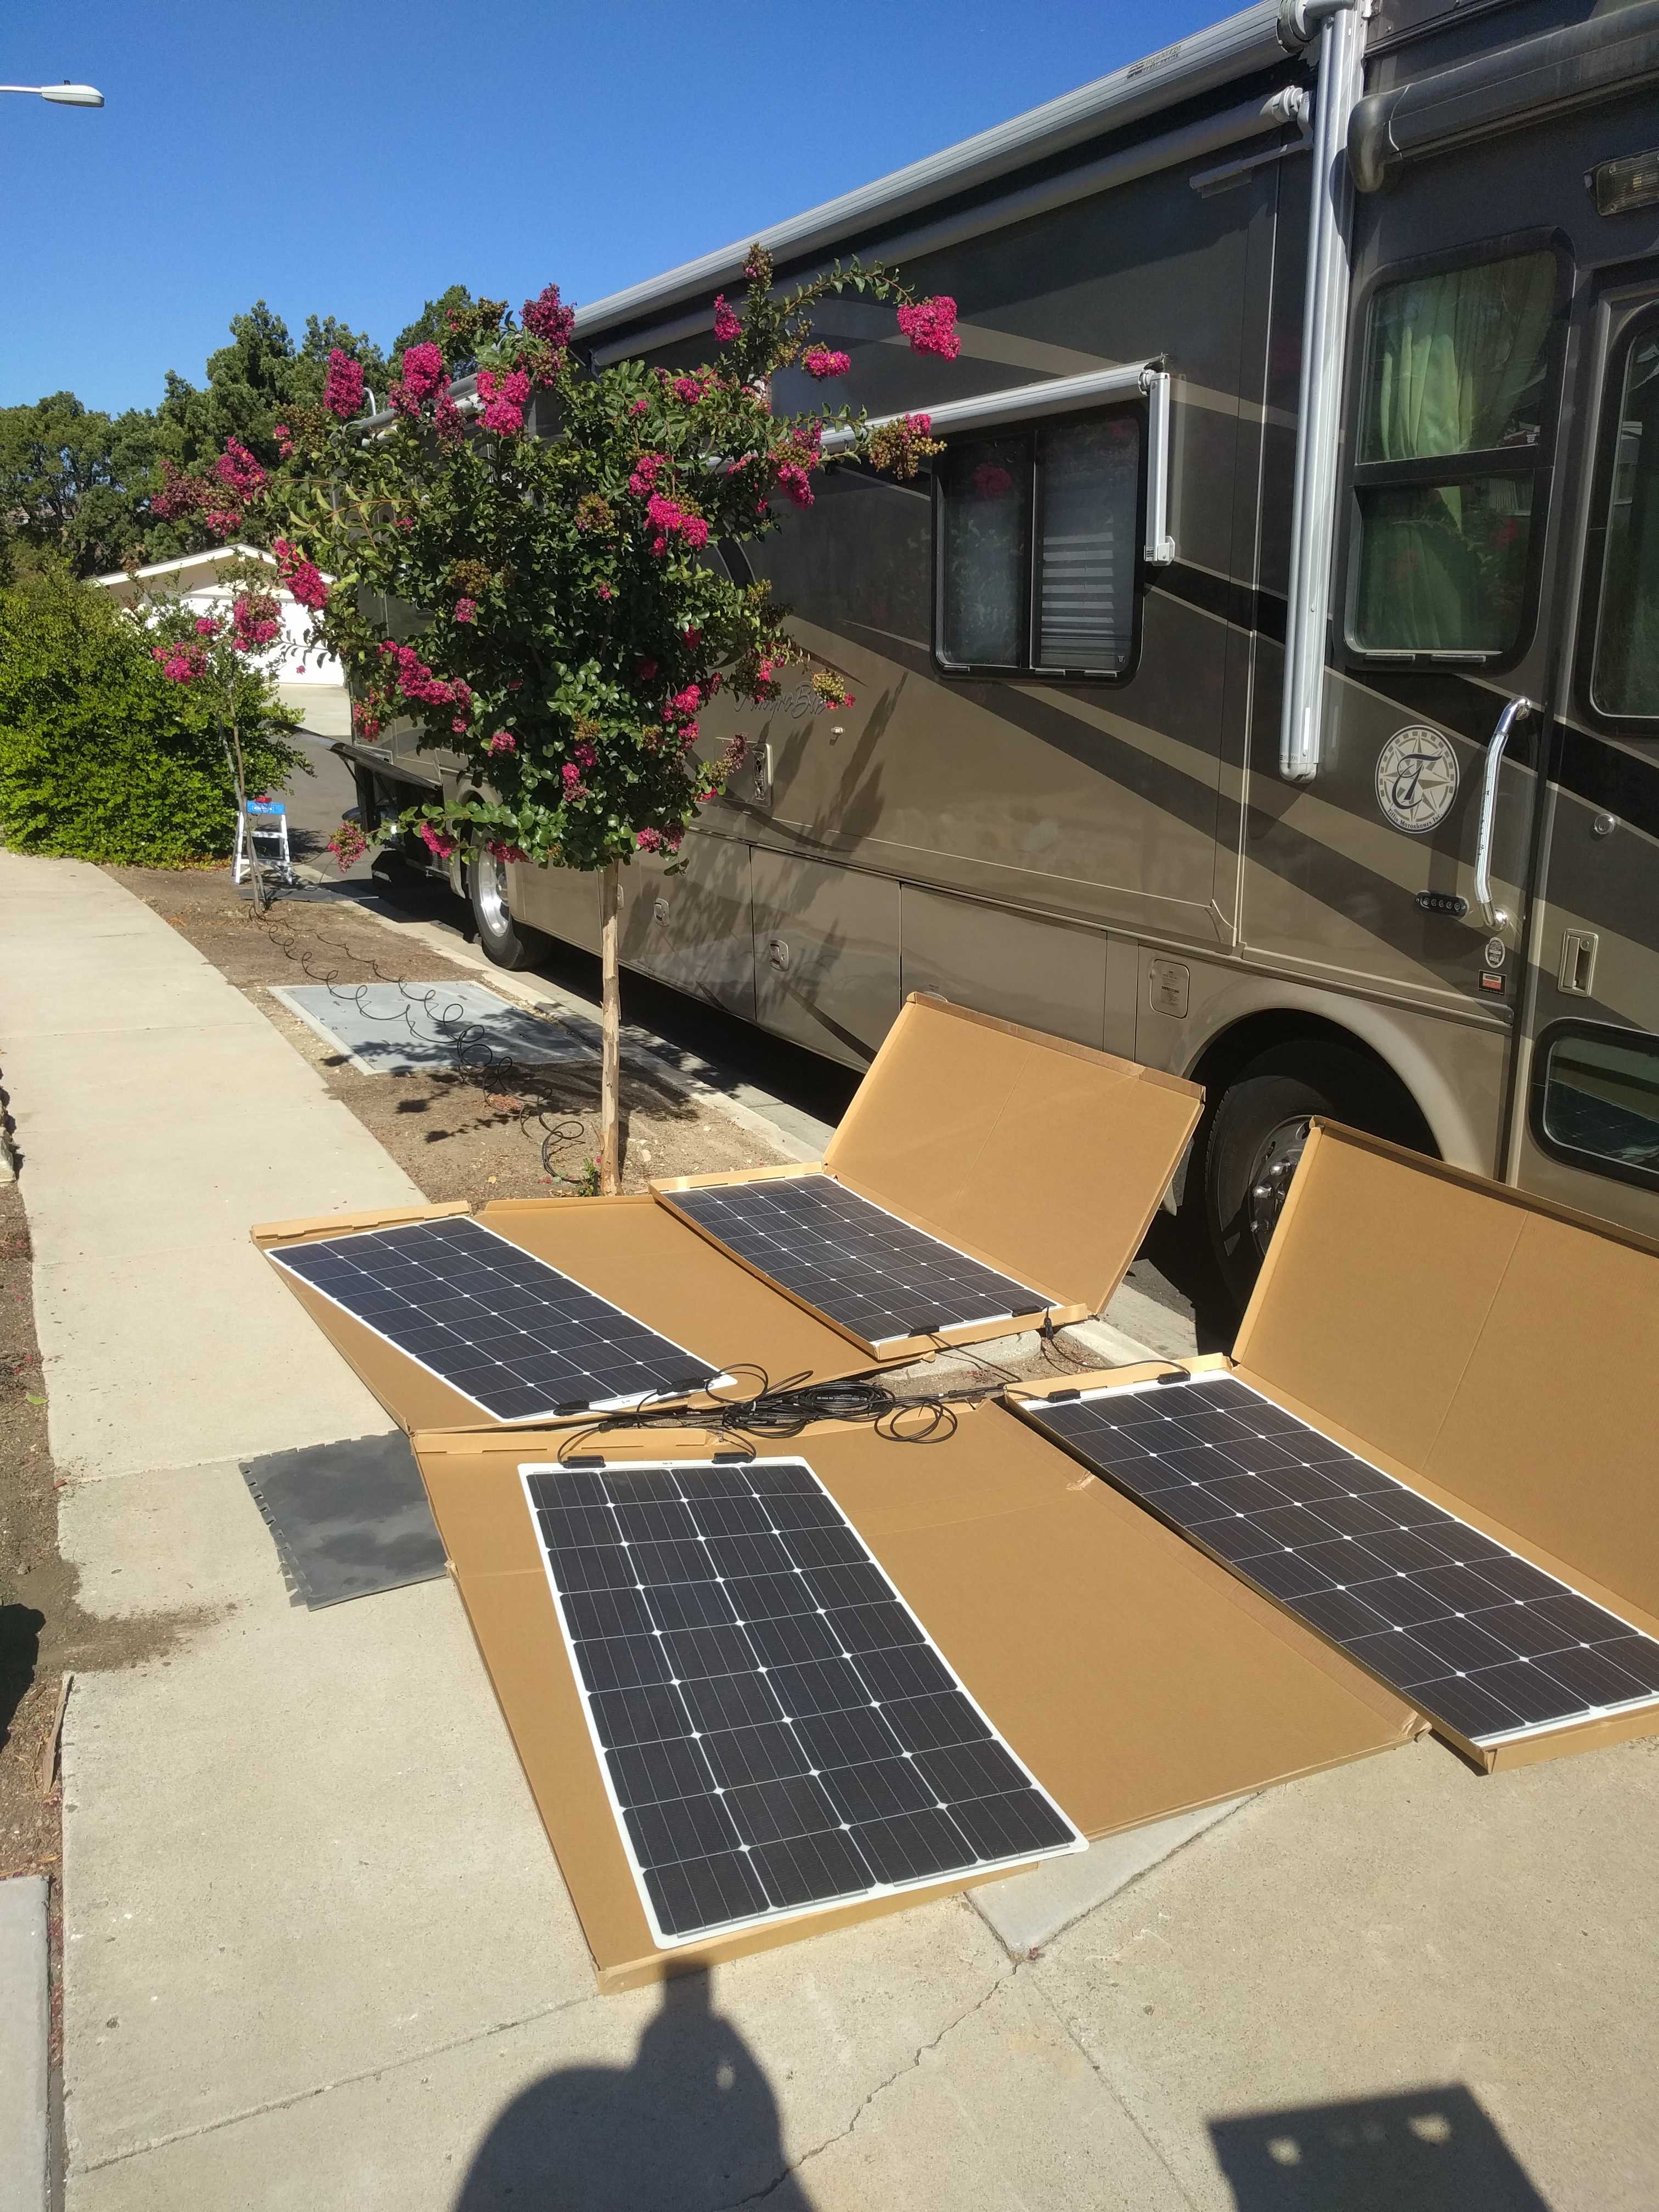
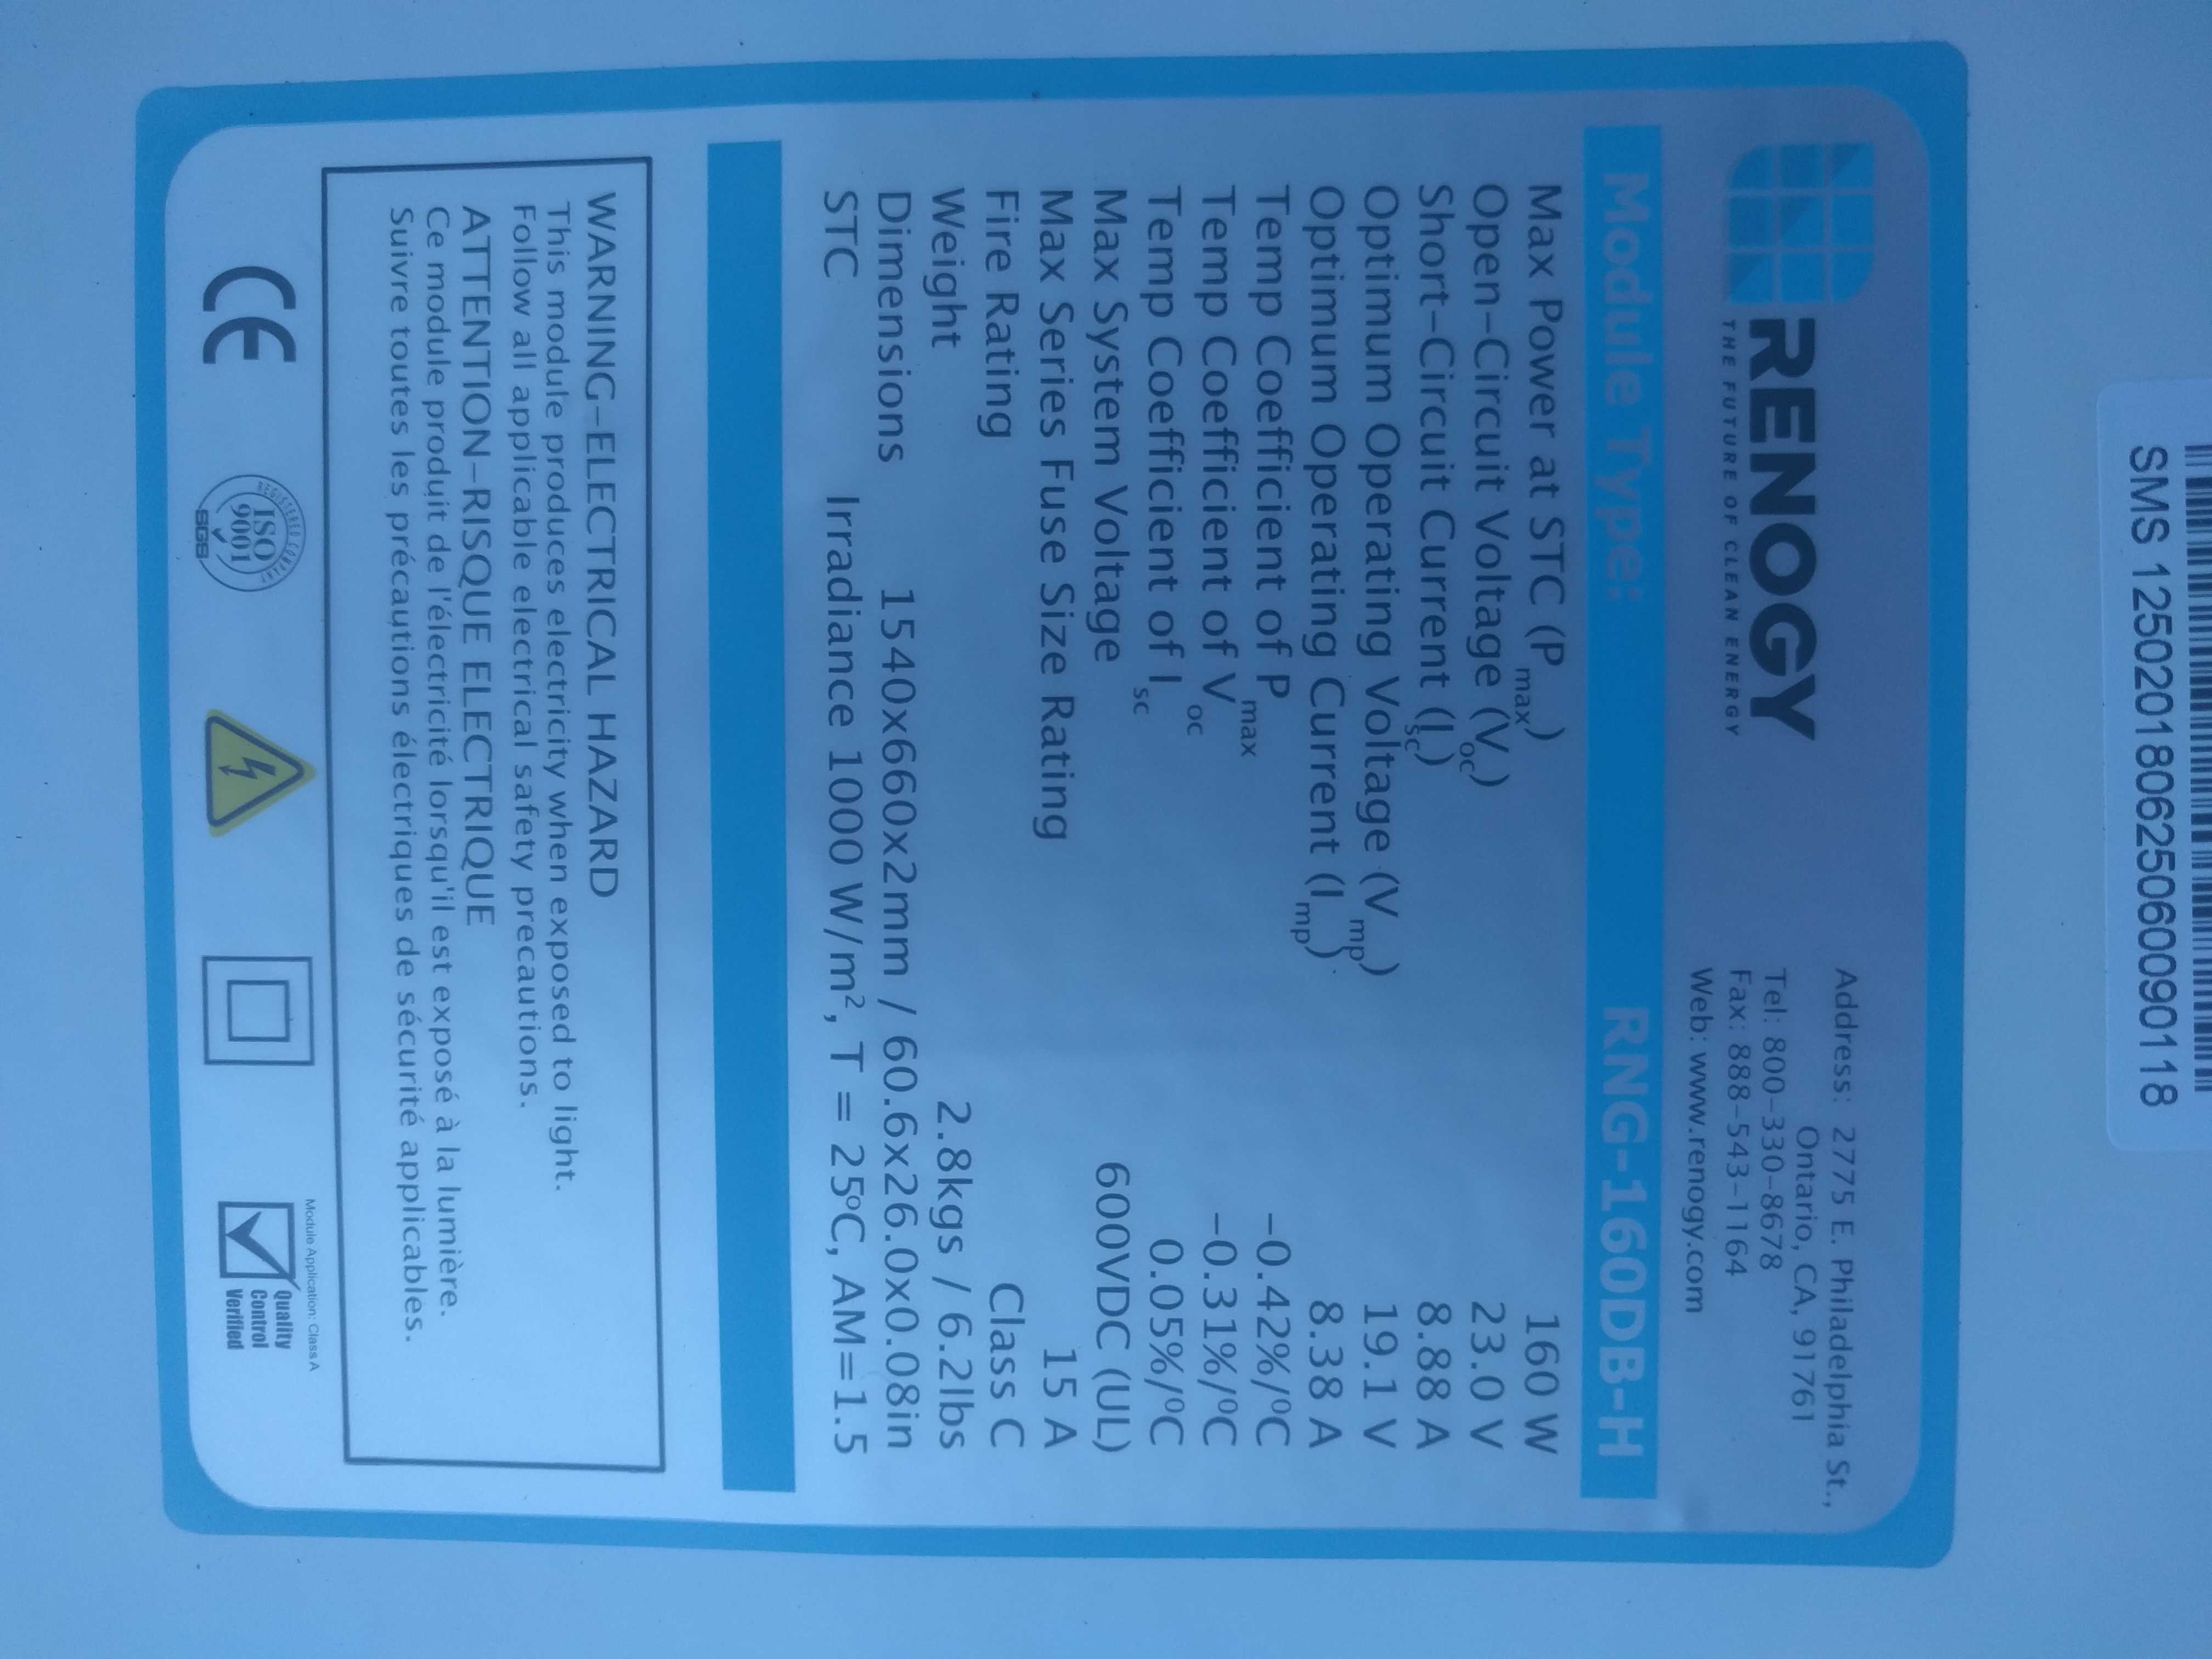
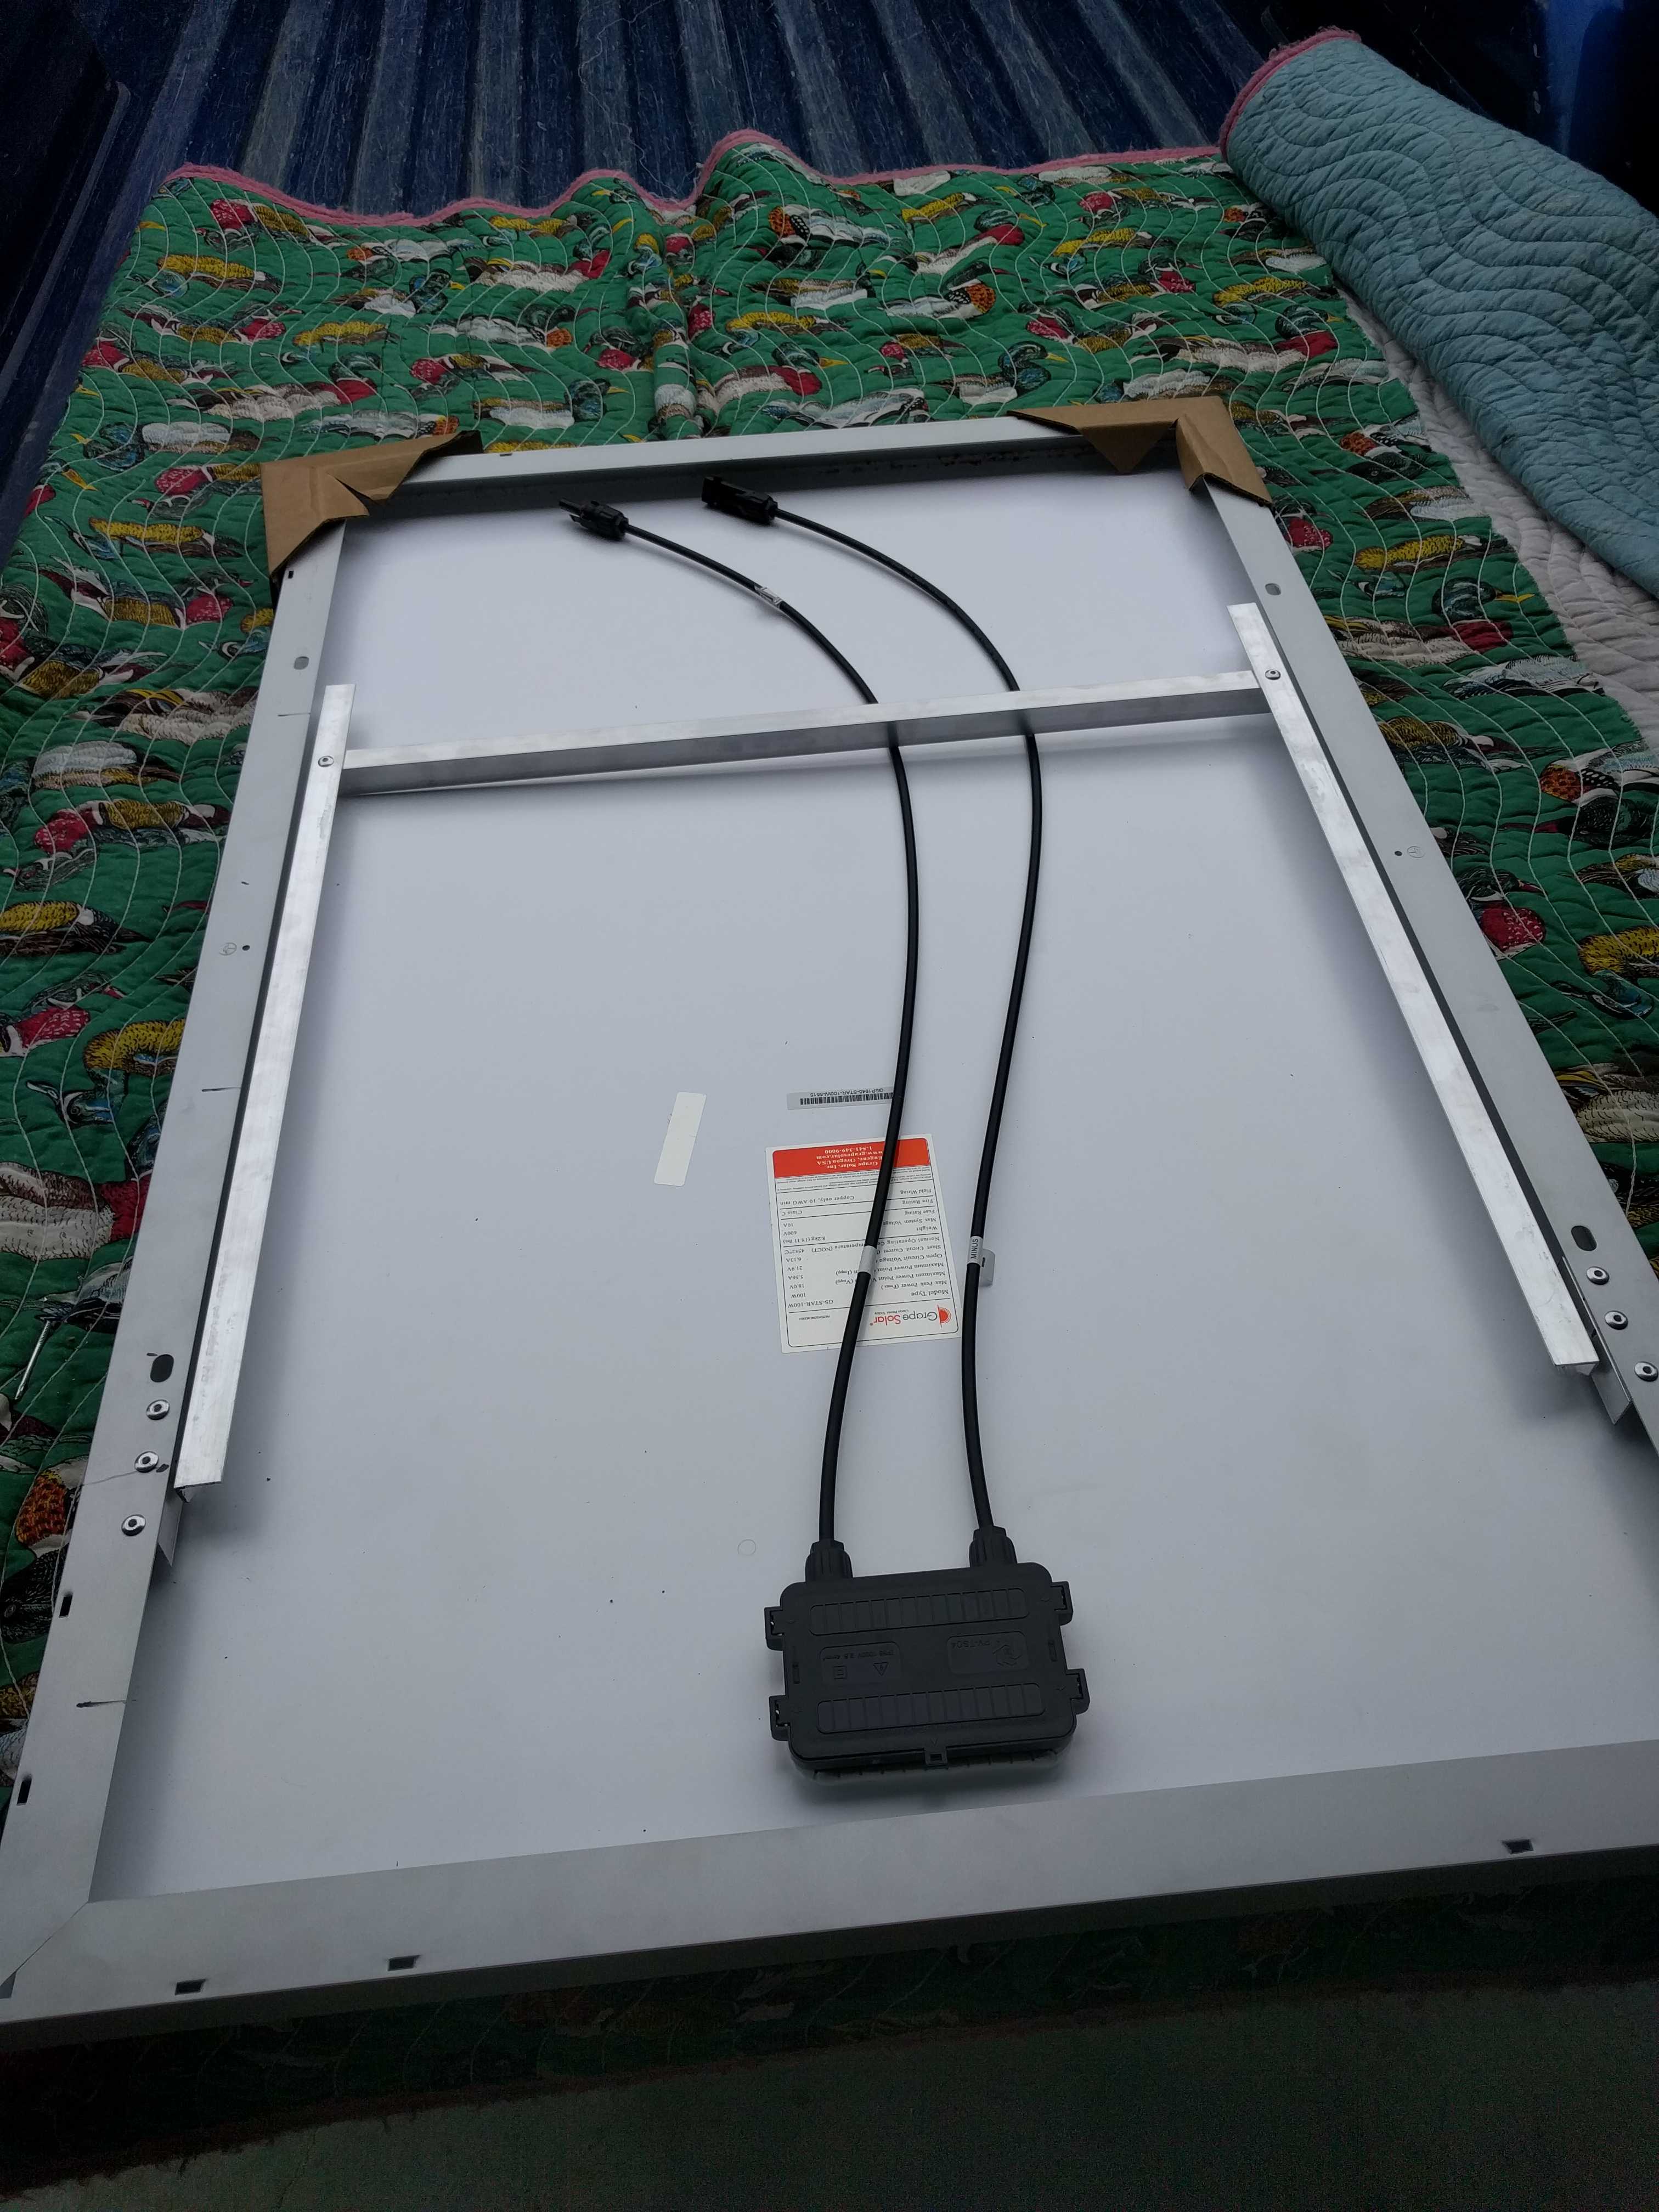
As our NorthByNorthwest trip is getting closer, I decided to build a portable setup first.  I purchased two 
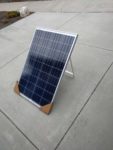
grape solar 100w panels at Home Depot for $89 each, and I finished making them into a portable suitcase with hinges on the long side.   I originally picked up one of these Victron 75/15 MPPT controller  off amazon.  It was only $118, including built-in Bluetooth, which is something I really wanted.   It was just a test setup as it will just handle 
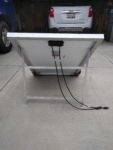
the two panels rated amps based on the Victron  configuration calculator sheet on a cold and sunny day.   
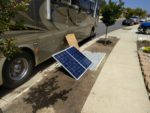
I am not worried I will ever get them to create the max amps.   I ended up going with the MPPT for the Bluetooth as none of the PWM controllers had a Bluetooth option that I could find.  An added benefit was the ability to set up the panel in series instead of parallel, allowing a longer run of 10 AWG wire and keep the voltage drop below 1%.

It made more sense to me to put the controller inside the coach instead of where I see all the other portable panels mount it.   If you mount the controller out on the panels like every other one I have seen so far,  then the long cables from the panels are running at a lower voltage and higher amps, creating more voltage drop than you probably want; or you need to run thicker (heavier) cabling, which on a portable is probably not what you want.  I know I didn’t.   Having the long cables carrying the higher voltage and lower amps (serially connected)  seems like a much better solution to me, so that is what I did.

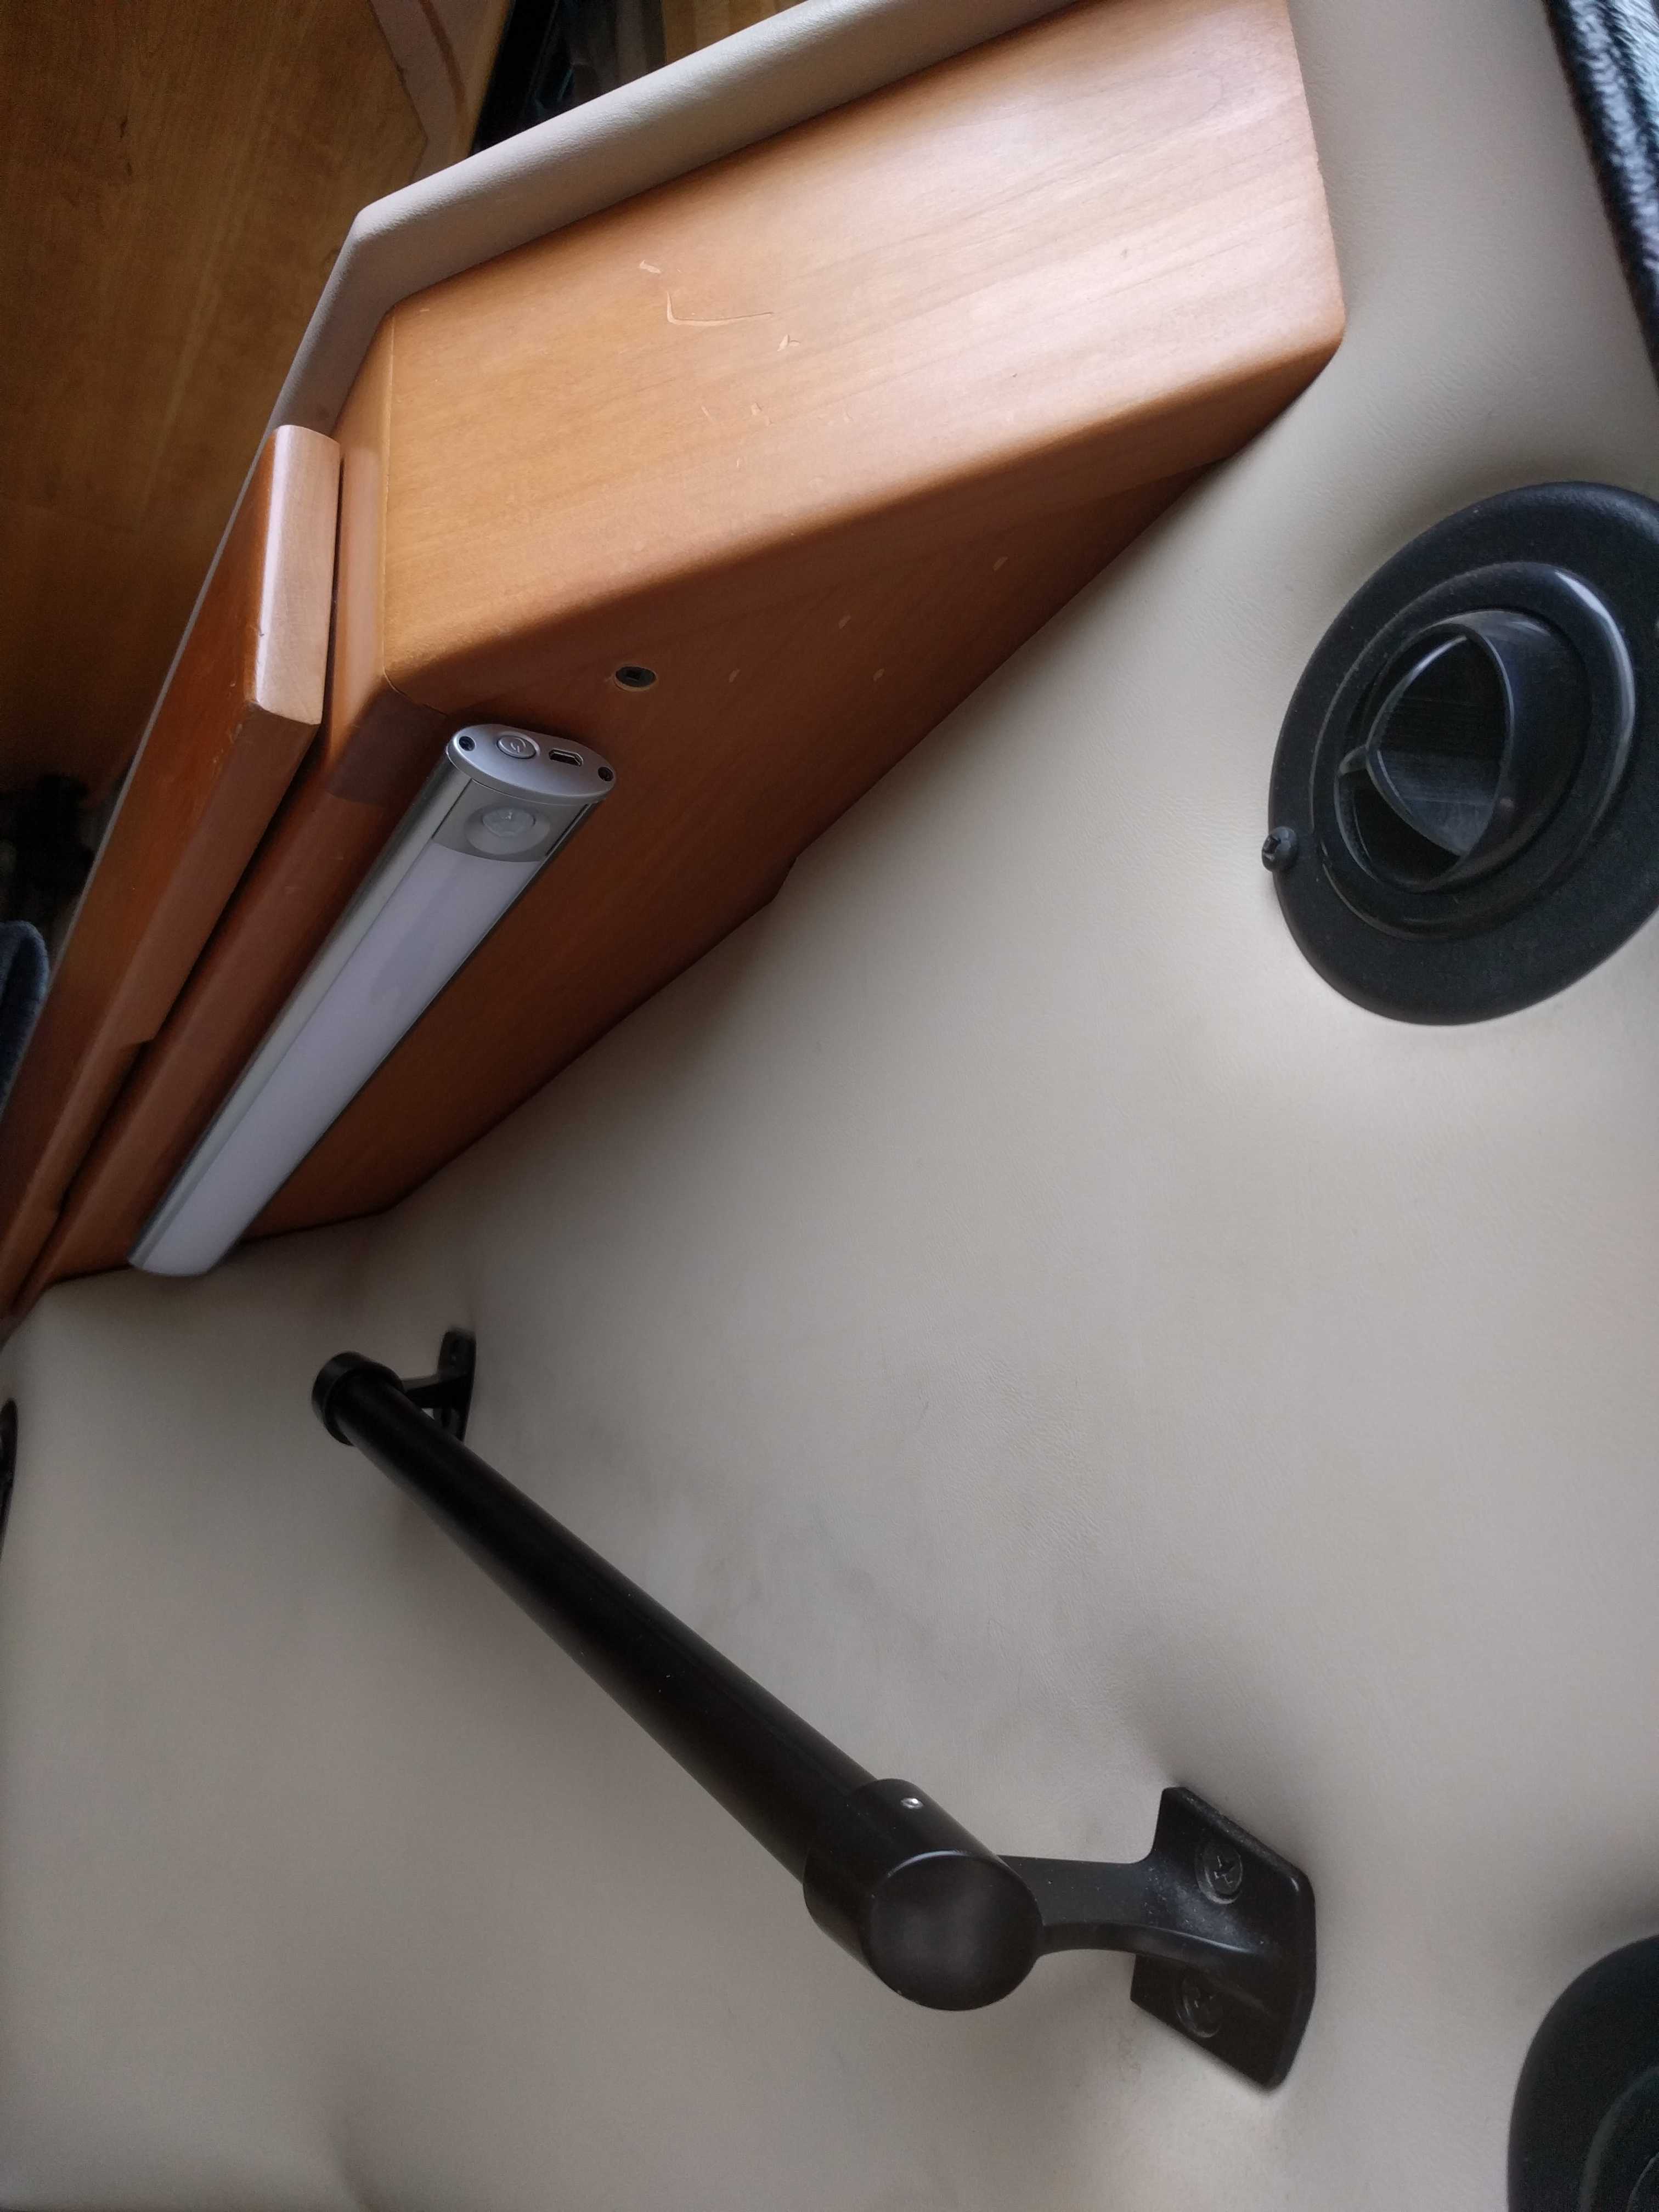
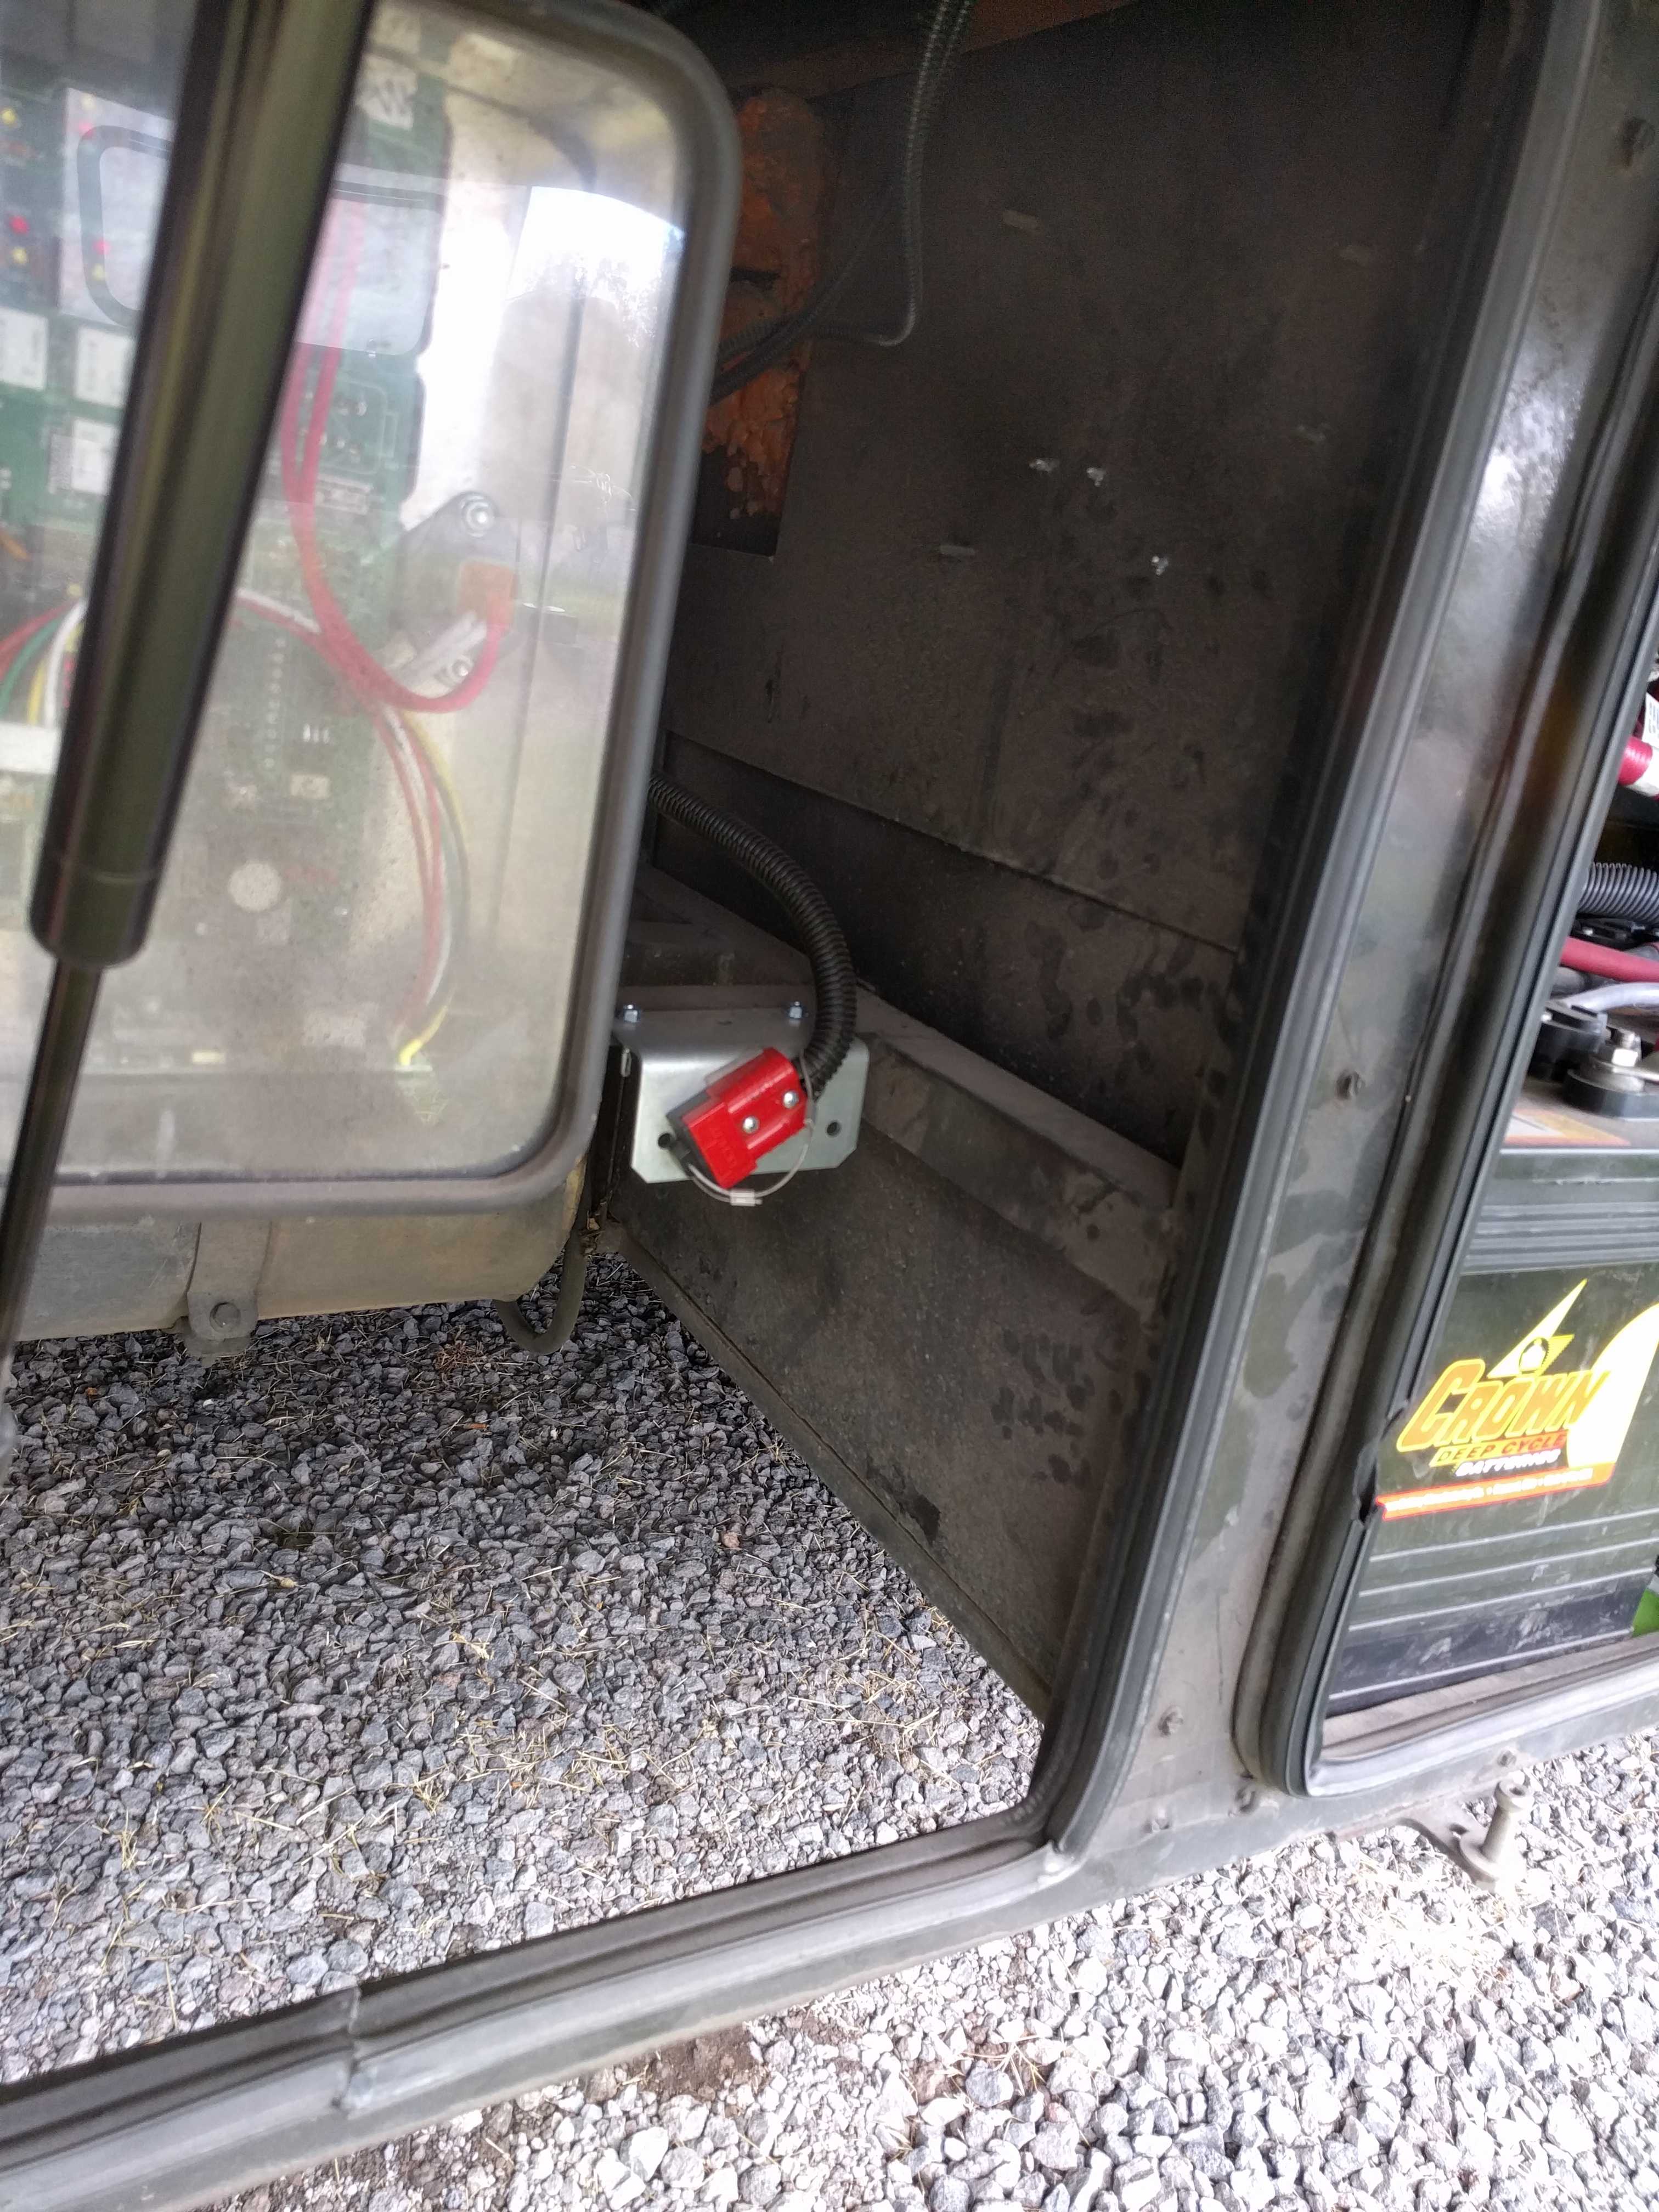
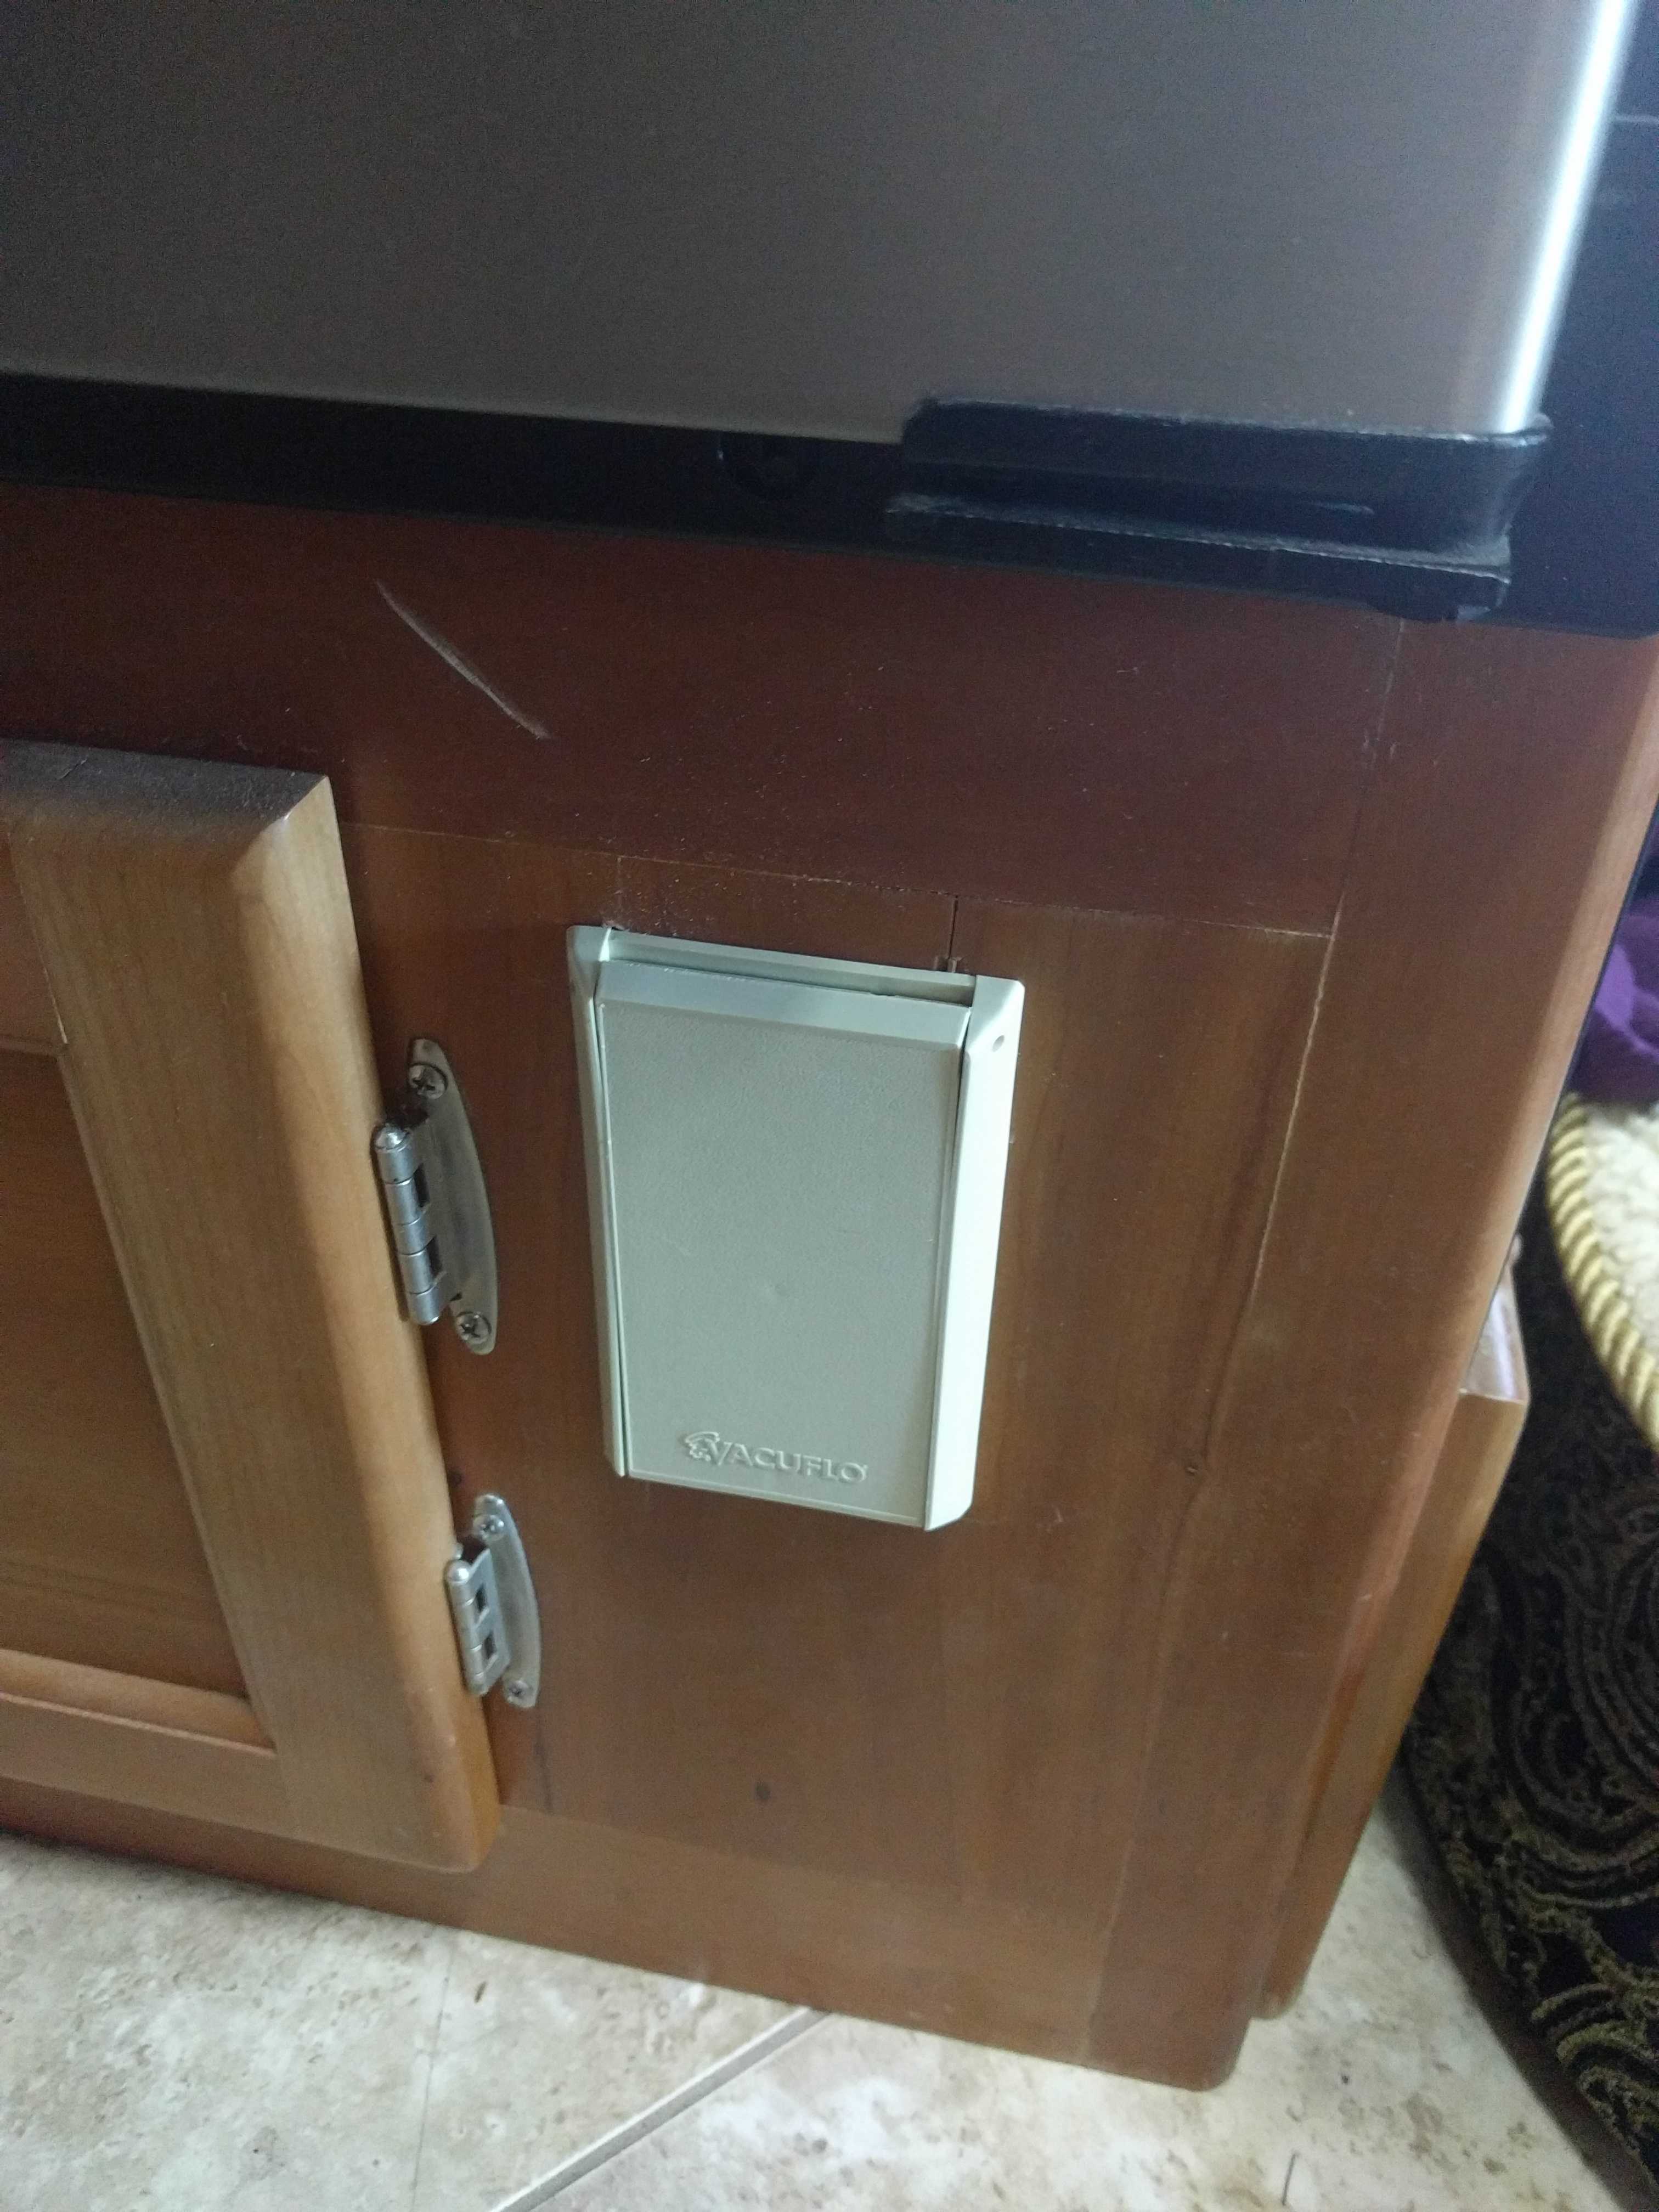
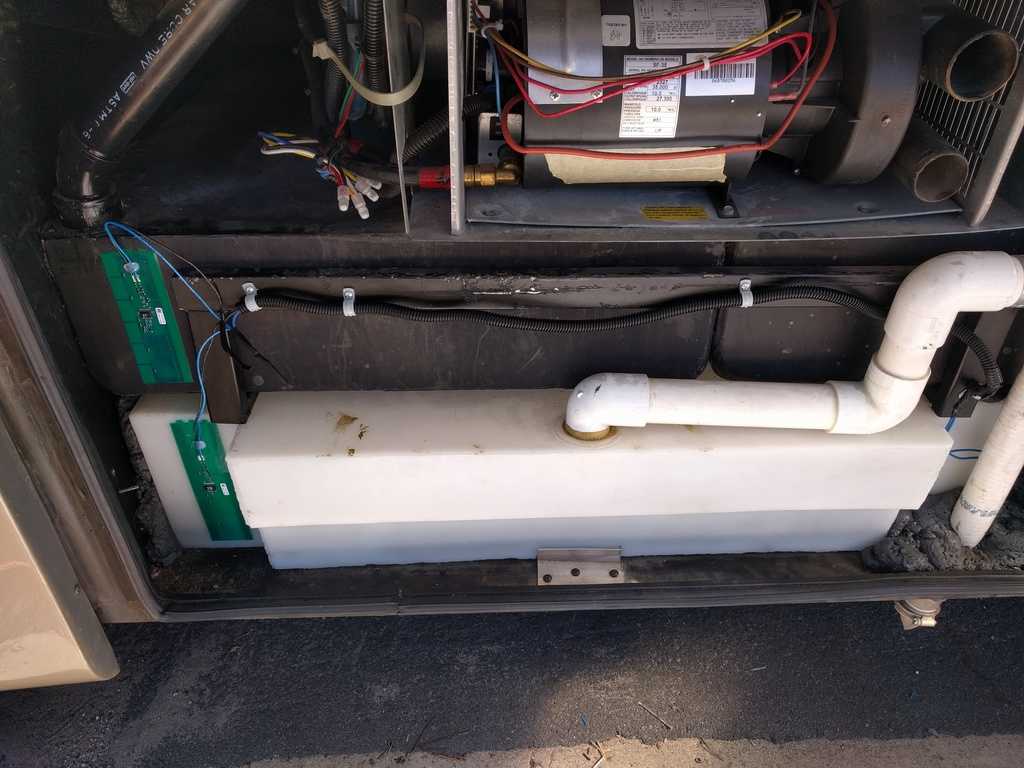
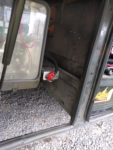
I mounted a  Quick Connect Plug behind the battery compartment door, where it also covers a smaller open space just aft of the battery compartment where the HWH leveling controller lives and was a perfect spot to mount the Quick Connector.   It’s hidden, but easy to get to when you open that battery bay door,  just pull the panels’ wire under the lower bar and up to the connector.

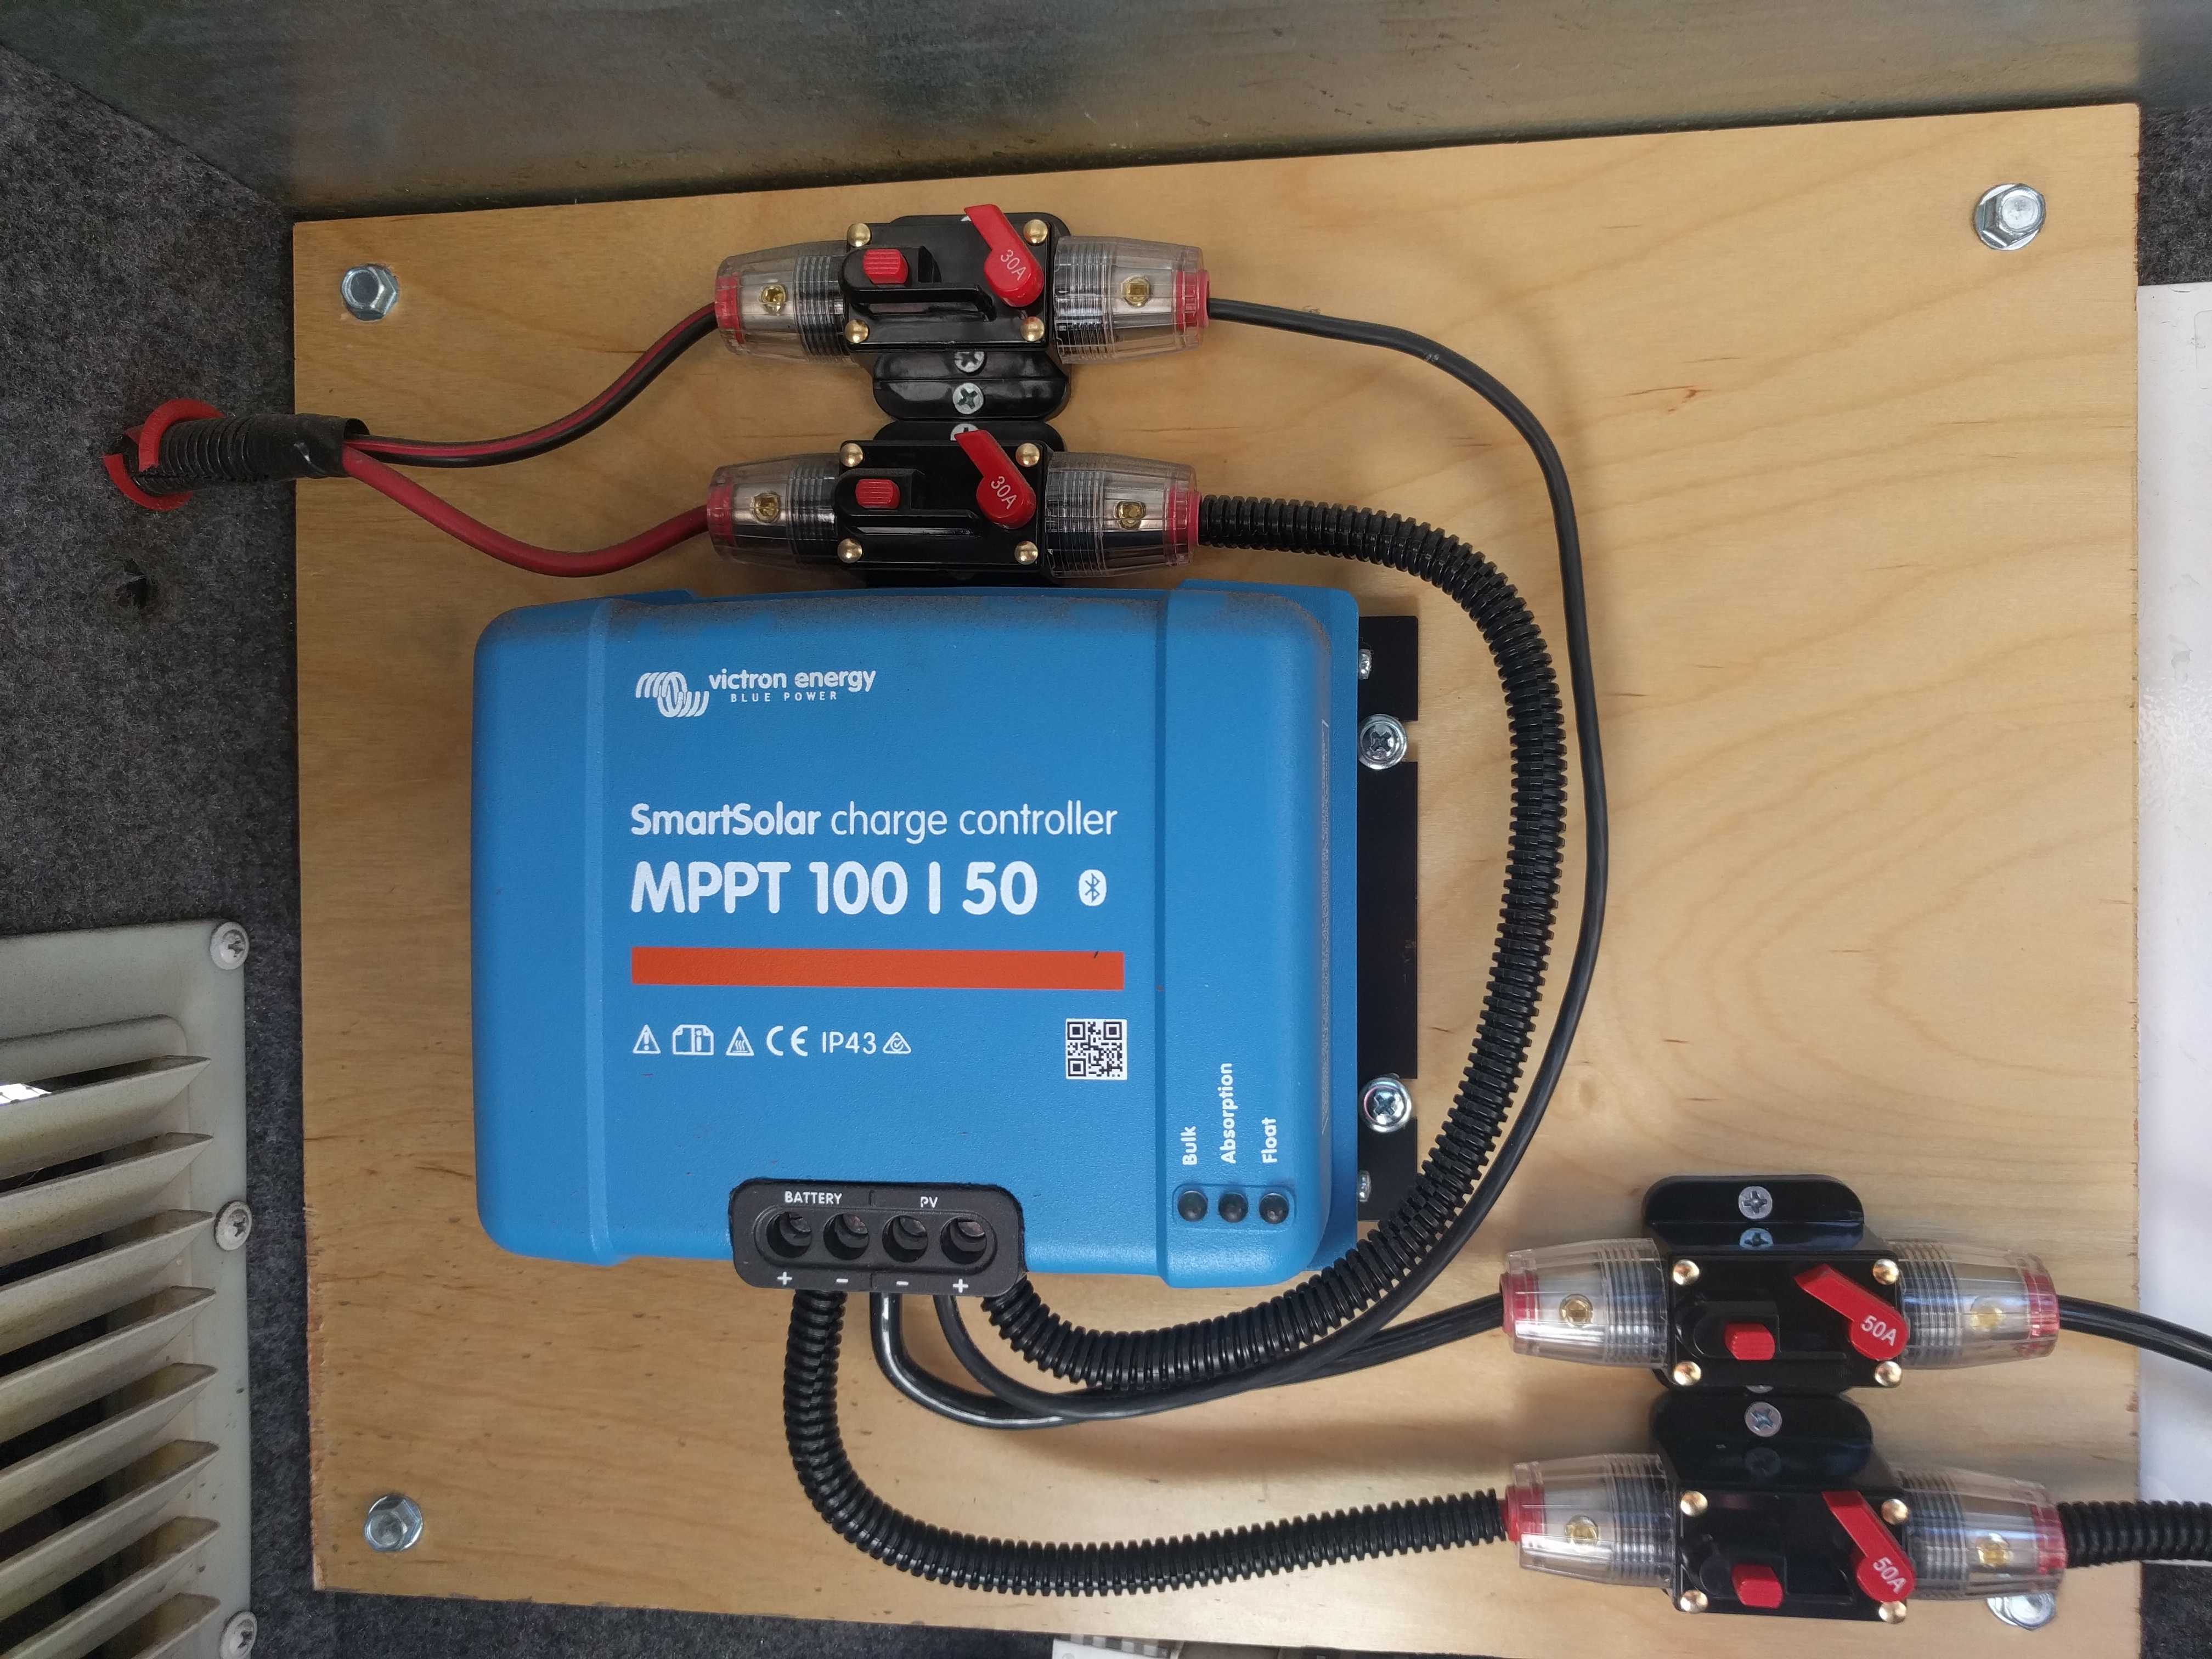
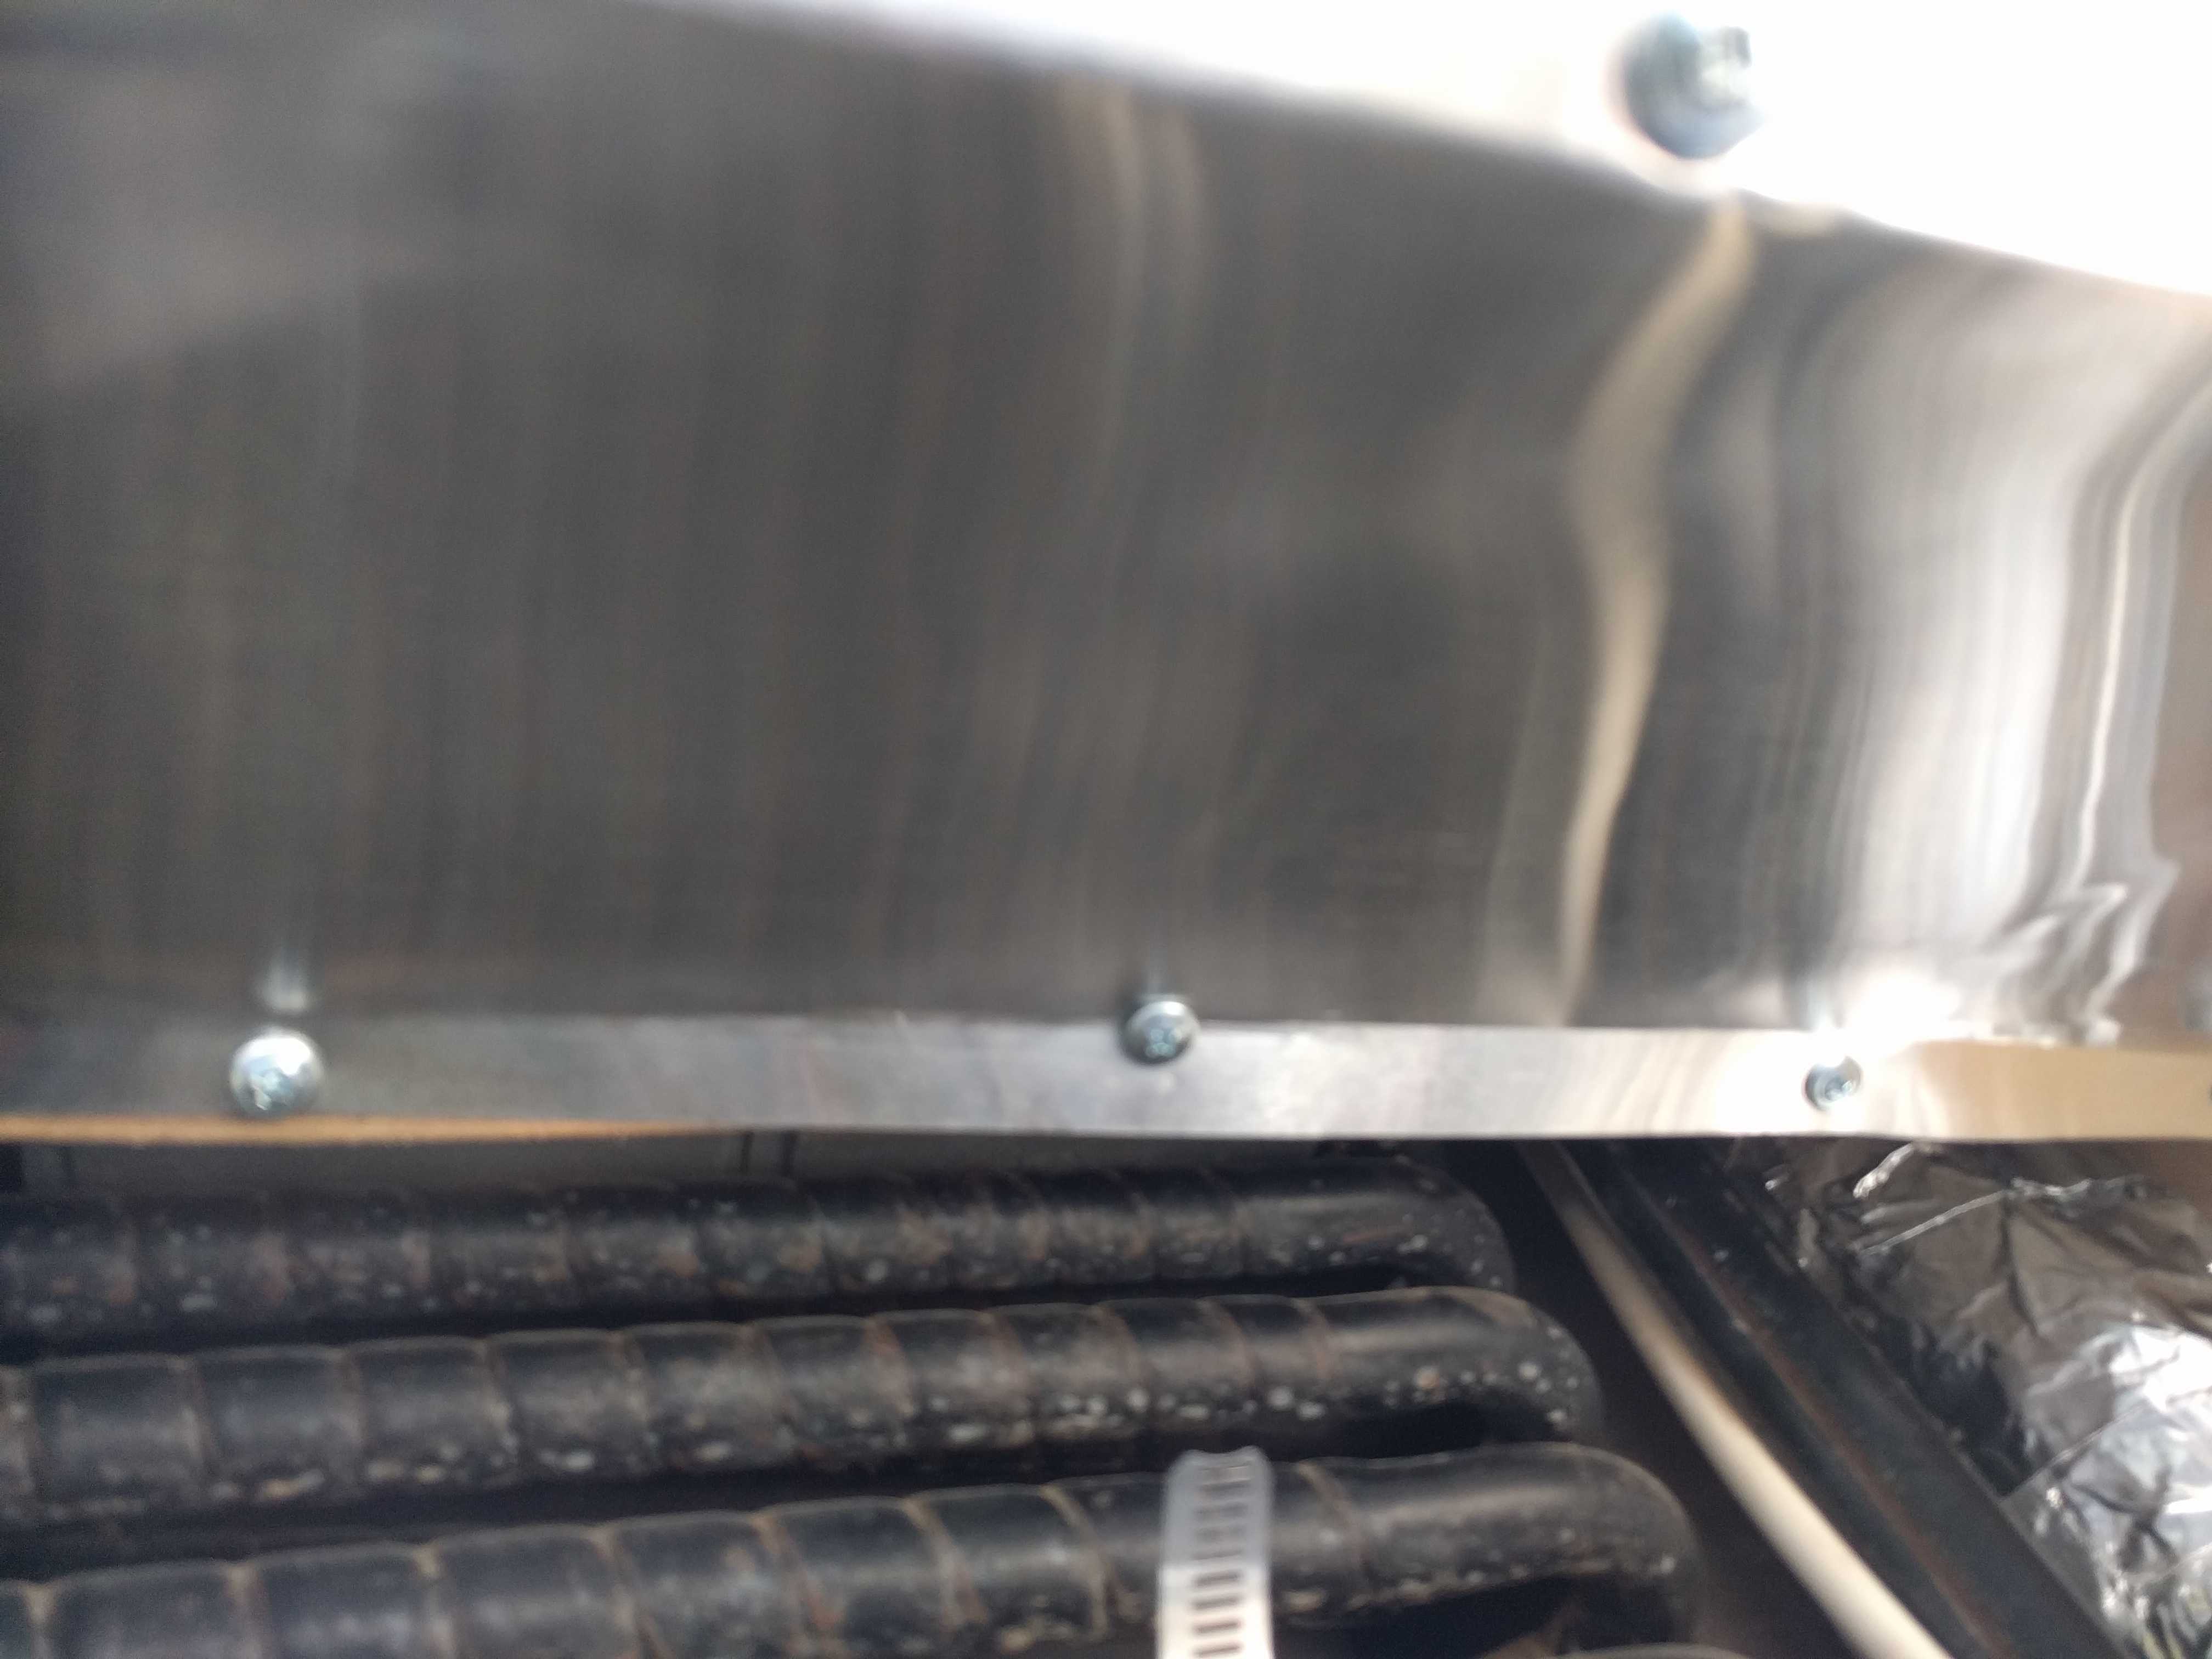
The mounted connector is wired with more 10AWG wire that enters the Inverter compartment and hooks up to these 30 AMP Circuit Breakers which will do double duty,  protecting the circuit and allowing me to turn off the panels without disconnecting the quick connect.    There is also a pair of those breakers, but at 50 amp on the output of the controller for providing the same options.

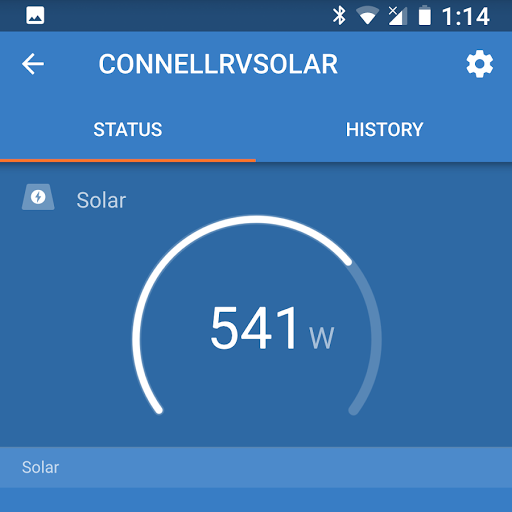
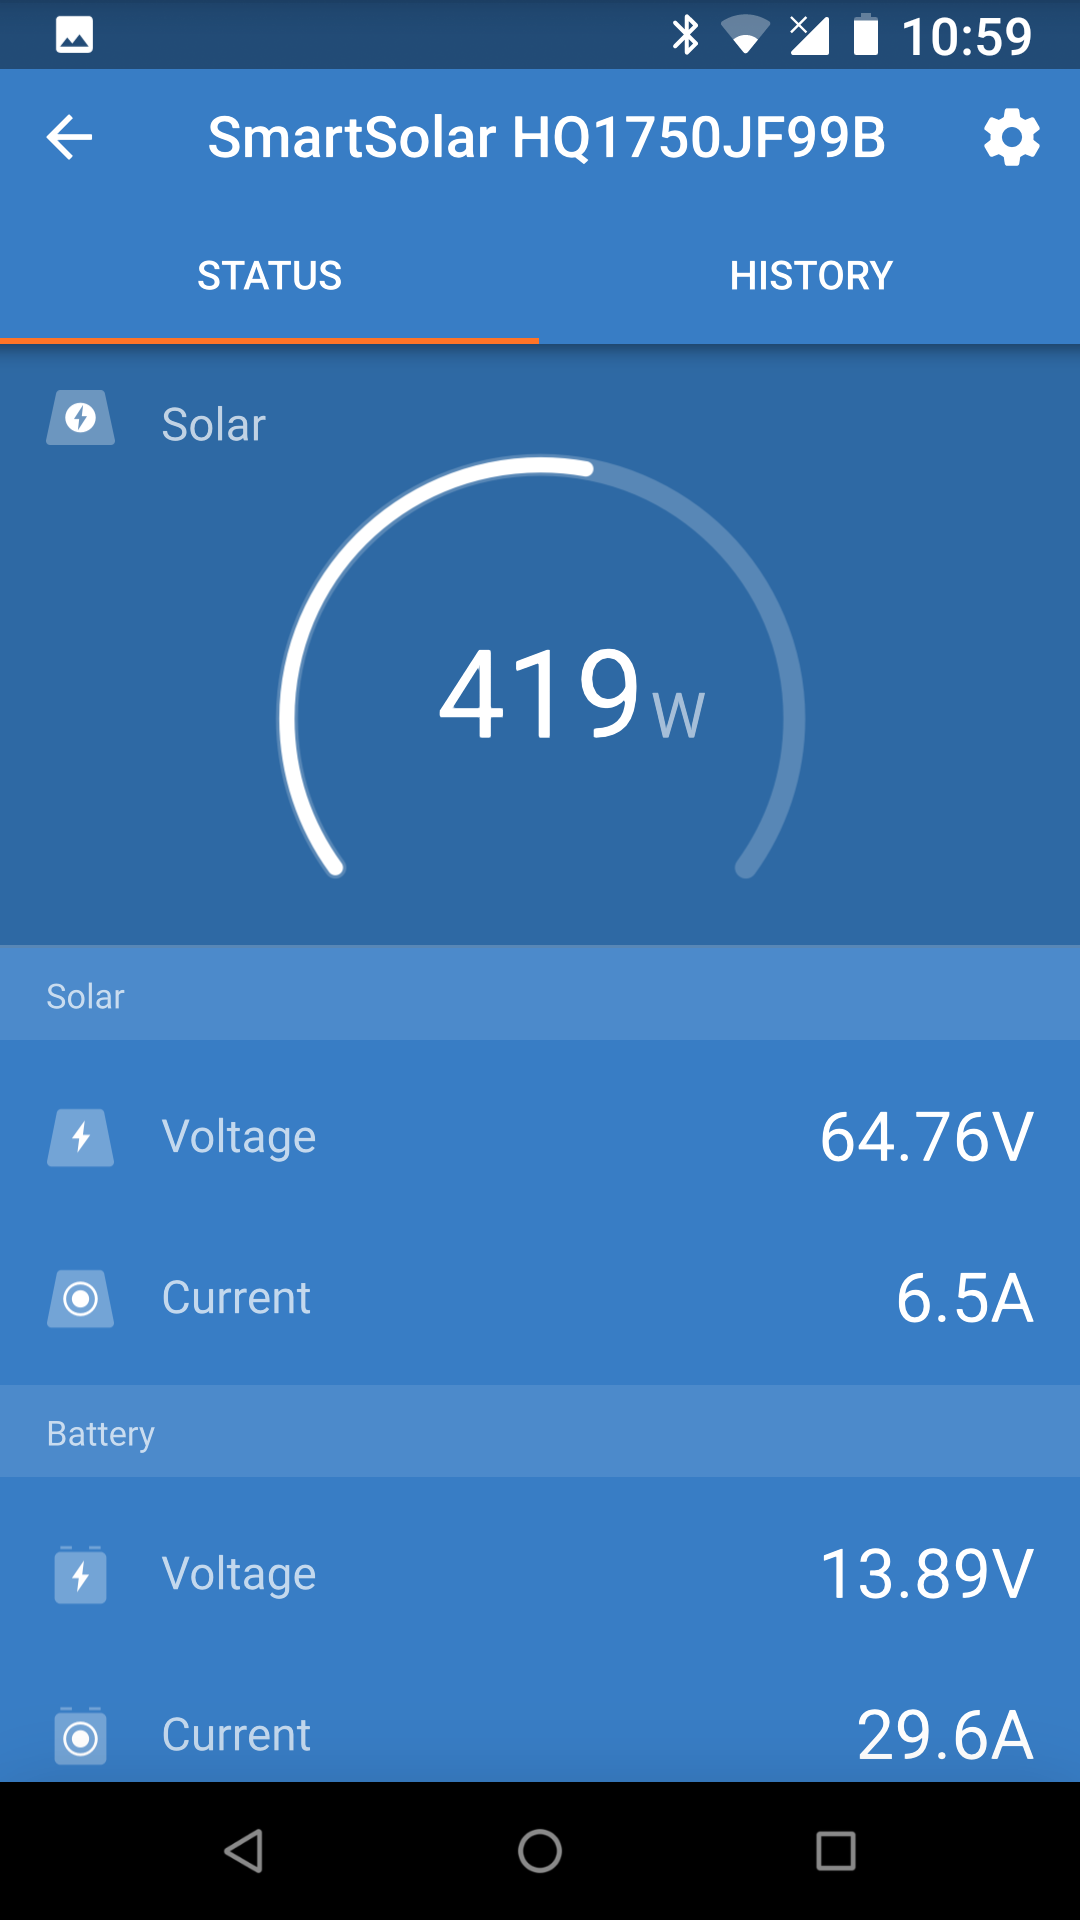
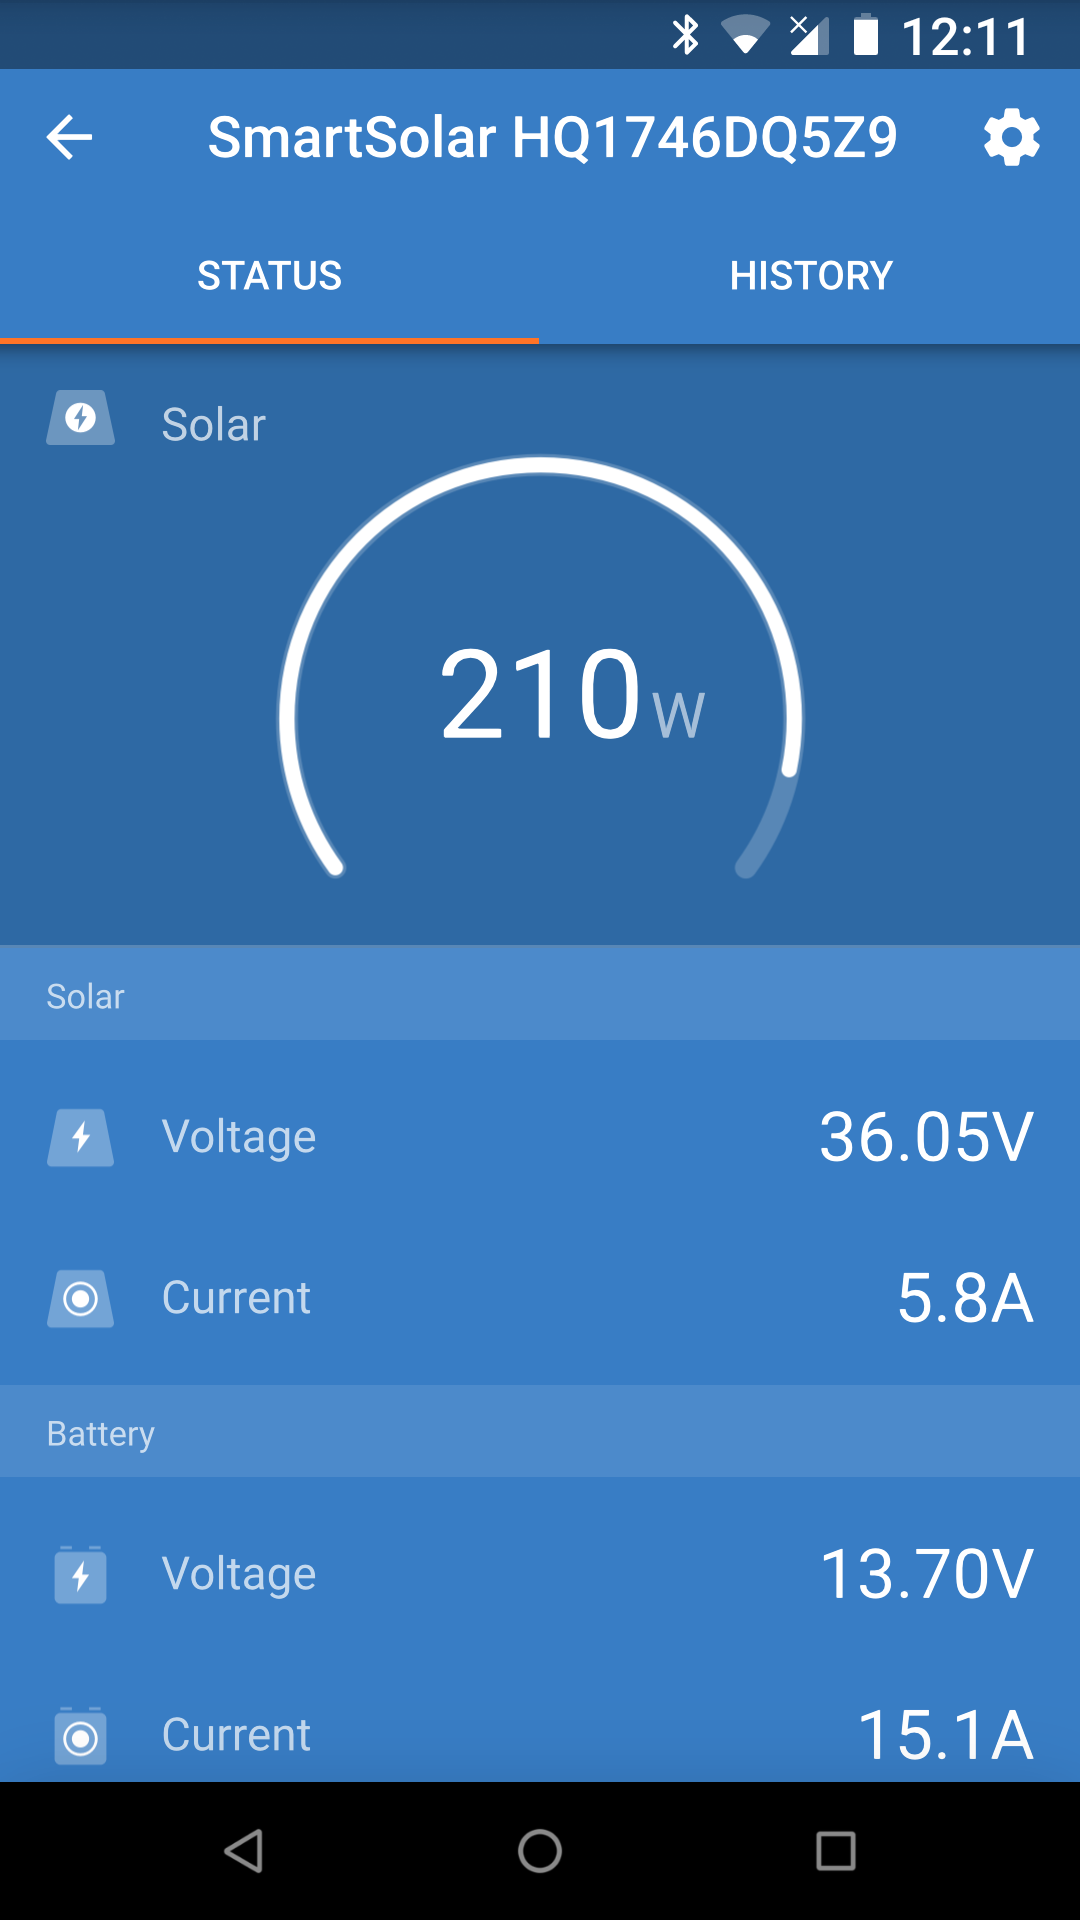
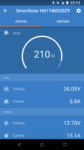
During my week of testing, the Victron controller lived up to its claims.   On the only cloudless day, my 200 watts of panels were putting out 210 watts of power, and according to the controller were pumping 15 amps into the batteries in Bulk mode.  (The Bogart meter said it was 14 amps)   The Bluetooth enabled Victron allows configuration from a Bluetooth app on my phone and has all the reporting capabilities built into it too.  No snaking more wire through the RV.  And no configuring it on a 1/2″ led screen while kneeling in the dirt or gravel in front of the cabinet.

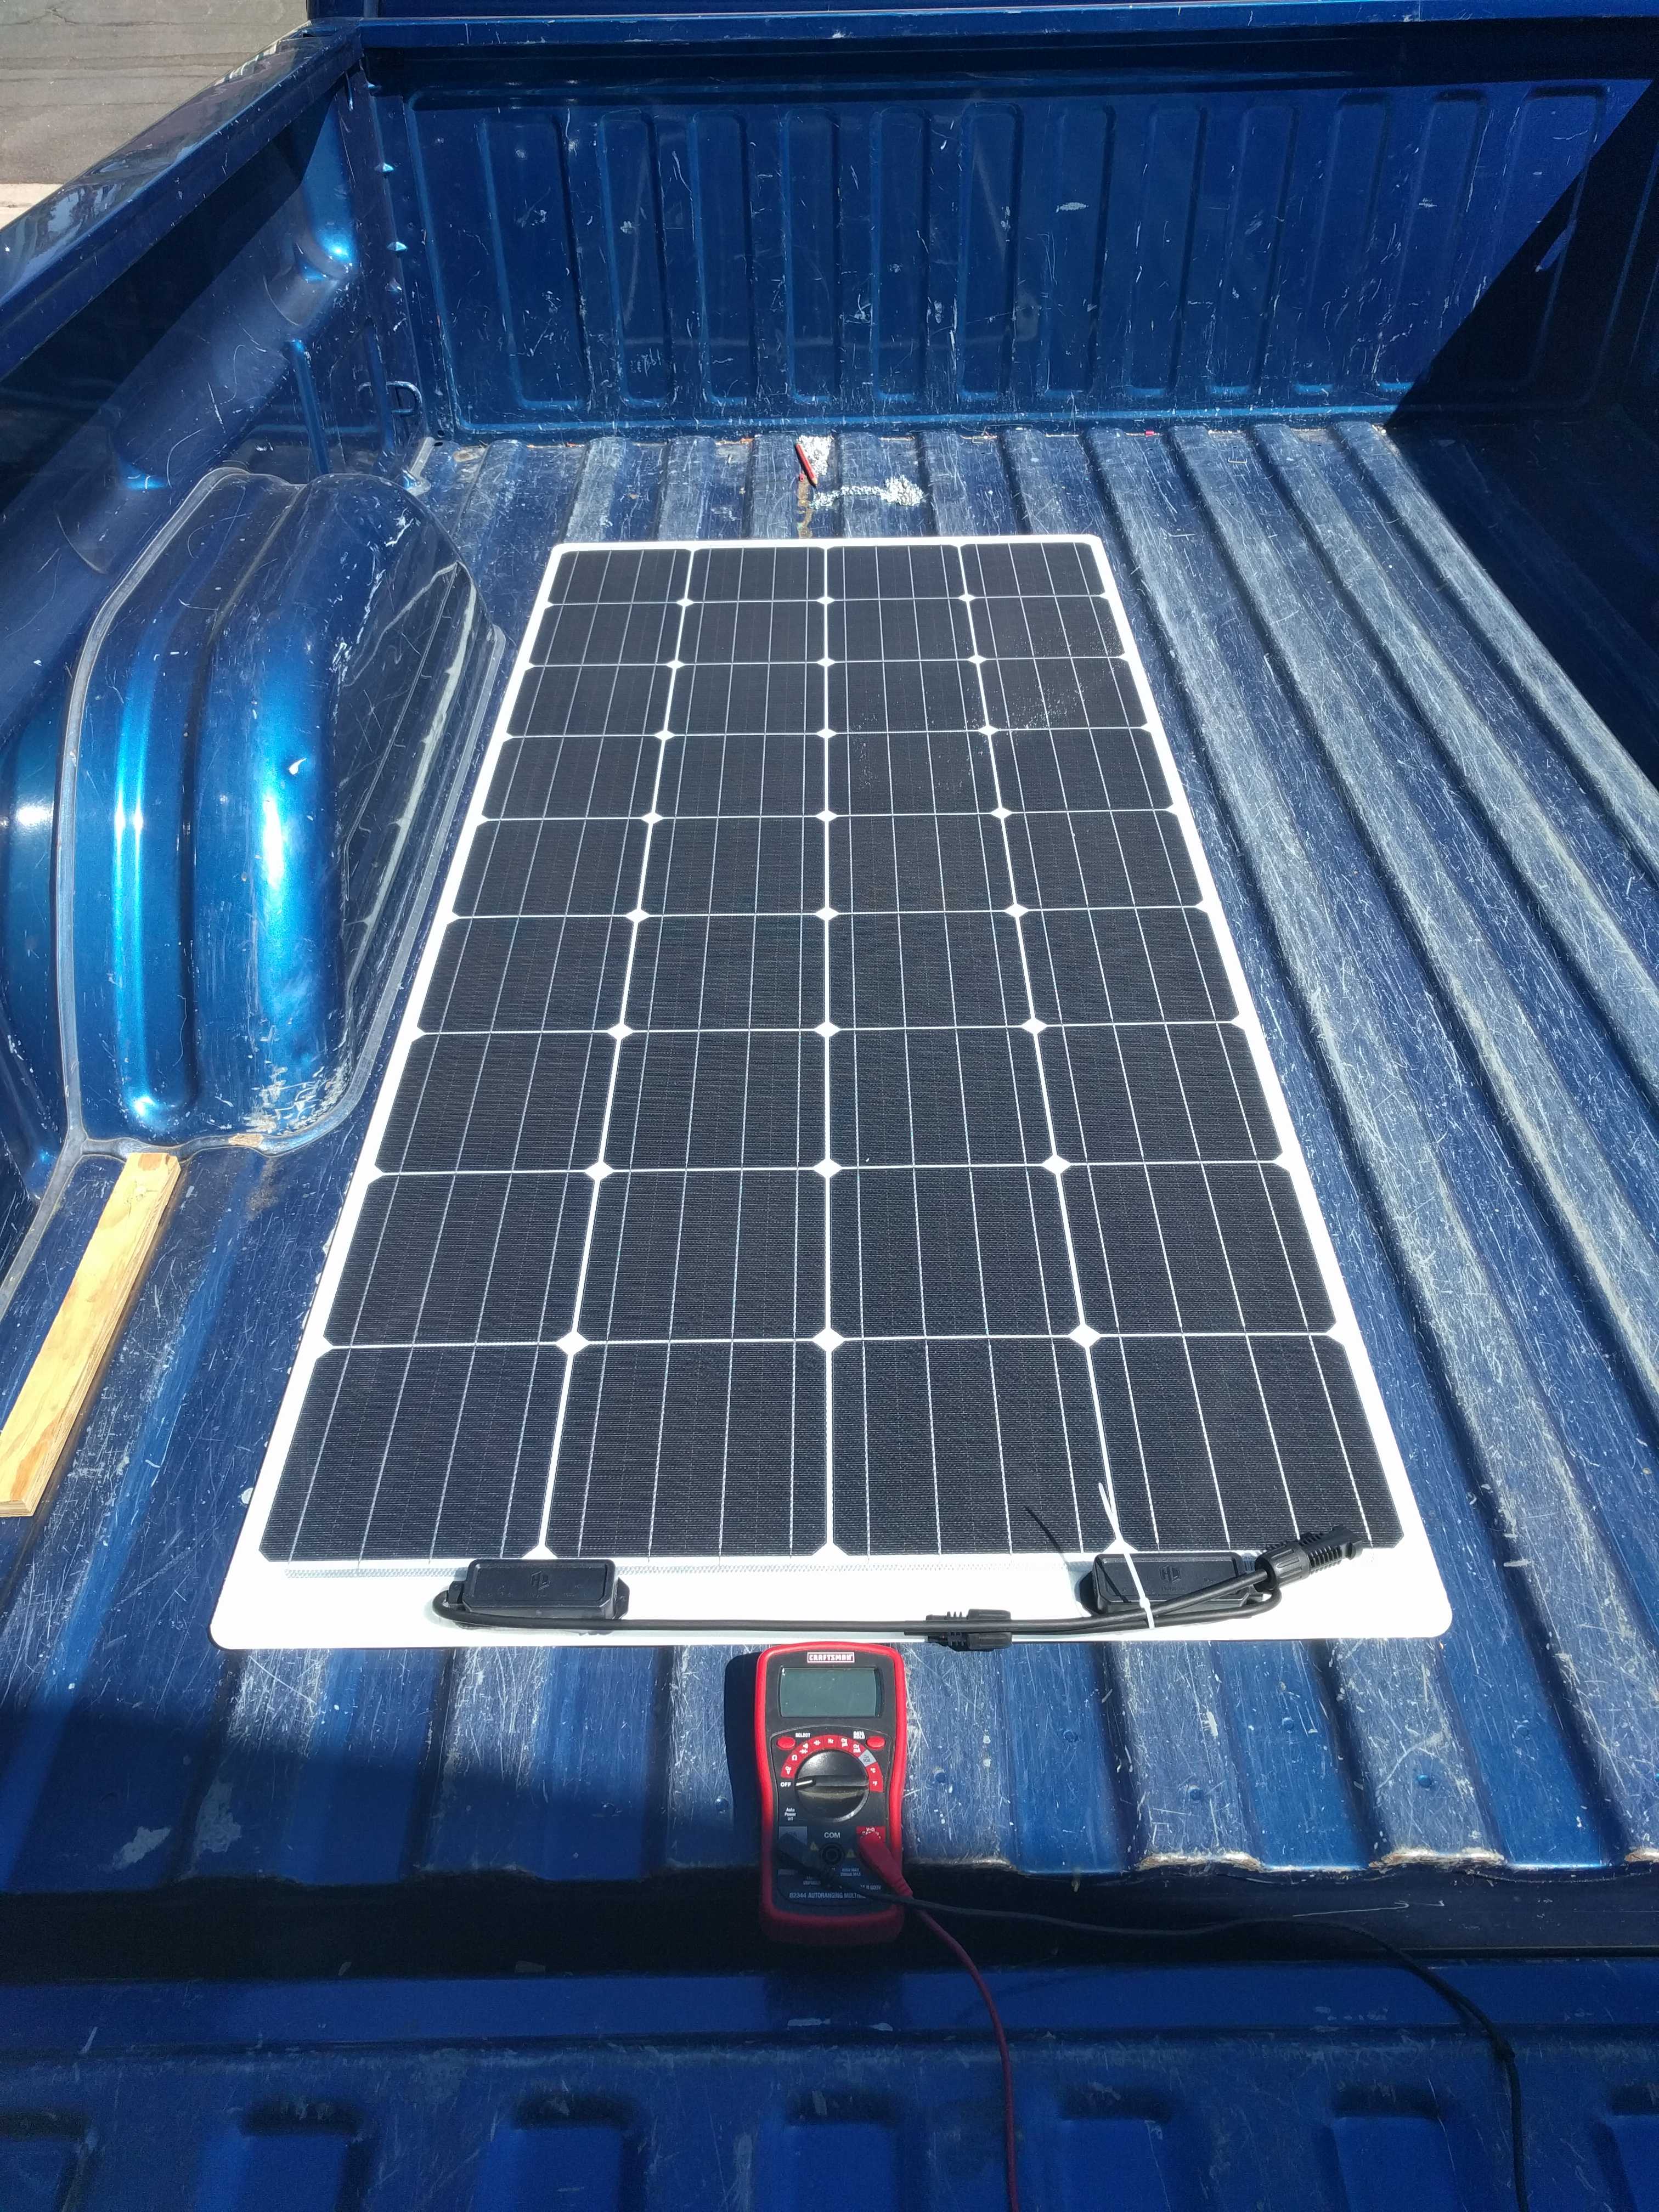
On May 18th,  I hooked everything up for a test run to make sure the panels and controller were working.    I hooked up the Victron to my truck’s battery with some alligator clips, and that allowed me to set up the Bluetooth.  Once I figured out that the pin was six zero’s and not four like most Bluetooth devices,  it automatically downloaded and updated the software a few versions, then it downloaded and updated the controller firmware.   That all finished in a few minutes.

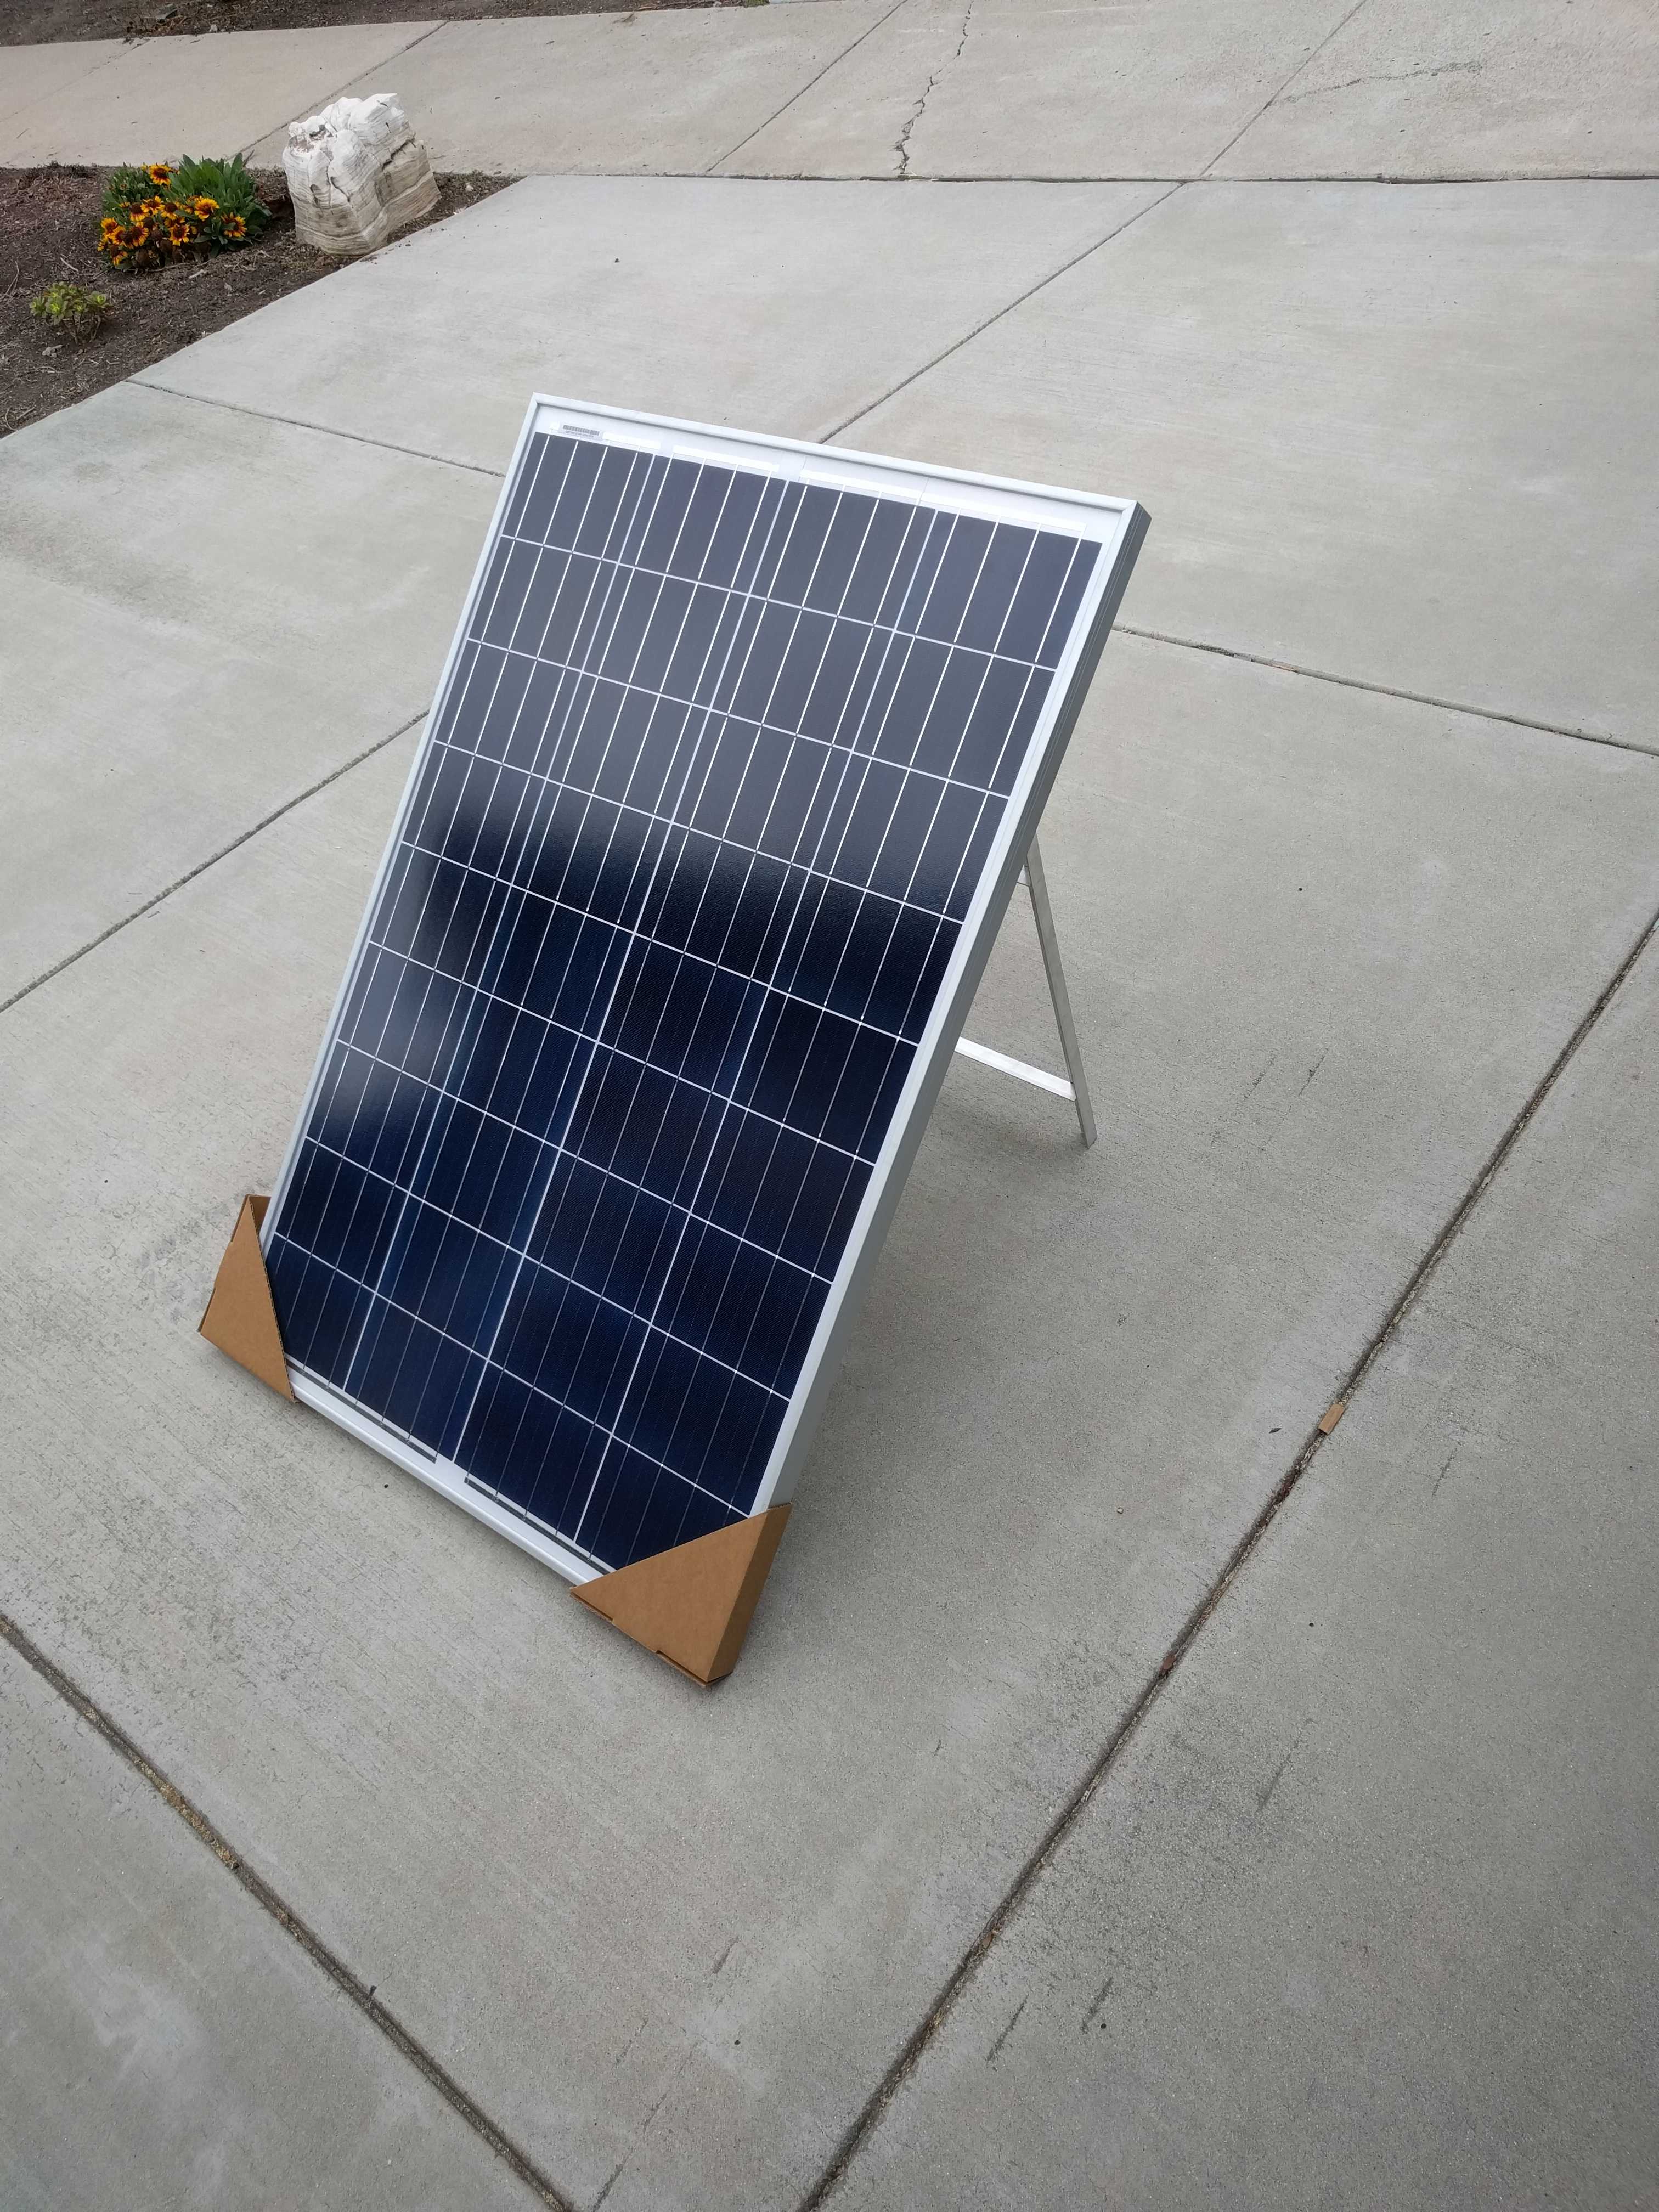
Afterward I configured the controller with my coach’s battery parameters, which are the same as the Magnum Charger set up for Absorb, Float and Equalize.   Once that was  done, I brought out the panels and leaned them against the side of my truck, pointing them toward the sun.  (There really wasn’t any sun, total cloud cover at 4pm, guess I should have hurried more as there was plenty of sun 30 minutes before)   I proceeded to cover them with cardboard so I could hook up the cabling.   Once all the cables were tight, I removed the cardboard, and to my surprise, I was  getting 24 watts at close to 40 volts from the two panels that were rated at 18 volts each or 36 volts max.   What was being produced translated to 1.8 Amps going to the batteries in Bulk mode.   The voltage seems a bit low on the battery side, so I better check that out tomorrow when there is sun!

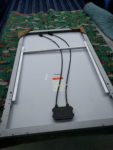
I finished the legs built from 3/4 aluminum angle, and installed the hinges and handles for carrying it.   I made a special shelf in the coach basement to hold the portable suitcase.

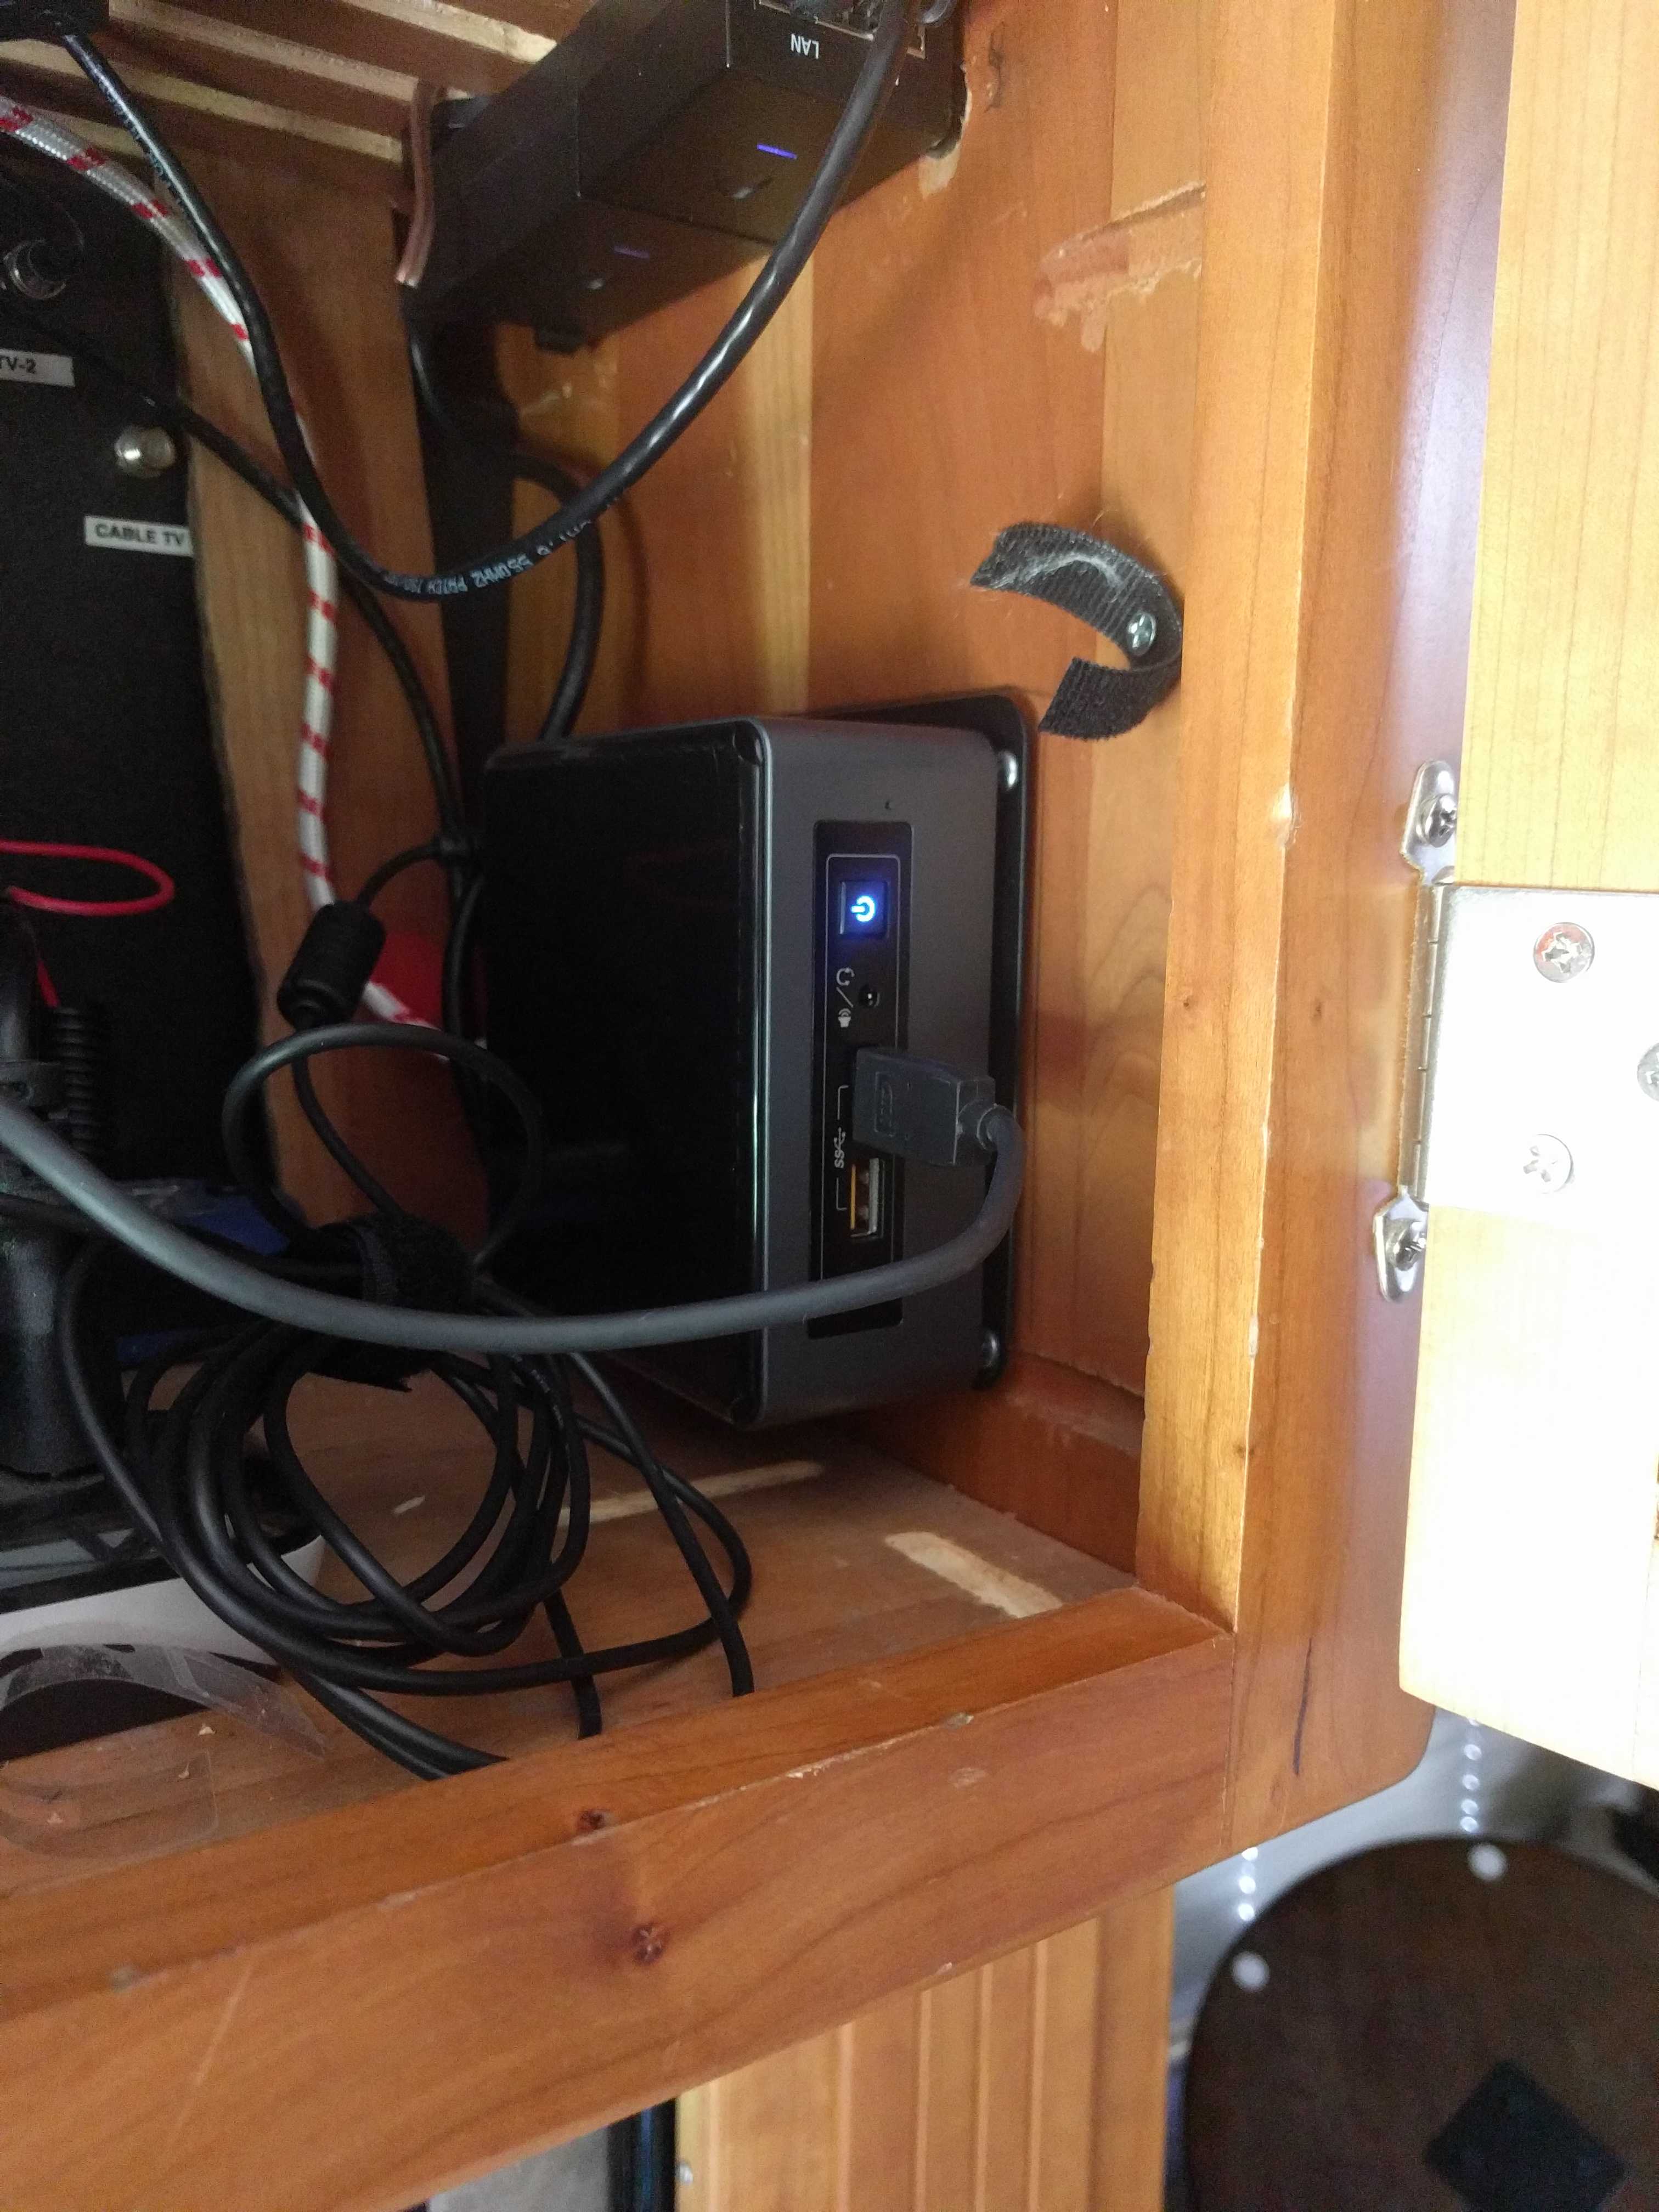
After the initial test, I returned the smaller controller and used that credit to buy the controller sized for what I think will be needed.  Once the new controller arrived, I wired it up in the inverter bay in the same place I had installed the smaller test one.   The new controller allowed me to use 6 AWG wire from the controller to the 4/0 battery cables coming from the inverter/charger.  Installed circuit breakers on both sides,  PV and battery side.   I also ran PV wiring over to right behind the battery bay door as previously mentioned.     I affixed an Anderson type connector in there.   That way I just open that door, pull the cable over from the panels up under the bottom rail and up to the connector.  Then I can close the bay door and we are hooked up, throw both battery breakers on, give the controller a minute to wake up and sense the battery voltage, and then throw the solar panel side breakers on and watch the batteries get charged!!

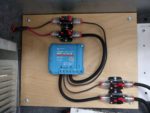
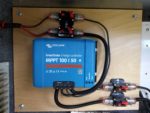
I ended up mounting the Victron 100/50 solar controller right above the Magnum 2800 watt inverter, allowing me to tap into the 4/0 battery cables from the inverter that charges the batteries.   I have the new 50 amp circuit breakers so when I get some time they will replace the 30 amp ones pictured.

Can’t wait to boondock again so I can test out their full capabilities and look forward to getting the bigger panels on the roof!  🙂


On the Road Again!

Check out the camera and GPS to see where we are today.

While I was trying to get my knee better I was doing some planning and installs.  I replaced all 6 batteries in the coach,  4 house batteries and 2 chassis batteries.    I also wired in a Shunt to allow metering of the power inbound and outbound from the house batteries.   I also installed a Bogart Trimetric Meter  above the thermostat on the hallway wall.
Pulling the wires from the battery bay to that interior wall was very difficult and time consuming, but its done now.    After all that was done, I ordered all new LED bulbs to replace the fluorescent tubes on the ceiling and above the sink.   I had replaced all the fluorescent tubes not long after purchasing the coach due to darking ends, but they needed to be replaced again as they were quickly turning dark grey at the ends again.  Researching that, it seems the ballasts need to be replaced.  Fast forward to now, I didn’t want to waste more money on those tubes and bit the upgrade bullet.  Changing them out was quite a bit more difficult than the videos implied.   Turns out my fixtures had the reflective shielding riveted in.  As I wanted to keep the existing coach wiring coming thru the ceiling as long as possible I had to drill them out while the fixture dangled over my head.  (had to drill them from the back side)

They’re all done now.   Thank God!


We are traveling…

Iron Mountain in the UP of Michigan

The roads in Wisconsin are pretty rough compared to both Minnesota and Michigan.   I guess fewer tax dollars are coming out of Washington for them, or they are being diverted somewhere else.   Currently we are staying on US 2 while trekking from Minnesota to Michigan and it appears it goes into Canada from Michigan, so we will probably head south toward Detroit.

We stopped in this town to get our fridge’s sensor replaced but that didn’t work out as planned.  Brought it over to an RV place in the next town over, but they didn’t read the requirement instructions prior to me getting there and only then did they realize they needed litmus paper as part of the diagnostics to get the new part from Norcold.   No one they or I could find had litmus paper.   So back to the campground I went.  Doubting I will hear from them, I choose a service center a few hundred miles away in Gaylord, MI, and made an appointment for the middle of next week.  (earliest they had, and I had to lay a guilt trip on the service manager to get that appointment)

While we were in Duluth, Kathy decided the central vacuum wasn’t working to her satisfaction.  [[Actually I have been telling him that all along!]  After a bit I agreed and went into the basement to check the bag and it was fine.  I noticed the flex pipe was kind of collapsing when turned on, but also realized it was hopeless as the angles were too severe and the pipe was collapsing at the 90 degree turn.

I ordered a new Dirt Devil Central Vacuum system while we were there to be delivered to our next stop in Iron Mountain.   And I finally got Intel to help me replace our Motorhome’s DVR server  NUC that crapped out about a month ago.   They offered to refund the price so I could buy a new one.   That turned out to be good for me as I purchased a new one for the same price but the CPU speed had doubled since I had bought it.

So repairs on the road..   The new DVR is up and running and the central vacuum was replaced last night.  What a difference that made,  Kathy was afraid the new one might suck the tiles off the floor. 🙂   I had been anticipating a tough job to replace it, but it was much easier than expected.   [Except a lot of time on the floor and knees, ouch!]  The new unit included a new wall receptacle and a much larger hose from that to the unit mounted in the basement.   Luckily I was able to use the old hose to fish the new hose thru the opening way back underneath the fridge.   That new hose was also a lot more ridged, so it is not going to collapse like the old one.

Thankfully I had my cordless multi-tool with me so I could cut the opening in the wall a bit larger to accommodate the new wall receptacle.  Only took one extra charge of the battery to finish it.  Harbor Freight Rocks!


Heading for De Tour Village in the morning.


Working on the punch list prior to leaving for the long trip .

Where has the time gone  Last minute updates to the coach are happening right now at a feverish pace.   Swapping a white outlet under the dining room table for the brown one that was impossible to find when you needed to plug in your phone or tablet, extending that circuit over to the side of that cabinet for plugging in the TV I installed behind the couch.  And hopefully I will have time to install the Linear actuator that will raise and lower that same TV with the push of a remote.

Ordered a new See Level Bluetooth tank monitoring system to replace the OEM system that always had me wondering how full they were.  While it’s slowly making its way here, I’ve been pulling wire from all the tanks and finding a place to draw power etc.


I sold the Jeep last Monday after Kathy said enough of the jarring ride.  Had the Equinox modified on Thursday to be able to tow it behind the coach.

We had a Base-plate installed along with a wiring kit to have the Equinox’s tail lights show followers what we intend to do.   And as a bonus I had a switch installed so we don’t need to unplug a fuse each time we tow and replace it when we get there and need to drive the car somewhere.